• Skip to primary navigation
  • Skip to main content

Primoz Bozic

Helping online entrepreneurs build a 7-figure online business

  • BLOG
  • Show Search
Hide Search

Primoz Bozic Blog

The Ultimate Guide to Creating Content That Sticks

By Primoz Bozic 9 Comments

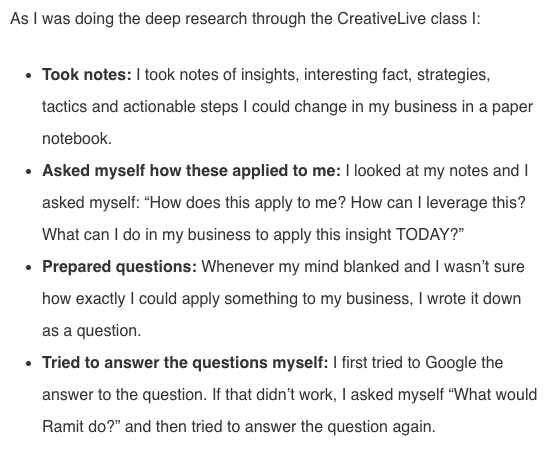
Did you ever wonder why…

  • Some blog posts get read hundreds of thousands of times, while others quickly get forgotten?
  • Some books become New York Times best-sellers, while others never make it to the shelves in Barnes and Noble?
  • Some online courses have hundreds of raving fans, while others only get a handful of sales?

There’s one key thing that almost EVERY successful YouTube video, blog post, online course or book has in common.

It’s the one thing that content that gets forgotten often lacks (even if you put a lot of work into creating it).

It’s the one thing that the top experts in your industry get remembered by, write books about, and deliver speeches about in front of thousands of listeners.

What’s the one thing?

Sticky ideas.

In this guide, I’ll talk about exactly what sticky ideas are, and how to spot them in the world.

I’ll share with you 20 examples of sticky ideas from established experts, authors and entrepreneurs, and explain why they work so well.

I’ll also teach you how to come up with your own sticky ideas so that you can create content that your audience will love, devour, and talk about to their friends for years to come.

Let’s dive in!

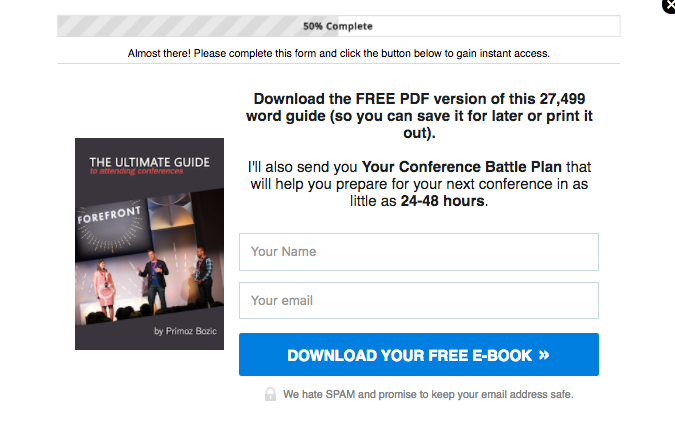
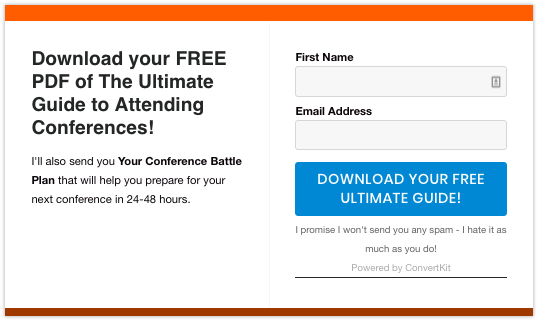
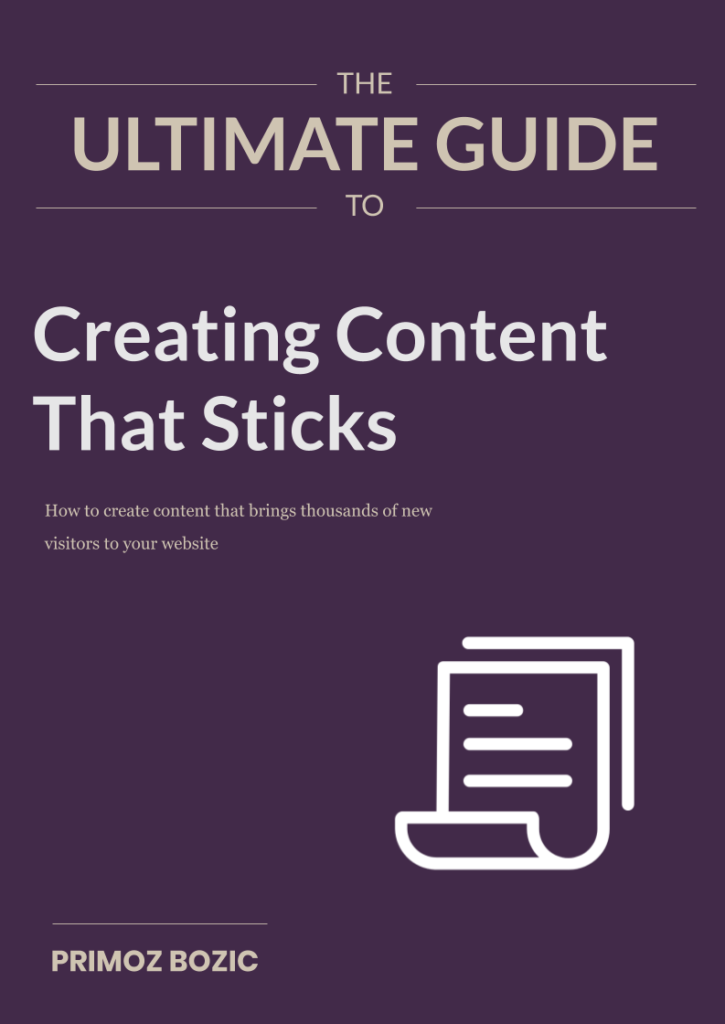
Download the PDF Version of This 16,000+ Word Guide!

As you can see, this is a LONG guide. You can download the FULL PDF version of this 16,000+ word guide (including the BONUS Sticky Idea Checklist) here to print it out, save it on your computer or read it on your Kindle:

Download your Ultimate Guide to Creating Content That Sticks

Download the FULL 16,000+ word guide (plus a BONUS Sticky Idea Checklist to create your own sticky ideas in 10 easy steps)

Success! Now check your email to confirm your subscription.

There was an error submitting your subscription. Please try again.

I promise I won't send you any spam - I hate it as much as you do! Powered by Kit

What are Sticky Ideas?

It was a hot summer afternoon, and I was sitting in the apartment from one of my mentors, Derek Halpern in Manhattan.

We were having a conversation about how to create content that will attract more visitors to my website that people will spread the word about.

“Primoz, the one thing you’re not doing right now that you have to start doing is come up with more sticky ideas.”

“Sticky ideas?”

“Yeah, big ideas like my 80/20 promotion rule that people will remember you by. People still talk and link to that rule to this day, even though I wrote a blog post about it years ago.”

As soon as he shared that with me, something clicked in my brain.

I remembered all of my favorite experts, authors and entrepreneurs, and their sticky ideas quickly came to mind:

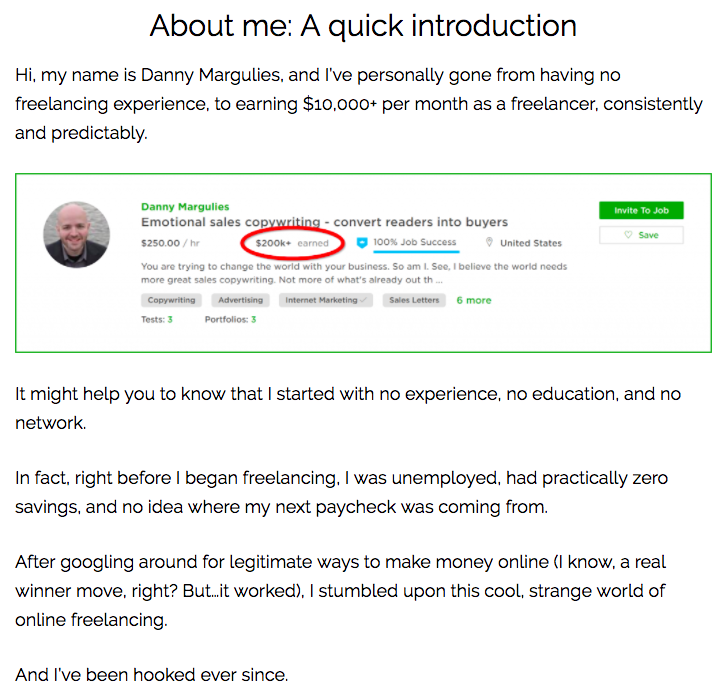
  • My mentor Ramit Sethi became known by his Briefcase Technique for negotiating your salary, a YouTube video that got over 100,000 views
  • Entrepreneur Ryan Levesque became known for his ASK Method, a concept he wrote a best-selling book about, spoke about at countless conferences, and built a whole business around
  • Author Mihaly Csikszentmihalyi (whose name you might not remember), became known for Flow, an idea he wrote his best-selling book about

If you think about your favorite expert, author or entrepreneur, they’re probably known for a sticky idea as well.

When Derek told me about sticky ideas it all made sense. There was just one problem.

How to Come Up With Sticky Ideas

I was never “good” at coming up with stick ideas that people would remember me by. It just wasn’t natural to me and I had no idea how to even get started with coming up with sticky ideas.

What makes a sticky idea? How do I come up with one? Do I just pull it out of thin air?

My brain HURT when I thought about the idea of sticky ideas.

“So Derek, how do I do that? How do I come up with sticky ideas?”

“Read this book. It will help. Then it’s all practice”.

He handed me the book Made to Stick from Chip and Dan Heath, and I devoured it in a few days.

The 6 Principles of Sticky Ideas (From Made to Stick)

What makes a sticky idea?

That’s a question that Chip & Dan Heath spent years learning about, researching and answering, that they discuss at length in the book.

Their definition of a sticky idea is “an idea that is understandable, memorable, and effective in changing thought or behavior”.

They say that sticky ideas are one or more of the following:

  • Simple
  • Unexpected
  • Concrete
  • Credible
  • Emotional
  • Stories

Principle #1: Simplicity

By simple, they mean that the closer you can get to the core of the idea, the stickier the idea will be.

A great example of a simple sticky idea is Flow from Mihaly Csikszentmihalyi – whenever we hear about a state of “flow”, we can instantly visualize what it means.

Principle #2: Unexpectedness

By unexpected, they mean that the ideas that have a counterintuitive twist will be stickier than the ones that don’t.

A great example is the LCHF diet or Paleo Diet: “You can eat as much bacon as you want and still lose weight”. We instantly want to know more about the idea.

Principle #3: Concreteness

By concrete, they mean that the more concrete the idea, the better. If people can attach it to something familiar they can envision, it’s more likely to stick.

A great example is the idea of the Briefcase Technique by Ramit Sethi – an interview negotiation technique where you bring research you’ve done on a company with you in a briefcase.

Principle #4: Credibility

By credible, they mean that attaching your idea to a credible source / research / authority / story, it will be more sticky and believable.

Some great examples are the ideas of Grit by Angela Duckworth, Growth Mindset by Carol Dweck, or Deep Work by Cal Newport, which are all ideas that are heavily backed by research.

Principle #5: Emotion

By emotional, they mean that your ideas should make people care and envoke emotions in them through stories and appealing to self-interests and identities.

A great example is the Alter Ego idea from Todd Herman – envisioning yourself moving through your day as your favorite superhero makes you feel excited to use the idea in your life.

Principle #6: Stories

By stories, they mean that using stories with your sticky ideas will get people to act as it will inspire them to improve their lives.

A great example is the Grief Casserole idea from Kate Schutt, where she uses a personal story of how she supported her mother through cancer to influence others to act.

4 BONUS Principles of Sticky Ideas For Online Entrepreneurs

As I analyzed 20 different Sticky Ideas (you’ll find the full analysis below, in the second part of this blog post), I’ve found that Sticky Ideas have 4 additional principles that Chip & Dan didn’t directly cover in the book, but you’ll want to pay attention to when you come up with your own Sticky Ideas:

Principle #7: Results

The majority of Sticky Ideas work really well and will get you visible results, which helps the ideas spread like fire.

For example, the Slow-Carb Diet became so popular because of how many lost a lot of weight with it (so they talked about it with their friends, family, etc.).

When you’re coming up with a Sticky Idea, it makes sense to start with the advice, frameworks or techniques you use that bring your clients the best results, and build your Sticky Ideas around that.

Principle #8: Accessibility

Many of the ideas are extremely accessible (almost anyone can do them), which makes it as easy as possible for as many people as possible to understand, use and spread the ideas.

For example, anyone can bring a Mac’n’Cheese Grief Casserole to a friend that’s grieving, heartbroken, or in a bad mood.

When you’re coming up with your Sticky Ideas, make sure they’re extremely easy to implement without any real “requirements”. The more people that can use the idea, the more people can spread it for you.

Principle #9: Alternatives

Some of the ideas provide an alternative, “better” way for achieving the same result:

  • Derek Halpern’s 80/20 Promotion Rule helps bloggers grow their blog audience without writing 24/7
  • The Paleo Diet helps dieters lose weight while still being able to eat as much bacon as they want to
  • The 1,000 True Fans idea from Kevin Kelly helps you build a business without having to attract hundreds of thousands of potential customers

They usually help people avoid something they hate / don’t enjoy doing (write a lot, give up bacon, feel like they need to attract hundreds of thousands of people to their business if they want to live off of it).

When you’re coming up with your Sticky Ideas, think about any alternative methods you have for achieving the results that they want that they might find more enjoyable than other methods currently available to them.

Principle #10: Problems

If you want your sticky ideas to spread and help your business, they should solve a problem that many people have (ideally it would be a problem that few people are solving for them).

If you pay close attention to powerful ideas in the entrepreneurship space, you’ll notice that every sticky idea is really just a solution to the problem that the audience of the expert is having, and it’s designed to be sticky.

The more people that have the problem, the more can benefit from an idea, and the more people you can reach with it.

On the flip side, Sticky Ideas that don’t solve any problems might fall flat, because people won’t really understand why/when they should use them.

Whenever you come up with your Sticky Idea Candidates, make sure they solve a problem. The more painful, the bigger, and the more common problem they solve, the more likely they are to stick.

20 Sticky Idea Examples From Experts, Authors and Entrepreneurs

To better understand these principles and see them in action, I collected 20 examples of Sticky Ideas from experts, entrepreneurs and authors I follow.

As you’ll see, each of these ideas have different qualities (some provide an exciting alternative, some are more emotional than others, and some have an unexpected twist to them(, though you’ll notice that most of them are simple and concrete.

You can read through these ideas, check them out in more detail through the relevant links, or simply skim through them and stop on ones that you find the most interesting (it’s quite a list!).

1.The Briefcase Technique (Ramit Sethi)

Click here to watch The Briefcase Technique

I first heard about The Briefcase Technique years ago when I was on a mission to learn everything I could from Ramit Sethi (one of my long-time mentors). Even though I wasn’t looking for a job, I devoured all of his content so I could soak up all of his knowledge that I possibly could.

When I read his content about finding your dream job, I came across his “Briefcase Technique”, which I instantly remembered and recommended to many of my friends that were preparing for job interviews. When I think of Ramit and sticky ideas, this is easily the most memorable idea that comes to mind.  

What is The Briefcase Technique?

Imagine you’re attending a job interview. Rather than just “swinging” the interview, Ramit recommends doing research on the company up-front and preparing a detailed plan on how you can help it up-front.

Instead of just talking about the plan, he recommends printing it out on paper and bringing it with you in a briefcase to impress the interviewer. You can see where the name comes from :).

Why it’s sticky:

  • Results: The concept works really well (a lot of people have successfully used it to negotiate a better salary), so a lot of people talk about it and link to it
  • Accessibility & Concreteness: It’s very tangible and familiar (you can tell a friend to do some research and bring it to an interview on a piece of paper – anyone can do it)
  • Emotional: You are excited about the idea of being able to negotiate your salary using this technique

2. 80/20 Content Promotion Rule (Derek Halpern)

Click here to read about the 80/20 Content Promotion Rule

I heard about the 80/20 Content Promotion Rule from Derek Halpern through Ramit Sethi’s Zero to Launch online course a few years ago, when I first learned about content creation and promotion.

This “rule” has since then been referenced in hundreds of articles all over the internet, and when Derek Halpern later became my mentor, he explained that people talk about it and link to it from their content to this day.

He also shared a bit of context behind why he thought this rule took off. He said that he noticed that a lot of people hated the idea of writing 24/7 to grow their blog audience, and this concept gave them permission and a way to grow their blog without having to do something they didn’t enjoy. That’s how the 80/20 Content Promotion Rule was born.

What is The 80/20 Content Promotion Rule?

The idea is simple: Instead of writing new blog posts every day (or every week), Derek recommends spending more time writing content that’s better than anything else out there.

But then, instead of just writing a ton of content, he recommends spending 4x the amount of time promoting your content to make sure it gets into the hands of people who need to read it (“you should spend 20% of the time creating content and 80% of the time promoting it”).

This then helps you build a blog audience without having to write all the time.

Why it’s sticky:

  • Results: It works well (which is why a lot of people mention it and talk about it to their friends)
  • Alternative: It gives people who hate writing an easier alternative to growing their blog audience
  • Concrete: It references the “80/20 rule”, a concept that many of us are already familiar with

3. First, Ten (Seth Godin)

Read about Seth Godin’s First, Ten here

I don’t remember when I first heard about Seth Godin’s First, Ten idea, but I do remember that I only had to hear it once to remember it for life.

If you’ve ever read any of Seth’s thousands of blog posts, you’ll know that he’s a master of expressing ideas clearly and with few words. As far as sticky ideas go, he has a whole mountain of them under his belt, and it’s worth studying how he creates them.

What is the First, Ten idea?

The idea is that whenever you have a new idea for a product, a concept, (or a sticky idea!), you can share it with 10 of your ideal customers. If they love it, they’ll share it with 10 more people (or more), and you’ll know that it’s an idea worth pursuing. If not, it isn’t.

Why it’s sticky:

  • Concrete: It’s very easy to imagine,remember, or explain to a friend (want to test an idea? Just share it with 10 ideal customers!)
  • Accessibility: It’s very doable and easy to try out (you likely know 10 people that you could share an idea with)
  • Alternative: It’s an alternative approach to testing your product ideas to other approaches that can take MONTHS to do

4. 1,000 True Fans (Kevin Kelly)

You can read about 1,000 True Fans here

The idea of 1,000 True Fans is so sticky it made it’s was into Tim Ferris’s Tools of Titans (which, by the way, is a book full of sticky ideas worth studying).

I first heard about the idea years ago and still keep it in the back of my mind whenever I think about how to run my business, write new content, and develop new products and services, as it serves as a great guiding point for nurturing relationships with my clients (and attracting new ones).

Who are The 1,000 True Fans?

The idea, as summarized by Kevin himself in his essay, is this:

“A creator, such as an artist, musician, photographer, craftsperson, performer, animator, designer, videomaker, or author – in other words, anyone producing works of art – needs to acquire only 1,000 True Fans to make a living.”

This idea applies to running an online business as well, as there are plenty of online entrepreneurs making a great living with audiences of 1,000 people or less.

Why it’s sticky:

  • Emotional: It’s easy and exciting to visualize an army of 1,000 True Fans knocking on your door and waiting to work with you (or at least that’s how I visualize it)
  • Concrete: It makes running a successful business feel a lot more tangible and achievable (“I just need 1,000 true fans – then I can make a living with my business”)
  • Alternative: It makes it easy for you to focus just on one goal in your business, rather than on 100 different things you “should be doing”

5. Skyscraper Technique (Brian Dean)

Read about The Skyscraper Technique here

While I’ve never been a fan of “link building” and other techniques from internet marketers (as a lot of them feel spammy to me), I do have to say that Brian Dean came up with an amazing concept called The Skyscraper Technique.

It’s a concept I heard about when Brian first published it, and I remember that everyone in the online business space was talking about it and telling me that “I have to read this article”. It was a hot idea at a time that still gets mentioned and referenced to this day.

What is The Skyscraper Technique?

Brian makes a point that “nobody cares about the 11th tallest building in the world”, but everyone is attracted to the absolute tallest one. He says that it’s similar with your content, and helps you create content that has a strong base with 20 additional floors, making it the “tallest skyscraper out there”, which everyone talks about.

Why it’s sticky:

  • Concrete: Everyone knows what a skyscraper is, so it’s very easy to remember. The analogy between a skyscraper and content creation is easy to understand and correlate (each layer that you add to your content is a floor in a skyscraper)
  • Credibility: Brian shares how this technique “helped him increase his search traffic by 110% in 14 days” to back up his idea with proof
  • Alternative: You can use the Skyscraper Technique instead of just creating endless content to make sure your content gets read by as many people as possible

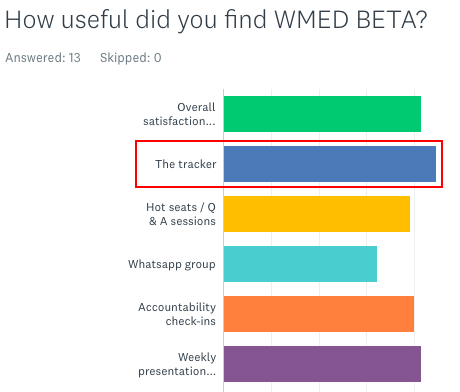
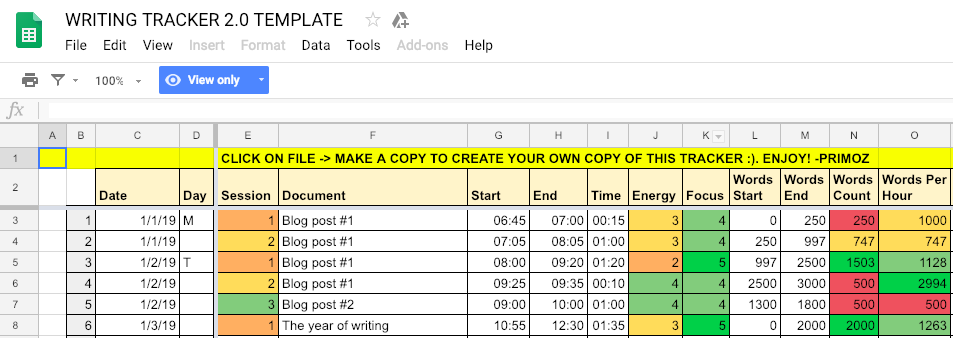
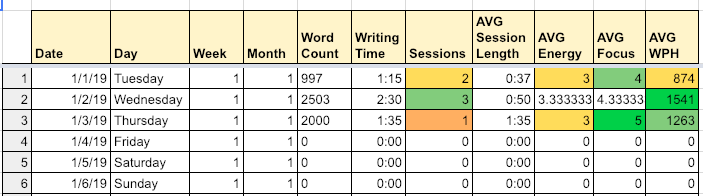
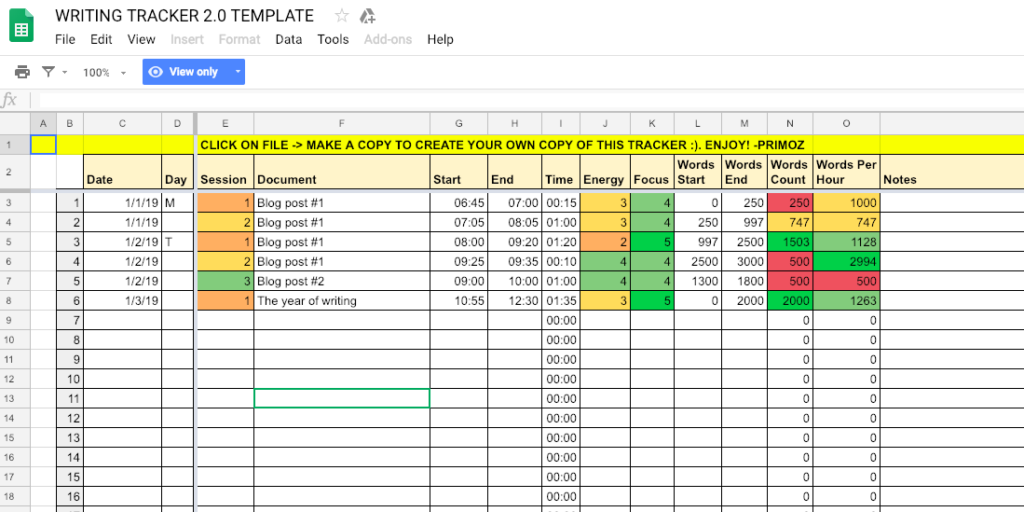
6. The Lean Review (Primoz Bozic)

You can read about The Lean Review here

I used to be horrible at coming up with sticky ideas, and just never even thought about doing it for my online business (which is why I have practically no sticky ideas in some of my earlier content).

However, as I studied top online entrepreneurs and authors and learned more about sticky ideas, I started sprinkling sticky ideas all over my blog posts, online courses and coaching calls (so that my advice helps and reaches more people).

One such example was The Lean Review, which is the most read blog post on my website (so far) in 2019, and an idea that many of my clients and readers implemented and told me about it afterwards.

What is The Lean Review?

The idea behind The Lean Review is to avoid doing a 20-hour annual review (if you don’t have the time for it or just don’t want to do it), and instead plan out your whole year in under 20 minutes, with the leanest possible approach.

Why it’s sticky:

  • Alternative: A lot of people love the idea of doing an effective annual review without spending hours and hours on it
  • Concrete: You can visualize something (or someone) being lean, and instantly understand what the idea is about
  • Accessible: It’s an actual system with a spreadsheet that you can just “plug and play”, which makes it very sharable and useful

7. The Paleo Diet (Loren Cordain)

You can read about The Paleo Diet here

If you work out a lot or ever followed Crossfit, you might have heard of the “Paleo Diet” which was popularized by Loren Cordain.

If you’ve heard about it, you might not have thought about it as a “sticky idea”, but it’s just that – a diet that was named and heavily spread throughout the Crossfit community as one of the go-to diets for the sport.

You can probably think of some other sticky diets as well (like the low carb diet, the LCHF diet, the Atkins diet, Intermittent Fasting, and the “slow carb” diet which we’ll analyze below).

What is The Paleo Diet?

The simple idea behind The Paleo Diet is to eat like our ancestors ate in the Paleolithic age (which is why some people also refer to it as “The Caveman Diet”) and to avoid eating foods like grains, bread and refined sugars which weren’t available back then.

Why it’s sticky:

  • Alternative & Unexpected: You can lose weight AND eat all the Bacon you want to.
  • Emotional: It’s easy, exciting and “hardcore” to visualize yourself as a caveman feasting on a wild boar (or just eating a lot of eggs, meat and vegetables)
  • Concrete & Accessible: It’s easy to know what to eat / what not to eat in a diet like this “if a caveman didn’t have access to it, I can’t eat it”

8. The Slow-Carb Diet (Tim Ferriss)

Click here to read about The Slow Carb Diet

While less main-stream than The Paleo Diet, The Slow Carb Diet is a sticky idea worth mentioning that went extremely viral among Tim Ferris’s readers after being mentioned in his 4 Hour Body book (as you can see by the 7,221 comments on his blog post about the diet).

What is The Slow Carb Diet?

The Slow Carb Diet is a diet that is focused on eating mostly carbohydrates that get absorbed into your body “slowly”, such as legumes and vegetables. It also includes a weekly “cheat day” where you can more or less go crazy and eat all the foods you’ve been craving the week before.

Why it’s sticky:

  • Results: It’s super effective (can you notice a trend in most of the sticky ideas?). There are hundreds of success stories from the diet, which help it spread.
  • Concrete: It sounds very similar to the “low carb diet” which many people are already familiar with, but has an interesting twist that people can easily understand and remember (the “slow” part).
  • Emotional: A lot of people are excited to be on this diet because of the crazy weekly cheat days, which also helps with spreading the idea.

9. The Mindless Margin (Brian Wansink)

Click here to read more about The Mindless Margin

One of the best books I’ve read this year was the book Mindless Eating by Brian Wansink. It’s a book about the psychology of eating (and why some people effortlessly lose weight, while others slowly gain weight for no apparent reason).

It’s a phenomenally written book full of interesting stories, research, and sticky ideas, with The Mindless Margin being one of them.

What is The Mindless Margin?

The idea behind The Mindless Margin is that small choices (like eating from bigger vs smaller plates, or buying a bigger vs smaller box of cereal) can invisibly help us lose or gain weight.

By making more of the “right” small choices within the mindless margin, we can effortlessly lose weight without feeling deprived as we would by going on a very restrictive diet. This way, we can slowly but steadily lose weight in the long run.

Why it’s sticky:

  • Concrete: The “mindless eating” is a sticky idea in itself (as it’s a new, unique way to look at eating), and the “mindless margin” is an evolution of it
  • Alternative: The idea of the mindless margin gets us excited so that we can “automatically” lose weight, without going on a diet
  • Accessibility: There are a lot of opportunities to see the mindless margin in our everyday lives, so we can reinforce the idea in our minds over and over again

10. Alter Ego (Todd Herman)

You can learn more about Todd’s Alter Ego idea here

I first met Todd at a mastermind event in NYC a few years ago and had the pleasure of spending a few hours talking to him over dinner.

That’s when he shared with me his idea of the Alter Ego and the stories behind it, which I instantly fell in love with. Later on, he wrote a book about the idea that made a big bang, got a lot of media coverage and became a bestseller.

What is an Alter Ego?

Todd’s idea is that world’s top sportsmen and performers use an “Alter Ego” that allows them to channel their inner “superheroes” to perform at their best during their matches and important events in their life.

Why it’s sticky:

  • Concrete: We’re already familiar with the idea of an Alter Ego (just not in this context)
  • Emotional: We love the idea of channeling our inner superheroes and unlocking a new version of ourselves
  • Accessible: The idea is easy to visualize and remember (we can easily envision ourselves putting on a superman’s cape when we get to work)

11. 5 Love Languages (Gary Chapman)

You can learn more about the 5 love languages here

I heard about the 5 love languages book from a friend when I asked them how to improve my relationships with people that were important to me.

When I read the book, I loved the framework of “the 5 love languages” – it was memorable, it made sense, and helped me see the world in a different way.

What are The 5 Love Languages?

Just as we speak different languages, we also have different “love languages” in which we express love and feel loved (like giving gifts, physical touch or words of affirmation). If we communicate in the same language, we get along well – if we don’t, we might feel misunderstood.

Why it’s sticky:

  • Concrete: We’re already familiar with the idea of languages and how we can understand (or misunderstand) each other if we communicate in the same or different languages
  • Unexpected: The concept of languages is paired with a new topic (love), which is unexpected and memorable
  • Accessible: The idea helps us compartmentalize our day-to-day communications into 5 different ways (so we see the world in a different way)

12. A Grief Casserole (Kate Schutt)

You can listen to Kate’s speech about A Grief Casserole here

I remember having a conversation with my friend Kate in a small bar in NYC about being there for people when they’re sad. “What do you say to someone when they’re feeling sad and you want to be there for them”? A grief casserole was her answer.

What is a Grief Casserole?

Whenever someone is feeling sad or grieving, even if you don’t know what to say to them, you can always make them a big casserole of mac’n’cheese and bring it to them. Nobody will ever get mad at you for bringing them comfort food, and you’ll always make them feel better.

Why it’s sticky:

  • Accessible: It’s practical, easy to do and implement (anyone can do it)
  • Emotional: It creates an image of comfort in our minds (bringing someone a big casserole of mac’n’cheese)
  • Unexpected: It’s attached to a counterintuitive reframe (“don’t say anything – bring a casserole instead”)

13. FAST Method (Sam Gavis-Hughson)

You can read more about the FAST method here

Sam is one of my private coaching clients, and when I interviewed him for a guide I’m writing about growing your email list, he shared one sticky idea that caught my attention – the FAST method.

Sam said that he tries to build in one core sticky idea into everything he does, from his e-books to online courses – and the FAST method is a great example of that.

What is the FAST Method?

The FAST method is a method for solving dynamic programming questions in coding interviews:

  • First solution
  • Analyze the first solution
  • Identify the Subproblems
  • Turn the solution around

Why it’s sticky:

  • Emotional: You can imagine this method help you get a job at a top tech company like Google, Apple, or Facebook
  • Concrete: The play on words is interesting (it implies that you can solve dynamic programming interview questions FAST with this method)
  • Alternative & Results: The method is different from all other methods out there and works really well (which is what helped the idea spread)

14. Deep work: Cal Newport

You can read more about Deep Work here

I’ve been a big fan of Cal Newport’s work ever since I read his books So Good They Can’t Ignore You and Deep Work.

Not only are the books amazingly well researched, written and useful, they’re also filled with sticky ideas like Deep Work.

What is Deep Work?

In his book, Cal talks about the concepts of “Deep Work” and “Shallow Work”. Deep work is working on activities that require deep concentration (like writing), while shallow work is work that doesn’t require deep concentration (like browsing social media).

Why it’s sticky:

  • Concrete: We’re already familiar with the concept of “shallow” and “deep”. We can connect the Deep Work with “deep concentration”, and instantly understand what the concept is about
  • Credibility: The concept of Deep Work is heavily backed by research, examples and stories from Cal and other top performers he interviewed for his book
  • Accessible: We can use the idea of Deep Work every day and pay attention to how much of it we get done to measure how productive we were

15. Growth Mindset (Carol Dweck)

You can learn more about Growth Mindset here

I spent a large chunk of last year working on my mental game. I wanted to understand how top performers in all walks of life think differently than everyone else, and find ways to improve my own mindset.

One of the books on the subject I loved the most was Mindset by Carol Dweck. The book is built around the core concepts of Growth Mindset and Fixed Mindset, which are great examples of sticky ideas.

What is Growth Mindset?

Growth mindset simply means that we think that our traits, qualities and skills are not set in stone, and that we can work on them to improve them (like our intelligence, our social skills, our discipline and work ethic, sports talent, etc.). The opposite of that is Fixed mindset, which means we believe that these qualities are set in stone.

Why it’s sticky:

  • Emotional: The term “Growth Mindset” implies that we’re growing when we think in the Growth mindset, which is exciting to the readers of her book
  • Simple & Concrete: Both “Growth Mindset” and “Fixed Mindset” are easy to understand and visualize
  • Credible: The idea is heavily backed by research, stories and examples from different industries

16. Conference Commando (Keith Ferrazzi)

Click here to learn more about becoming a Conference Commando

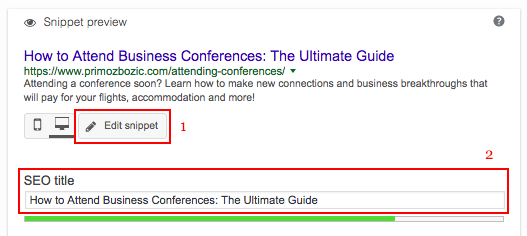
Never Eat Alone from Keith Ferrazzi was the first book I read about connecting with influencers and finding mentors, long before I met Keith at a party at his house in the Hollywood Hills. In the book, one idea stood out to me that I remembered for years – the idea of becoming “The Conference Commando”.

What is a Conference Commando?

In his book, Keith advises against just “attending” a conference. Instead, you should attend the conference like you’re “on a mission”, host intimate dinners with other attendees you want to meet within a conference, strategically connect with speakers, and make sure you get the most out of a conference that way.

Why it’s sticky:

  • Concrete: We’re already familiar with the concept of a “commando”
  • Emotional: We can visualize ourselves “being a commando on a mission” within a conference
  • Unexpected: The unusual combination of two seemingly unrelated terms (conference and commando) is memorable

17. Hell Yeah / Hell No (Rich Litvin)

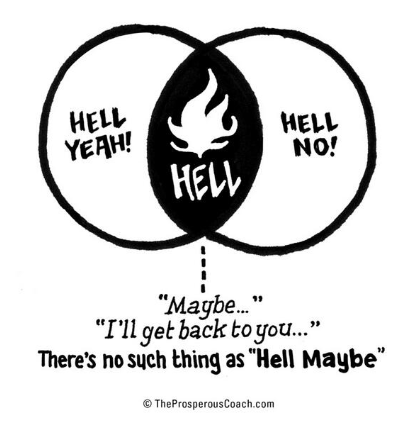
You can read more about the Hell Yeah / Hell No idea here

I read Rich Litvin’s book Prosperous Coach when Rich noticed me in an online community and reached out to work with me, as part of my research and preparation. Little did I know that his book would be one of the most impactful books I would ever read about coaching, that I would give to any of my clients that asked me about growing their coaching business.

Within the book, the idea of a “Hell Yeah / Hell No” stood out as the most memorable idea that I still use to make decisions in my life to this day.

What is a Hell Yeah / Hell No?

To make it easier to decide which clients to work with (or what to work on in your business), Rich recommends polarizing your decisions to only two choices – “Hell Yeah”, “Hell No”. This helps you avoid being stuck with clients that you don’t love working with, or doing things you don’t love doing.

Why it’s sticky:

  • Simple & Concrete: We can instantly understand what the concept means and remember it by reading about it once
  • Alternative: It’s a strong polarizing idea that helps us eliminate a lot of decisions, and is the alternative to “figuring out if we want to do this”, creating a list of pros and cons, etc.
  • Accessible: We can use the idea over and over again in our daily lives

18. ABCDE Framework (Martin Seligman)

You can learn more about the ABCDE Framework here

I read Martin Seligman’s book Learned Optimism when I decided I wanted to stop complaining so much, think more optimistically and recover from setbacks faster. From the whole book, the ABCDE framework was the stickiest idea, which I use to this day.

What is the ABCDE Framework?

Any time you catch yourself thiking negatively or pessimistically, you can work through:

  • Adversity (the situation that triggered your response)
  • Beliefs (our thoughts / interpretations of the event)
  • Conscequences (the way we feel or behave)
  • Disputation (arguing and disputing our beliefs)
  • Energisation (outcome of effects from redirecting your thoughts to actions)

This framework helps you “flip” negative thoughts and actions into positive ones.

Why it’s sticky:

  • Concrete: “ABCDE” is a memorable combination of letters, and the “elements” of the idea are fairly easy to remember (ok, I have these thoughts, what happened, what are my beliefs about them, what are the consequences, how can I dispute them…)
  • Alternative & Results: This method provides a practical alternative to just “hoping we’ll feel better soon” and actually helps us feel better sooner
  • Accessible: The idea is a practical framework of steps we can go through and practice over and over again

19. Time Management Matrix (Stephen Covey)

You can read more about The Time Management Matrix here

7 Habits of HIghly Effective People was the first personal development book I ever read, and opened my eyes to the world of improving myself and becoming the best version of myself. There were a lot of great ideas in the book, but the Time Management Matrix is the one idea I still use to mentally organize the work I want to do.

What is The Time Management Matrix?

The Time Management helps us organize all of our tasks by how urgent and important they are, into 4 categories:

  • Urgent and Important (the tasks that need to get done ASAP, like a launch email we want to send out today)
  • Not Urgent and Important (tasks that are important, but without a deadline, like strategic work on our business)
  • Urgent and Not Important (emails, interruptions, phone calls…)
  • Not Urgent and Not Important (browsing internet, scrolling social media, wasting time, etc.)

Why it’s sticky:

  • Concrete: It allows us to organize all of our work that we have in our head into 4 different categories, and it’s usually instantly clear if something is important or urgent (or not)
  • Accessible: We can use the idea every day in our lives
  • Alternative: It’s an alternative to just looking at all of our work as one long, never-ending TO-DO list

20. Don’t Criticize, Condemn, or Complain (Dale Carnegie)

You can read more about this idea here

Dale Carnegie’s How To Win Friends and Influence People is one of my favorite books of all time, and it taught me so much about how to show up in the world as a nice person that people like hanging out with. One of my favorite “rules” from the book that I still remember from the book is “Don’t Criticize, Condemn or Complain”.

What does “Don’t Criticize, Condemn or Complain” mean?

This principle teaches us how to treat people kindly and with respect:

  • Don’t Criticize someone that has a different opinion than you, even if you disagree with them
  • Don’t Condemn someone that made a mistake (as it won’t do any good)
  • Don’t Complain about problems – instead work on solving them

Why it’s sticky:

  • Concrete: There’s something about the sound of this principle that makes it sticky and easy to remember
  • Accessible: It’s very easy to implement in everyday life (every time someone makes a mistake, you have an opportunity not to condemn them)
  • Emotional: Using the idea in action makes you FEEL good about yourself, which means you’ll likely use it over and over again

7 Steps for Coming up With Sticky Ideas

Ok, we went over what Sticky Ideas are, we looked at 10 principles of Sticky Ideas, as well as over 20 examples of real Sticky Ideas from experts, authors, and entrepreneurs.

By now, you should have a pretty good idea how to spot sticky ideas in the world and understand why they’re sticky.

I’m excited for you because I know you’ll now see the world in a different way than before, even if you do nothing else after reading this guide.

You’ll see the world of “sticky ideas” all around you – in books, podcast interviews, ads, everywhere.

But since I know that you’re here because you want to come up with your own sticky ideas that you can use in your blog posts, e-books, online courses, books and public speeches, let’s talk about the final piece of the puzzle – coming up with your own sticky ideas.

You can do that by going through the following steps:

  • Step #1: Develop Sticky Idea Thinking
  • Step #2: Find Your Sticky Idea Candidates
  • Step #3: Use The Sticky Idea Checklist
  • Step #4: Run Sticky Idea Experiments
  • Step #5: Create your Sticky Idea Bank
  • Step #6: Spread The Word
  • Step #7: Rinse And Repeat

Let’s look at them step by step.

Step #1: Develop Sticky Idea Thinking

Now that you have a solid understanding of what sticky ideas are, you’ll automatically start seeing Sticky Ideas in every book or blog post you read, as well as every podcast episode, online course or speech you listen to.

Next, you’ll want to apply the Sticky Idea Thinking to your own business as well.

Whenever you sit down to write a blog post, record an online course video or write an e-book, ask yourself “what Sticky Idea can I talk about today?”.

You want to stop thinking in terms of “creating content” and start thinking in “creating and sharing Sticky Ideas”. Your content is merely the vehicle for sharing those ideas with the world.

You can get started by creating one Sticky Idea per every piece of content you create, and you’ll instantly start putting more ideas into the world.

Step #2: Find Your Sticky Idea Candidates

Now you’re probably wondering “well what should I create my Sticky Ideas about?”

The best place to start is to think about your most effective strategies, frameworks, techniques, mindset shifts, concepts, stories and ideas that bring you or your clients the best results.

For example, I shared my Lean Review and Lean Schedule ideas because the Lean Review System was something that worked really well for me, and the Lean Schedule strategy was something that worked really well for a lot of my clients, so I decided to write blog posts about these ideas.

Coming up with your most impactful ideas and turning them into Sticky Ideas will give you the highest chances of success (as you’ll automatically follow the results principle with your ideas).

Step #3: Use The Sticky Idea Checklist

Once you have a list of at least a few Sticky Idea Candidates, it’s time to repackage them to make them sticky.

You can do that by following the Sticky Idea Principles that I shared above, and applying at least a few of the principles to your ideas.

To make your life easier, I put together a Sticky Idea Checklist for you that you can follow step by step and make your ideas, with exact questions you can ask yourself and examples you can use for inspiration.

You can download your Sticky Idea Checklist here, together with the FULL PDF version of this 16,000+ Word Guide:

Download your Ultimate Guide to Creating Content That Sticks

Download the FULL 16,000+ word guide (plus a BONUS Sticky Idea Checklist to create your own sticky ideas in 10 easy steps)

Success! Now check your email to confirm your subscription.

There was an error submitting your subscription. Please try again.

I promise I won't send you any spam - I hate it as much as you do! Powered by Kit

Step #4: Test Your Ideas

Once you have a list of your first few Sticky Ideas, you can go and test them in the world to see which of them stick.

Try to test your ideas everywhere you can:

  • In blog posts, e-books, and guides you’re writing
  • In online course videos you’re creating
  • In coaching and casual conversations with your clients and readers
  • In emails and comments, whenever you’re giving advice to someone
  • In YouTube videos, speeches, webinars…

You get the idea – you should take any chance you have to experiment by testing your ideas in the world.

Here’s a quick and easy way to do that:

Instead of saying “you should do this”, you can say “I call this the [STICKY IDEA]. This is how it works…”.

That’s it.

You can also start coming up with Sticky Ideas “on the spot”:

  • Every time you’re trying to explain something to one of your clients and it feels a bit slunky, see if you can find an analogy for them (and turn that analogy into a sticky idea in the spot)
  • Every time you’re writing a blog post and you’re trying to explain something, think about how you could explain it through a Sticky Idea
  • Every time you’re creating a presentation for your online course, think about a sticky idea you could create that would be the core of the presentation

As you have the conversation, publish the blog post, or deliver the presentation, pay attention to what happens in the following days / weeks (as you keep mentioning the idea).

Do people remember it and repeat it back you you without you mentioning it, as Seth Godin says in his First, Ten article?

Or do people have a hard time remembering the name of the idea, even when you bring it up to them?

If it’s the former, you have a sticky idea. If it’s the latter, you don’t.

As you’re testing your ideas, many (or most of them) might not stick, and that’s ok.

With the ones that do, move on to Step #5.

With the ones that don’t, you can stop talking about them, and tweak the ideas (you could simplify them, make them more concrete, change their name, etc.).

Step #5: Create Your Sticky Idea Portfolio

Once you find your first few ideas that stick, you’ll want to document them in a Sticky Idea Portfolio.

It doesn’t matter if you put them in a spreadsheet, write them down in a notepad, or into a Google Document. Just make sure you keep track of them so you don’t forget them.

It’s useful to keep these ideas on hand so you can spread the word about them more easily (and reference them in any new content you create).

The last thing you want to do is spend hours developing an idea that you end up completely forgetting about.

Step #6: Spread The Word

Once you discover your Sticky Ideas, it’s time to put the pedal to the medal and spread the word about them as much as you can:

  • You can create a blog post and/or a YouTube video around your idea that people can link to and share with others
  • You can create a social media post that links to your blog post or YouTube video
  • You can reference your blog post / video within all the future content you create
  • You can mention your idea in guest posts, publicity opportunities and podcast interviews
  • You can expand on the idea in a presentation or a master class in your online course
  • You can create a public speech, a TED talk, or even write a whole book around your idea

This will help you spread your idea with others, and giving them them the opportunity to share it with their clients and friends.

Step #7: Rinse and Repeat

If you look closely, you’ll notice that every expert you follow has a lot more eticky ideas up their sleeves, even if they’re known for just 1-2 signature ideas.

For example, one of my mentors Ramit Sethi has a lot of Sticky Ideas, like Conscious Spending, The Seagull Strategy, Immersion Strategy, You are The CEO of Your Business (and plenty more).

As you start reading their books and blog posts or going through their online courses, you’ll see that they think and talk in Sticky Ideas. They use Sticky Ideas every chance they have to make their ideas and content stickier and more shareable.

And yet, there will only be a handful of signature Sticky they are remembered by.

Then, there are a handful of other ideas that they’ll build their online courses about or write books / e-books about (you’ll notice that most big pieces of content are built around 1-3 core ideas).

Then, there are even Sticky Ideas that will be sprinkled throughout their content. They might not serve the purpose to reach hundreds of thousands of people, but they’ll make ideas and frameworks more memorable and easier to understand and reference for their audience.

Over time, you can add more and more ideas to your Sticky Idea Portfolio – and just like with stocks, some will take off while others will tank. But sooner or later, you’ll unlock a few signature ideas that you’ll become known for for years to come.

Keep coming up with Sticky Ideas. Keep testing them. Keep mentioning them. Mention the ones that stick, ditch the ones that don’t. And always come up with new ones whenever you create new e-books, blog posts or online courses.

BONUS: Your Sticky Idea Checklist

Woah, this was a long guide, right?

Well done on reading all the way until the end!

Since you’re already here, I know you’ll want to do more than just read a guide – you’ll want to put everything you’ve learned into action.

To make that as easy as possible for you, I’ve put together the BONUS Sticky Idea Checklist for you.

In this checklist, you’ll learn about:

  • Part 1: The 4 Stages of Creating Your Sticky Idea – How to go from an idea to a finished piece of content.
  • Part 2: The 10-Step Checklist For Developing Your Sticky Idea – How to run your idea through the 10 Sticky Idea Principles and make it stickier, with examples and questions to guide you along the way
  • Part 3: The Checklist In Action –  Watch me apply the Sticky Idea Checklist to one of my own Sticky Idea Candidates

It includes exact questions you can ask yourself to make your ideas sticky using the Sticky Idea Principles, as well as examples you can use for inspiration when coming up with your Sticky Ideas.

You can download the Sticky Idea Checklist through the orange box below – enjoy!

And if you enjoyed reading this guide, I’d love for you to share it with a fellow entrepreneur that would love to read it.

Your Turn: What is one Sticky Idea YOU love that I didn’t include in this guide (and why do you love it)? Share it with us in the comments below!

The FREE Automated Writing Tracker Spreadsheet Template

By Primoz Bozic Leave a Comment

Writing tracker spreadsheet template

You’re here because you want to track your writing.

Maybe you want to…

  • Keep track of your daily word counts
  • Calculate your writing speed in words per hour
  • Track your writing progress for every day, week, or month of the year

Or, you’re just a spreadsheet nerd like me that loves creating spreadsheets for every part of their lives.

In any case, you’re in luck – I created a simple writing tracker spreadsheet template that you can use to write more, better, faster content every day – and keep track of all of your writing totals and stats automatically.

My students have used this writing tracker spreadsheet to write over 1,000,000 words

I recently ran a writing experiment where I worked with 18 of my students to help them write more content over the course of 3 months.

Here’s how much my students wrote throughout the program:

  • “I’ve written 19 YouTube scripts, all with accompanying blog posts and emails, plus 5 extra engagement emails, 2 sales emails and 2 opt-in bonuses for a total of 72,837 words.”
  • “I have written a total amount of over 58.261 words, mainly blog posts.”
  • “I wrote 87k words plus! / 10 engagement emails, 3 sales emails, 15 blog posts! the beginnings of 3 novels“
  • “I’ve come up with 50 article ideas and created an outline/draft for each an every one of them. By combining all the emails, blog posts, and free writings, I’ve written a total of 117,466 words!”
  • “I wrote 3 monthly newsletters, 5 video scripts, 6 blog posts, and a monster consulting case study for a total of 40,300 words!”
  • “Oh holy fuck. I’ve written over 30 helpdoc articles for my FAQ. (10 include videos which I would’ve scripted or outlined) I’ve written 4 long-form blog articles, and about 10 emails. I’ve also written OTHER video scripts, and emails for the future on top of this — including one 24 hour launch and one full 5-day launch (both of which performed above 10% conversion rate)”
  • “I wrote a total of 30,168 words — even while traveling and dropping off considerably in November and December.”
  • “I tracked 52401 words written over 200 writing sessions during 90 days”
  • “61550 words, 3 growth studies, I never missed engagement email on my newsletter (12 weeks in a row)”
  • “Up to Dec. 12th, the day of the final call, I had finished my Ultimate Guide with 44402 words total. I had 100 sessions working on the Guide, either writing or editing. Also, I wrote 20 blog posts and 12 engagement emails.”

I was astonished by their results. I knew that my program worked well, but that it worked THAT WELL? I honestly didn’t expect that, and when I read those responses I had teary eyes as I felt my heart melt.

At the end of the program, I also asked my students what they’ve found the most helpful throughout the program.

To my surprise, their favorite feature was our writing tracker spreadsheet:

Writing tracker favorite

Why did the students love The Writing Tracker Spreadsheet?

Here’s what some of the students said about the tracker:

  • “Knowing how much you write, when, what, energy and focus, is measurable. You can see where to improve and you can replicate good sessions because the info is there.”
  • “What gets measured gets managed. Start counting. At least know how many sessions you are doing and preferably how much time you are spending writing. If all you do is measure, you will still improve.”
  • “The tracker is a life changer – it keeps me consistent and accountable.”
  • “I can now “find the time” to write, thanks to the tracker, and quantify my writing. I can schedule writing so I can get my best writing done. I am not a calendar guy and the tracker is my calendar. I”

I also use the writing tracker spreadsheet myself on a daily basis because I love keeping all of my writing in one place, I love competing with myself, challenging myself, and seeing the progress I’m making.

Plus, I’m a big spreadsheet nerd and create a spreadsheet for everything (from how much work I get done on a daily basis, to writing, to how much I read, to my annual review).

My writing tracker acts as my “lab” that allows me to run writing experiments and learn what actually helps me write more, better and faster.

What is The Writing Tracker Spreadsheet and how does it work?

The Writing Tracker Spreadsheet is a simple spreadsheet where you an track all of your writing sessions:

Writing tracker spreadsheet template

It helps you track:

  • Every writing session
  • How much time you spent writing every day
  • How many words you write every day
  • How many writing sessions you have each day
  • How long it takes you to go from an idea to a published post
  • Your writing speed in words per hour (WPH)
  • How long are your writing sessions
  • How energized you are when you sit down to write every day
  • How focused you are during your writing sessions
  • How much time you spend writing vs researching vs editing
  • How much you’ve written in a day, week, month, and even the whole year
  • …and more!

It’s super simple to use.

All you do every time you sit down to write is:

  • When you start writing: Write down (1) the name of the content you’re writing, (2) your starting word count, and (3) how energized you feel when you start writing.
  • When you finish writing: Write down (1) your final word count, (2) how focused you felt during the session and (3) any relevant notes that influenced your session (optional).

The tracking takes less than 10 seconds per writing session, and I always have the tracker open when I write so it’s super easy for me to use whenever I write.

Automatically calculate your writing stats, daily / weekly / monthly word counts, writing speed in words per hour, and more!

Now for the fun part – the automatic tracking and stats.

Every time you complete and enter a writing session in your tracker spreadsheet, it will automatically calculate and update your daily, weekly, monthly and annual writing word count totals and averages.

Writing tracker spreadsheet daily word counts

It will help you visually see things like:

  • How much you’ve written in a given day, week or month
  • How your writing speed and word counts improve over time
  • How much you’ve already written in the whole year

And it all happens without you even pressing a button.

Want to see the writing tracker spreadsheet in action?

Here’s a quick demonstration video on how to use it:

Get priceless counterintuitive insights about your writing

I love using the tracker because it helps me visually see how I’m progressing with my writing.

It also helps me see what helps (or hurts) my writing so I can continue to improve my daily and weekly writing routine.

For example, here are just some of the things that you can learn from using the tracker for a few weeks:

  • Which days are your best (and worst) days and times of day for writing so you can plan around that
  • When you write the fastest and when you write the slowest (and why)
  • How well you can write when you’re tired vs. when you’re fresh (the results might surprise you)
  • How short / long breaks and the number of writing sessions every day influence your writing
  • Which types of content are easier for you to write than others (and why)

And that’s really just the tip of the iceberg – there’s an infinite amount of things you can learn from your writing tracker spreadsheet.

Plus, you could always modify the spreadsheet to track additional data like:

  • How long it takes you to write different TYPES of content (sales copy vs engagement e-mails vs blog posts)
  • How different writing locations influence your writing
  • How much writing you get done for yourself, and how much for your clients (if you’re a copywriter)

The more you track, the more you’ll learn, and the more you’ll write in less time.

Download your FREE Writing Tracker Spreadsheet Template

You don’t have to spend tens of hours creating, tweaking and troubleshooting your own writing tracker spreadsheet.

It can be a bit of a pain to create even with decent Excel / Google Sheets knowledge, and it just takes time to create all the fields and automate all the stats tracking.

Instead, you can use the template I use myself and with my students and get started with tracking your writing within minutes.

So how can you get access to your very own writing tracker spreadsheet (plus video instructions on how to set it up and use it in under 10 minutes)?

Simply enter your name and e-mail below and I’ll send you your free copy :).

How about you? What’s your experience with tracking your writing?

2019: The Year of Writing

By Primoz Bozic 2 Comments

Every year, I like to choose a theme that becomes my main focus for the year.

For example, last year my theme was “Don’t be an asshole”.

It helped me do things like:

  • Develop new programs that I thought of developing for a long time (like Work Less, Earn More BETA and Write More Every Day BETA, which later evolved into The Lodge).
  • Spread my message with more people by going on 20+ podcasts and summits throughout the summer
  • Come up with and share more of my own original ideas and concepts, rather than just passing on the experiences I got from working with my business mentors

I felt like it was a good theme, though if I had done anything differently than last year I’d make sure I have a good weekly review system to help me stay focused on it.

This year, while going through my 20-minute annual review, I also thought about my theme for the year.

While it took me a while to decide on the theme last year, this time it came to me in an instant, and it was a no-brainer.

2019 would be the year of writing.

Why The Year of Writing?

I decided to make writing (and sharing my ideas about writing) my main focus for the year because:

  • Writing is one of the best ways to spread your ideas and leave a lasting legacy. We’re still reading books from tens, hundreds (or even thousands!) of years ago, and I want my work to be remembered and easily accessible for years to come. I also want my ideas to be accessible to anyone on the internet, regardless of where in the world they live.
  • Writing is in my “Zone of Genius”. I’m not amazing at making YouTube videos, creating Instagram stories or writing short social media posts. But writing long articles and guides? That’s fun and enjoyable for me, and I feel like I’m pretty good at it as well.
  • I have so many ideas that I need to share with you. Lately, my head has literally been exploding with ideas and concepts that I’ve developed through my online programs and experiments, as well as working with my coaching clients. These are ideas that I’ve seen few people talk about on the internet. Now that those ideas have been thoroughly tested, it’s time for them to become public.

I feel like writing is still one of the best ways to spread your ideas, whether it’s through blog posts or writing a book (which I’m excited to do in 2020).

So in 2019, you can expect A LOT of it.

What can you expect from me in 2019?

In 2019, I’ll be sharing:

  • A lot of new content about writing: Through my 3-month writing experiment, we cracked the code to what helps entrepreneurs like you write more. I’ll share with you a lot of blog posts and guides about writing more, writing faster, building a sticky writing habit, creating better content, coming up with ideas what to write, creating a writing routine, outlining, editing, content strategy, and so much more!
  • Different experiments that I’m running: I’ll also share some of my favorite ideas and experiments and just general things that excite me that aren’t directly related to writing (like the 20-minute annual review I shared with you recently). That’s because I want to connect with you on a more personal level and just talk about everyday stuff we all think about and run into.
  • Access to my new writing membership: I’m in the trenches of developing my membership for entrepreneurs who want to write more, faster, better content. It’ll teach you all you need to know about writing, as well as create a community like no other for entrepreneurs, copywriters and writers to connect with each other and become better writers.

As you can see, a lot of my focus will be on writing, from writing myself, to talking about writing, to creating programs about writing.

It’s just something that I feel like is missing in the entrepreneurship world, and I’m excited to fill that gap.

How I’m writing tens of blog posts and guides this year

It’s one thing to say you’ll write. It’s another one to actually do it.

Last year, I wrote less than I wanted to, especially in the first half of the year, as I didn’t feel like I had the energy, focus and the mental space to do it.

I had coaching calls every day of the week which occupied a lot of my time and mental space, and I didn’t really know what I was writing about or had a deep purpose or excitement behind it.

This year, I feel like I have a REALLY good system set up for writing. Over the past week, I’ve written 3 blog posts (4 if you count this one) and created 2 very detailed PDFs that you’ll be getting access to soon.

The excitement of the New Year and the fact that I’m super recovered from my vacation probably has something to do with it, but I also know that I have a great system set up that will help me keep going.

Here’s how I’m writing tens of blog posts and guides this year:

  • I created the time and space to write: I reorganized my schedule and freed up 3 days plus 2 mornings every week (with the exception of customer research weeks) to dedicate to writing. This means no coaching calls, no meetings, no errands, no coffee dates or lunches on those days. Just the time and space to write and create.
  • I have a clear strategic focus in my writing: I’ll be focusing the majority of my writing on writing about writing (from coming up with ideas what to write, to going from an idea to a published post faster). I have a document with hundreds of things I could talk about related to writing already created from my writing experiment, so I’ll never run out of ideas what to write.
  • I’ll go with the flow: To prevent myself from feeling “locked in” to a specific theme (which I know I hate), I’ll let myself go with the flow and write about the things I’m excited about on a daily basis (for example, today I really wanted to write this blog post, so I just let myself do it). This helps me have fun with writing and mix things up, so I’ll never be bored with writing.

I won’t say that my system is 100% bulletproof and I know that I’ll have days/weeks when I don’t write as much as want to, but I do know that I’ll write more than I ever did before.

Join me in The Year of Writing (and download my favorite writing tool)

If you want to write more this year so you can…

  • Spread your ideas faster
  • Attract more readers, e-mail subscribers and paying customers to your blog
  • And leave a lasting legacy

Then I invite you to join me in The Year of Writing.

To get started, I’d like to gift you access to my favorite tool on writing that will instantly help you write more.

This is a tool that I use with my clients and myself to write thousands of words every week and to write more every day.

It’s called The Writing Tracker, and looks something like this:

Writing Tracker

The Writing Tracker will help you:

  • Keep and organize all of your writing in one place
  • Get automatic stats on how much you’ve written in a day / week / month / year, as well as how fast you write and more
  • Gain counterintuitive insights that will help you write more (that you’re sure to miss otherwise)

You can download The Writing Tracker through the box below – just enter your name and e-mail and I’ll send it your way, together with video instructions on how to use it.

What about you? What is YOUR theme for 2019?

The Lean Review: How to Plan Your 2019 in 20 Minutes

By Primoz Bozic 9 Comments

how to plan your 2019

I know you want to make 2019 an amazing year.

But how can you do that…

    • Without setting New Year’s resolutions that you don’t stick to?
    • Without spending 20 hours creating a 30-page yearly review that you never review?
  • Without not doing a yearly review at all because you’re too busy working (or relaxing from work and spending time with your family)?

I’ve tried a lot of different things when it comes to reviewing the past year and planning out the next year.

I’ve tried the New Year resolutions. They never worked for me for longer than a few weeks when I forgot about them and moved on with my life.

I tried doing the 30-page planning documents, and while they worked well for a lot of my friends, I just never ended up using and reviewing them for longer than a few weeks.

This year, I realized that I didn’t want to spend 20 hours reviewing my year and planning the next year.

I decided I’d rather spend the 20 hours during the holidays skiing in the mountains, relaxing in a spa, and night-tobogganing after a crazy Apres Ski party:

I spent the holidays skiing in Solden, Austria – it was incredible!

But when I came back home, I felt like something was missing.

I recovered REALLY well during my vacation and felt more relaxed than I did in months, but I lacked a sense of clarity and direction for 2019, and it bugged me.

As I had only a few days left before I got back to work (most of which were spent preparing for a NYE party, partying late into the night and then laying hungover in bed next day watching Christmas movies and eating junk food), I wanted to find a way to make 2019 awesome without spending 20 hours doing a gigantic yearly review.

Instead, I wanted to plan my year in a way that:

    • Is FUN and exciting for me
    • I’d accomplish what I wanted to accomplish
    • Is simple and doesn’t require a huge time commitment
    • I would have crystal clear focus for the year
  • I could easily review my progress every week and correct course

To have even more fun with it, I decided to create my own annual review system that I call The Lean Review.

And of course, because I’m a spreadsheet nerd, I created a spreadsheet to go with it.

Today, I’ll share this full system with you – so you can use it to plan out your 2019 in a matter of minutes, rather than hours (and have fun while doing it).

Let’s dive in!

The Lean Review

The Lean Review includes just 5 steps:

    1. The 5-Minute Clarity Session
    1. Bronze, Silver and Gold Medals
    1. The Lean Review Dashboard
    1. The 2-Minute Weekly Review
  1. Support & Accountability Systems

With the exception of the last step (the support and accountability systems) which can take a bit longer (but is optional), all of the steps within this process take only a few minutes to complete – and they’re actually FUN and EXCITING, not just another thing that you HAVE to do (but don’t have the time for).

So let’s get started!

Step #1: The 5-Minute Clarity Session

There are quite a few things I don’t like about the ultra-long annual reviews:

    • They take A LOT of time (that could be spent relaxing and recharging)
    • They force you to review and work on ALL areas of your life (which can be counterproductive as it splits your focus into too many directions)
  • They can be dreadful and tiring (rather than fun and exciting)

So this year, when I did my planning, I asked myself:

“What’s the 80/20 approach to doing an annual review and planning out my next year? And how could I do it in under 5 minutes?”

I ended up asking myself just 3 simple questions:

    • What are some achievements that would make this year AMAZING?
    • Which of these achievements are in my control?
  • “Do these achievements feel EXCITING, “MEH” or TOO MUCH?”

Let me provide some more context on each of these questions and how I used them to get more clarity on what I wanted from 2019:

What are some achievements that would make this year AMAZING?

Notice how I’m not saying “goals” – I’m saying achievements.

I don’t want to just set random “goals” that sound good on paper, feel like I “should” work on, and I’m not actually all that excited about.

Instead, I’m asking myself what can I ACHIEVE this year that would make this year amazing.

This helped me come up with really cool challenges that would challenge me and stretch me to achieve things I have never achieved before (and would make this year a year to remember).

Which of these achievements are in my control?

When I thought about my achievements, I made sure that they were actually in my full control, and avoided achievements that were not in my full control.

For example:

    • I didn’t focus on losing X amount of body weight, instead I focused on going 60 days without a cheat meal.
    • I didn’t focus on getting X new e-mail subscribers, instead I focused on writing 1,000,000 words in a year.
  • I didn’t focus on hitting X amount of revenue, instead I focused on putting in 1,000 hours of quality work this year.

I intentionally focused on tracking my hard work, not results.

That’s because if you focus on results…

    • And something goes exceptionally well (a blog post goes viral and you get 2,000 new e-mail subscribers from it), then you can hit your goal and stop working hard
  • If something goes really badly (a few blog posts don’t get you almost any e-mail subscribers), you can get really discouraged by the lack of results, even though you could be doing all the right things

I wanted to avoid this emotional roller coaster around things that aren’t fully in my control, and instead focused on making progress on things that I CAN control, knowing that they’ll bring the results that I want in the long run.

Do these achievements feel EXCITING, “MEH” or TOO MUCH?

When I brainstormed my achievements, I came up with a lot of different things, from writing 1,000,000 words in a year, to going for a walk 5 times a week, to hosting 12 dinner parties in a year.

As my list grew to around 15 goals, I realized I quickly felt more and more pressure, rather than excitement when I looked at the list. That’s when I knew that I had to cut it down and make it leaner.

To do that, I simply looked at all of my achievements and asked myself:

    • Does this achievement feel really EXCITING?
    • Does it feel “MEH, KIND OF NICE”?
  • Does it feel like TOO MUCH?

For example, while I liked the idea of hosting 12 dinner parties in a year, it didn’t really excite me, it just felt like “meh”.

And when I thought about learning to cook 100 new dishes in a year, I just felt like it was way too much, and not really what I wanted to achieve this year.

I then eliminated all of the achievements that didn’t feel EXCITING and created a Lean List of 6 achievements that I stuck with.

How many achievements should you choose?

Should you choose 1 achievement? 3? 5? 10?

Should you focus on achievements in your business, health, or in personal life? Or all of them?

I don’t think there’s a “one size fits all” answer to this question.

Instead, I like to think about it this way:

    • You can look at the list, and if it feels EXCITING (and not like TOO MUCH or TOO LITTLE), you have a good length of the list
  • You can always add or remove items from the list later during one of the weekly reviews IF you begin to feel like it’s too much or too little

I personally chose 6 achievements because that felt just right to me after I trimmed down my list. I could have easily gone with 4 or 8 items and it probably wouldn’t make a huge difference, and I know I might add or remove something from the list down the line.

Why you should only spend 5 minutes on this task

I call this task the “5-minute clarity session” because if you take just a few minutes for this task, you:

    • Won’t get bogged down in it too much
    • You’ll usually come up with the ideas that are on top of mind
  • You’ll get 80% of great ideas in a fraction of the time

What about the other 20% that you’re “missing” with this approach?

Well, chances are that if you have another really good achievement in the back of your mind, it will come to you over the next few days / weeks.

Then, you can just add it to your Lean Review System (which will literally take 30 seconds).

How I did it:

Here’s how I went through my clarity session.

First, I brainstormed all the cool achievements I could achieve this year:

    • Write 1,000,000 words
    • Put in 1,000 hours of high quality work
    • Go on 5 walks every week
    • Go on 12 long hikes
    • Host 12 dinner parties
    • Publish 50 posts on my website
    • Save $100k
    • Go for 60 days without cheat meals
    • Have 10 collaborations with other bloggers
    • Read 100 books
  • Get 200 members in my writing membership

Then, I cut out all the things that didn’t feel as exciting, and was left with:

    • Write 1,000,000 words
    • Put in 1,000 hours of high quality work
    • Read 100 books
    • Go for 60 days without cheat meals
    • Save $100k
  • Get 200 members in my writing membership

Notice there’s no goals related to relationships, just one goal related to health, and no goals related to family, vacations, etc.

That doesn’t mean I won’t be working on those areas this year – it just means that some of these are going really well right now already, and I don’t have anything major I want to achieve (which might change throughout the year).

Instead of mindlessly filling up my list with 20 achievements just to cover every single area of my life (which can feel like too much and become a chore to keep up with), I’d rather have focus and do really well at the things I DO decide to achieve.

YOUR TURN:

Take 5 minutes and brainstorm all the cool achievements you could achieve this year.

Then, go through the list and trim it down to create a Lean List of achievements that feel really exciting for you.

STEP #2: Bronze, Silver and Gold Medals

If you read through my achievements above you might be thinking “You’re crazy! If you really write 1,000,000 words, read 100 books AND put in 1,000 hours of work, you won’t have a life!”.

You’re right. I probably won’t achieve all of those, and that’s totally OK.

A lot of us love this idea of setting “stretch goals”, “impossible goals”, or “insane goals”. It gets us really excited for the moment, and motivated for a few weeks.

But how often do we actually hit those impossible goals, and how often do we just forget about them and move on to something else when life gets in the way, even though we were actually doing really well?

For example, I could give myself an achievement to read 100 books in a year, which would mean reading roughly 8 books a month. If I only read 4 books in January, I might start feeling like this achievement is “too much”, “fall behind” and give up on the challenge.

But that’s nonsense. If I read 4 books, that’s great as I got a lot of new ideas for my business and I’m expanding my knowledge. Why would I feel crappy about it and not keep going?

To combat this issue, I developed the Medal System for my achievements.

Here’s how it works:

    • The Bronze Medal is an achievement that might slightly stretch my current capabilities, and will feel GOOD if I achieve it this year.
    • The Silver Medal will stretch my current abilities more, require more discipline and be more exciting, but won’t feel like I need to sacrifice everything to achieve it. I will feel GREAT if I achieve it this year.
  • The Gold Medal is the “impossible” achievement that might almost feel out of reach, but I know that it’s possible deep down if I put all of my focus, heart and work into it. It will feel INCREDIBLE if I achieve it this year.

Because it’ll be relatively easy to keep up with my Bronze Medal achievements, I know I’ll feel like I’m making good progress most of the weeks when I review how I’m doing, which will help me keep the momentum going.

But even if I’ll be doing well, I know that the competitor in me will want to push me harder and harder so I can reach the Silver Medal and Gold Medal benchmarks.

My goal isn’t to get 6 Gold Medals this year – but I know that even if I hit 1 or 2 (or just get a few Silver Medals), my year will be really amazing.

I love these challenges because they help me change my behavior and make slightly better decisions every day.

For example:

    • “Sticking with a diet” is less exciting to me than to keep a streak of no cheat meals going for just another few days so I can hit the next medal.
    • Instead of listening to music while driving to the gym, I can make a choice to listen to an audiobook and get closer to hitting my Silver and Gold Medal benchmarks that week.
  • Instead of watching Netflix over the weekend I can make a choice to get some writing done or read a book, to get closer to hitting my desired benchmarks.

If you love a challenge, you’ll love having these benchmarks in your life!

How I did it:

Here’s how I created my own Medals for different achievements (Bronze, Silver, Gold):

    • Savings: 20k, 50k, 100k
    • Words Written: 200k, 500k, 1m
    • High Impact Work Hours: 500, 750, 1000
    • Books Read: 20, 50, 100
    • Membership Members: 50, 100, 200
  • Days Without Cheat Meals: 14, 30, 60

YOUR TURN:

Take a few more minutes to create bronze, silver and gold medals for your achievements – and have fun with it!

STEP #3: The Lean Review Dashboard

I love spreadsheets.

I have spreadsheets for everything – from tracking my diet, writing, work hours, my content strategy, and more.

So when I went through my Lean Review process, I knew I wanted to have this one place where I could visually see how I’m progressing towards all of my goals in a matter of seconds (and see exactly where I want to do better).

That’s how I created The Lean Review Dashboard.

I created a dashboard where I can keep track of all of my achievements (and how close I am to reaching the Bronze, Silver and Gold Medals for the year):

Lean review spreadsheet example

I created a way to track my progress on a weekly basis for 52 weeks of 2019:

Lean review tracking progress

And I even created weekly benchmarks for each of the medals, so you can see if you’re on track to hit them this year:

Lean Review Bronze Example

90% of this dashboard works fully automatically.

All you need to do is:

    • Input your achievements
    • Define Bronze, Silver and Gold medals
  • Spend 2 minutes every week updating your scores

…and that’s it!

All the other numbers like weekly benchmarks for different medals and your progress towards those benchmarks will get calculated automatically.

Setting up this dashboard literally takes 2 minutes, as you already have all the data for it from the previous steps.

You can download the Lean Review Dashboard through the box below free of charge (it’s on me – consider it a gift to make 2019 really amazing!), and I’ll also send you a quick instructional video with it to show you exactly how to use it.

Download The Lean Review Dashboard

Download my free Lean Review Dashboard to set up your own Lean Review System in under 20 minutes!

Success! Check your inbox for the email entitled with "Download your FREE Ultimate Guide Checklist" to download your free guide. If you can't see the email, make sure you check your spam folder and promotions tab (gmail users).

There was an error submitting your subscription. Please try again.

Powered by Kit

YOUR TURN:

Download The Lean Review Dashboard through the link above, watch the instructional video and set it up to fit your achievements (this will take less than 2 minutes).

STEP #4: The 2-Minute Weekly Review

Have you ever tried doing a weekly review?

You know, one of those reviews where you sit down for 30 minutes every week, go over every goal you set, analyze what went, well, what didn’t go well, and make a plan for the future?

I know I tried keeping up with a weekly review habit multiple times in the past, but it always became a chore after a few weeks.

If I did the review at the end of the week, I felt tired and just wanted to finish working for the week.

If I did it at the beginning of the week, I felt like I was wasting time when I really wanted to be working.

Then, I felt guilty for not doing the weekly review, and in the end having one hurt me more than it helped me.

That’s why I stopped doing a weekly review in a traditional form.

I still have a few review elements in my support accountability systems (like checking in with my nutritionist 2x/week or working with a thinking coach 1x/week) that automatically happen every week, but I’m not using a review where I sit down and reflect on my life every week.

Instead, I decided to design a weekly review that’s easy, fun, and takes under 2 minutes every week.

All I’ll do every week is enter 6 numbers in The Lean Review Dashboard to see how I’m doing with my achievements:

Lean review tracking progress

Then I’ll compare those numbers to the Bronze, Silver and Gold Medals to see how I’m doing:

Lean Review Bronze Example

For example, I’ll update how much money I have in my savings account each week, I’ll calculate the number of words written so far, how many hours I worked this past week, etc. and add these numbers to the dashboard.

Then I’ll check if I’m on track to hit Bronze, Silver or Gold benchmarks this year.

And that’s it!

I won’t answer 10 different questions around each of my achievements thinking about how to do better at 10 different things.

Instead, if there’s an achievement where I really feel like I want to do better, I’ll use or revisit my support & accountability systems to do better next week – but that won’t include 30 minutes of journaling.

This might not feel thorough enough to you, but I do believe that it serves the 80/20 rule really well.

Of course, if I’ll feel like “crap, I didn’t get any writing done this week”, I’ll AUTOMATICALLY think about what I can do better next week and make some changes. It will just happen – it won’t be a chore that I have to do every week.

So I’ll work on “correcting course” when I want to, but won’t feel obliged to do so every single week, especially if things are going well.

How I remember to actually do the review every week

Right now that I’ve started using this system, using it is easy as it’s on top of my mind. However, I know that using it 3 months from now, or when life gets in the way might not be as easy, and there might be times when I forget to use it.

To prevent that from happening, I set up a simple calendar reminder that reminds me to update my dashboard every Friday. This isn’t a fixed appointment and I can move it to a Saturday or Sunday (which I likely often will), but I just want it to be there so I don’t forget to do my 2-minute review.

I also created three shortcuts that help me access the weekly review easily every week:

    • I set The Lean Review Dashboard as my homepage in my browser
    • I bookmarked The Lean Review Dashboard in my bookmarks bar
  • I linked The Lean Review Dashboard in my google calendar event description

This way I can access the dashboard at any time with a single click and make it super easy for me to do my weekly review.

Some people also prefer to use the Google Calendar reminder rather than a Google Calendar event to create reminders like this.

The differences are that:

    • A Google Calendar Event can have a description (so you can link to your LRD from it), but can be easy to forget if you “miss it”.
  • A Google Calendar Reminder doesn’t have a description box, but doesn’t disappear until you mark it as done (it moves to the next day automatically), so it’s harder to miss.

Either can work well – I suggest just picking one and going with it (you can always change it in the future).

YOUR TURN:

You can set up your own weekly review system by:

    • Creating a calendar reminder or event every Friday, Saturday or Sunday for your 2-minute review
    • Linking the LRD (Lean Review Dashboard) in the calendar event description
    • Bookmarking the LRD in your browser
    • Setting LRD as a homepage in your browser
  • Simply doing the 2-minute review every week

STEP #5: Create Your Support & Accountability Systems

If you followed all the steps above, you’ve successfully completed The Lean Review and have a bulletproof system and bullet journal layout ideas set up so that you can keep up with your achievements throughout 2019.

Even without going through this last step, you can already get started with tracking your progress towards achievements and have an amazing 2019.

Nice work!

Now, let’s talk about one last step.

This final step of The Lean Review will make it easier for you to actually hit your Bronze, Silver, and Gold Medal benchmarks and help you “correct course” along the way.

This isn’t a step that you have to go through once though – it’s an ongoing process that you can iterate through and evolve over time (though you can get started with it today if you want to).

It’s not something you HAVE to do, it’s something you’ll AUTOMATICALLY do when you’ll want to make better progress towards your benchmarks.

As you create your achievements and bench for the year, you’ll want to ask yourself questions like:

    • “How can I make it EASIER for me to reach my benchmarks?”
    • “How can I go from a Bronze Medal to a Silver Medal next week?”
  • “Where and how can I do better than I’m doing right now?”

And from my experience, the easiest way to actually ask yourself those questions on a regular basis (and improve your progress towards your achievements) is to create some sort of a support & accountability system for each of your benchmarks.

For example, when I first started going to the gym, it was extremely tough for me to work out regularly.

Then I hired a personal trainer and all of a sudden, I went to the gym 3-4/week consistently for a YEAR.

That’s because even when the times were tough, my trainer was still there waiting for me, but also supporting me and encouraging me to keep going when I was swamped with work, felt tired or just didn’t feel like working out.

Or, in order to stick with my diet better, I hired a nutritionist that I have to send updates to 2x/week so that he can help me modify my diet as needed (and keep me on track with it).

To create your own support & accountability system, you don’t necessarily have to hire experts to keep you accountable (though I highly encourage you to do it if you CAN afford it).

You can:

    • Find a gym buddy to hit the gym together
    • Join a book club to read more books
    • Create a writing tracker where you track your writing
    • Join a cooking class to cook more
  • Track all of your work in a spreadsheet so you can improve your work routines and accomplish more

Even just having the 2-minute review for your achievements already counts as having a basic self-accountability system for all of your achievements and will help you do better than by not having any system at all.

On a more general level, there are a lot of different levels of support and accountability that you can think about:

    • Hiring an expert or a coach to help you and keep you accountable 1on1
    • Joining a group coaching / training program
    • Joining a community or a club
    • Joining an online membership
    • Taking an online course
    • Getting an app
    • Taking a class
    • Finding a mastermind group or accountability buddy
  • Creating a tracking system that keeps you accountable

Some of these are more expensive, others are more accessible. Some involve more active, others more passive accountability. Some keep you accountable to yourself, others to others.

If the achievements you’re working on are really important to you, I recommend setting up the best support & accountability systems you can afford for each of them, then iterating through them until they work well for you.

For example, you could always just try tracking your diet in a spreadsheet to see if that helps you make good progress with it. If that’s not enough, you could consider finding a diet buddy or hiring a nutritionist, until you find something that works really well for you.

You don’t have to set up all of these systems right away, but you can try to create more and more systems for yourself throughout the year, with the goal of eventually having a bulletproof system for each of the achievements you want to achieve.

Some of these systems might be more hands-on and more expensive (like hiring a 1on1 coach), while others might be a lot simpler (like having a spreadsheet where you track your work every week).

It’s important to note that not all of these systems will work for you, so I recommend just trying them up, then tweaking / replacing them after a few weeks if they don’t end up working as well as you wanted them to.

You can set up these systems when you feel like you’re plateauing and not progressing as well as you want to, when you feel like you fall off track too often, or simply when you have some extra money to invest in yourself.

How I did it:

Here are the support & accountability systems I’m currently using to make progress on my achievements:

    • Savings: I have frequent conversations with my girlfriend about money and how my savings are going
    • Cheat meals: I have a nutritionist that keeps me on track + I track my cheat meals (and how many days I haven’t had one) in a spreadsheet
    • Writing: I track all of my writing in a spreadsheet + have weekly conversations about writing with my thinking coach
    • Working hours: I track my work hours in a spreadsheet + have weekly conversations about work with my thinking coach
    • Membership members: I update my Lean Dashboard whenever a new member joins the program
  • Books: I don’t have a system here yet, but will likely create a spreadsheet to track my reading that worked well for me in the past (or potentially join a book club)

I know that these systems aren’t perfect, and in an ideal world I would definitely have more support accountability, especially with reading books, my membership, my work hours and writing – but it’s a solid start and I’ll see where it gets me.

Then, throughout the year I can change my systems or invest more time or money in better systems if I feel like I’m plateauing or not making as much progress as I want to.

YOUR TURN:

Here come the final action steps. You can go through these now, or simply keep them on top of mind as you do your weekly reviews and notice that you’re not hitting your benchmarks.

For each of your benchmarks:

    • Write down your CURRENT support & accountability systems
    • Think about how you can create a better system TODAY
  • Think about what the IDEAL system would look like

And then create, change and improve your systems throughout the year as needed.

Conclusion

That’s it!

To fully implement everything you learned from this post:

    • Create your Lean List of achievements for 2019
    • Create Bronze, Silver and Gold benchmarks for each of them
    • Download The Lean Review Dashboard through the box below
    • Set up The 2-Minute Review in your calendar
    • Create shortcuts to your Lean Review Dashboard
  • Create and improve Support & Accountability Systems throughout the year

And except from the last step, you should be able to do all of this in under 20 minutes.

I hope you’ll find this system as helpful as I’m finding it – and if you do end up using it, let me know how it helped you!

What about you? What kind of a review system are you using for 2019?

How we Debunked The 3 Biggest Writing Myths

By Primoz Bozic Leave a Comment

Writing myths
In my last post, I took you behind the scenes of my 3-month writing experiment called Write More Every Day BETA where I worked closely together with 18 of my readers to help them write more.

Throughout the program, we analyzed over 2,000 writing sessions and exchanged over 418 e-mails to get to the bottom of what really helps entrepreneurs and copywriters write more.

Today, I’ll share with you the 3 biggest writing myths that we debunked during this program (as well as the data behind them) that will change the way you think about writing, and help you get started with writing more.

Let’s dive in!

Myth #1: “I don’t have the time to write”

Whether it’s client work, a 9-5 job, or simply wanting to spend more time with the family, there always seems to be something that pushes the writing to the bottom of the to-do list.

This means that we often have a never-ending list of ideas that we want to write about, but just can’t seem to find the time in our calendars to actually write.

To get over this obstacle, I gave my students from Write More Every Day BETA a simple challenge:

“Just for one week, focus on finding opportunities to write more, rather than reasons not to write”.

What happened during that week was fascinating.

My students started finding new ways to get writing done, some of them which I didn’t even anticipate.

Here are just some of the examples:

  • During the commute to work
  • During a kid’s swim class
  • Waking up 30 minutes earlier to write before work
  • While the kids are playing at a playground
  • When the spouse is watching TV
  • When waiting for the spouse to wake up
  • During a fresh block of time after a cancelled coaching call
  • During a long layover at the airport
  • …

It wasn’t just the opportunities to write that were creative – the ways in which my students wrote were interesting as well.

Some of them just took their laptop everywhere. Others decided to write on their phones (and even bought bluetooth keyboards that fit in your pocket), while others recorded voice notes that they then got transcribed and converted into blog posts.

We did more than that in our program to carve out more time to write and keep it , but this simple mindset shift of moving from reasons not to write to finding opportunities to write was a game changer for writing more, especially during the times when time was limited.

ACTION STEP:

For just one week, focus on finding creative opportunities to write more, rather than giving in to reasons not to write. You can use the list above as inspiration, but don’t be afraid to test your own ideas as well. See what happens!

Myth #2: “I can only write when I feel like it”

It’s easy to write when you’re full of energy and inspiration, and have a clear idea of what you’ll write in your head.

But what about when you don’t feel like it?

  • What about when you’re tired?
  • What about when you have a bad day?
  • What about when you don’t feel inspired to write?

In those cases, just sitting down to write can feel like pulling teeth.

Now here’s the problem.

If you ONLY write when you feel like it (in the perfect conditions, when all the stars align), you’re likely to have times when you write A LOT in seemingly no time, followed by dry-spells of no writing that can take days, weeks or even months.

And in the long run, you know that those dry spells will hurt you.

Ideas what to write about will keep piling up in your head, but they won’t be going out into the world, and they won’t be growing your business.

Then, a few months, you’ll look back at how much you’ve written and feel sick in your stomach, knowing that you could have written more.

Writing just when you feel like it or when inspiration strikes is not the best solution if you want to write consistently.

Because even if you do everything “by the book”, from getting enough sleep to eating well to having a distraction-free writing environment, there will STILL be times when you have a bad day, and won’t feel like writing.

To help my students get better at writing when they don’t feel like it, I encouraged them to adopt a professional attitude for a week.

Think of a professional basketball player who plays in the NBA.

They need to show up for practice every day, regardless of how they feel. If they have a headache, they still need to practice. If they have a bad day, they still need to practice. If they have to do a lot of media interviews, they still need to practice. If they’re tired from playing 3 matches in 3 days, they still need to practice.

They can’t just rely on practicing when they “feel like it”, as that probably wouldn’t make them very good basketball players.

Instead, they show up day after day and give it their all, regardless of how they feel.

And on better days when they’re full of energy, their all might be more than on days when they feel like they were hit by a bus. But those days that aren’t great when they keep pushing and moving forward ultimately help them become as good as they are.

If writing is a core part of our business, why would we treat our writing practice any differently than sportsmen treat their practice?

My thinking is that we shouldn’t. We want to show up every day and give it our all, whether our all on that day means writing a kick-ass blog post or a sales page, or writing some crappy copy for an hour that will never get published.

Here’s the good news (that almost nobody talks about).

As I paid attention to my own writing habits and analyzed over 2,000 writing sessions from my students, I realized an interesting phenomenon.

When we tracked out writing sessions, we always tracked 2 different metrics:

  • How energized we feel (measured before writing)
  • How focused we feel (measured after writing as we reflect on our writing session)

I expected these metrics to line up (for example, if I feel like my energy is 3/5, my focus should also be 3/5), but I couldn’t be more wrong.

By looking through the data carefully, I realized that:

  • If you are SUPER tired (energy 1-2), your sessions will indeed be shorter and less focused (though there ARE a handful of sessions when you’ll get in the zone and become super focused)
  • If you are TIRED (energy 3), you’ll have A LOT of very focused sessions once you just sit down and start writing, where your focus will be between a 4 and a 5.
  • If you are FULL OF ENERGY (energy 4-5), you’ll have a lot of very focused sessions, but also a handful sessions where you can’t focus for long because your mind keeps racing to other things.

We’ve seen a similar pattern across most of our students in Write More Every Day BETA.

This helps us come to a few conclusions:

  • If you’re SUPER TIRED (jetlagged, running on 2 hours of sleep, or after a 12-hour work day), it is indeed harder to get in the zone than if you’re less tired.
  • If you’re TIRED, just sitting down to write is harder than if you’re full of energy, and you’ll often get in the zone and forget that you’re tired ONCE you actually start writing.
  • If you’re FULL OF ENERGY, it is indeed the easiest to get started with writing, but you might have some sessions where the excess energy will keep your mind racing and distract you from writing for hours on end.

The biggest insight for me here is the #2 (that we can actually get writing done when we’re tired).

In fact, for 80% of my writing sessions, the energy levels are between 3 and 4, with my focus being between a 4 and a 5.

This tells us that “I don’t feel like writing” is really more of an excuse not to write than a real reason not to get started. What we’re really just saying is “I don’t feel like sitting down to write”.

That’s when we can use the professional attitude to sit down to write anyway, even if it’s just for 10 minutes – just to see what happens. Then, once we get started, the we’ll often forget that we’re tired, get in the zone, and let the words flow.

ACTION STEP:

I could tell you all about the data I collected, but what will REALLY help you see that you can write when you’re tired is experiencing it yourself.

Next time you feel “too tired to write”:

  • Write down your energy level before you start writing
  • Use the “professional attitude” to write for just 10 minutes
  • If you get in the zone, keep writing even after the 10 minutes
  • At the end, write down your focus during the session

If you go through this exercise a few times, you’ll soon see patterns emerging, and you’ll internalize that you CAN indeed have great writing sessions even when you don’t feel like writing.

Myth #3: “I’m a slow writer”

When I surveyed my readers in the survey I did about writing, I asked them what kind of a writer they best identify themselves as:

What’s interesting is that over 30% of the people who filled out the survey (maybe even more if you count the ones that said that they “can’t get themselves to write at all”) identified themselves as “slow writers”.

In Write More Every Day BETA, I decided to put that hypothesis to the test and see if people actually ARE slow writers, and more importantly, if we can learn how to write FASTER.

I’ve always considered myself a “fast writer”, but I didn’t think that was something I was born with.

  • I remember spending hours and hours on a computer in primary school playing a touch typing game that taught me how to type faster, which I knew helped my typing speed (which in turn helped my writing speed).
  • I remember that writing a 25,000-word Ultimate Guide took me 6 months the first time I did it, something I was able to replicate in less than 2 weeks the last time I wrote an Ultimate Guide.
  • I remember doing an experiment where I just wrote without editing and wrote 2,000 words per hour, while combining writing with editing lead to a measly 500 words per hour, or 4x slower writing.

That’s why I wanted to see if there are ways to help my readers write faster as well, and get to the bottom of what’s slowing down their writing.

In one of the earlier weeks in the program, I introduced the concept of “bottlenecks”.

My theory was that nobody is truly a “slow writer”, but that we all have some sort of a limiting factor that is the “bottleneck” that slows down our writing.

I decided to put that theory to the test by sharing 6 different types of “bottlenecks” with my students, and giving them tools to help them remove them.

I let them use these tools for a month, then looked back at the stats to compare how their writing speed changed over the course of a month (I compared their average writing speeds in September with their average writing speeds in October).

The results were fascinating:

  • Within a month, 73% of my students increased their writing speed
  • On average, the students wrote 28% faster
  • Some students increased their writing speeds by as much as 46-83%

This means that if my students spent 10 hours per week on writing, they could now write the same amount of content in less than 8 hours a week, saving 2 hours a week for more writing, other tasks in their business or simply to have more free time.

But that’s not where the story ends. The actual writing was just one of the bottlenecks of the writing process.

Throughout the program, we identified that two HUGE bottlenecks were:

  • Spending too much time in the editing phase
  • Combining the idea generation, research, outlining, writing, and editing into one process, rather than separating these processes into different tasks

By removing these bottlenecks, we were able to drastically cut down the time it took to go from an idea to a published blog post (many students reported speeding up their editing process by 30% or more, sometimes saving themselves WEEKS of editing time).

At the end of the program, I concluded that:

  • It IS possible to learn how to write faster, and it doesn’t require months of rigorous touch typing practice
  • Most people aren’t actually “slow writers”, they are slow editors or try to combine the writing process with editing, which drastically slows them down

The bottom line is that there’s really no such thing as being a “slow writer”, it’s more that we all have certain bottlenecks that slow down our writing. If we remove them, we can all learn how to write faster – and it’s easier than you think.

ACTION STEP:

If you consider yourself a “slow writer”, pay attention to which parts of your writing process feel exceptionally slow:

  • Is it just getting started with writing? If yes, could you create an outline of the article you want to write to speed it up?
  • Is it the actual writing? If yes, why? Is it that you’re a slow typer (can you learn how to type faster?) That you get lost and don’t know what to write next (can you create a more detailed outline)?
  • Is it the editing? If yes, how could you edit faster? Are there parts of your editing process that are very time consuming, boring or draining but don’t help you make your content 10x better? Could you trim down your editing process?

Start paying attention to which part of your writing process is the slowest, and start working on it – and you’ll find yourself writing faster and saving hours and hours each week.

Conclusion

Throughout my writing experiment in Write More Every Dat BETA, I’ve put many writing myths to the test in order to get to the bottom of what REALLY helps us write more, better and faster.

I learned that the “conventional wisdom” when it comes to writing is not necessarily true, and that there are a lot of things out there that many people never talk about (like that you’ll be tired most of the time when you write, but that won’t prevent you from being focused while writing).

Most importantly, I learned that it is possible to become a better writer in every single aspect of writing.

You can learn how to write better content. You can learn how to write faster. You can become more consistent with writing, even when you don’t feel like writing or don’t have the time to write.

I’m really excited about these findings because I feel like nobody really talks deeply about writing in the online business space and runs such detailed experiments, and I feel like I can really help you improve your writing game and put more of your ideas into the world.

What about you? Which writing myths have you discovered?


Behind The Scenes of my 3-Month Writing Experiment (2,000+ Data Points)

By Primoz Bozic Leave a Comment

I was always curious about writing:

  • How can we sit down to write consistently every day (even when we don’t feel like it or don’t have the time to write)?
  • Is it possible to learn how to write, edit and publish content faster, and if yes, how?
  • Do we have to be “born writers” to create great content or can we actually learn how to write better without decades of practice?

To find the answers to these questions, I ran a lot of writing experiments over the past few years:

  • I’ve written everything from 500-word blog post to 26,000-word e-books to see what it’s like to write different types of content
  • I wanted to see how much I was capable of writing and challenged myself to write 100,000+ words in a month, which I successfully accomplished (that’s the length of an average novel, or a 200-page Google Document)
  • I’ve gone through tens of books and courses on writing from famous authors like Stephen King, Malcolm Gladwell and others, as well as established copywriters

And over time, I felt like I had a pretty good grasp on my writing.

I began to understand what helps me write more, and which obstacles are the most likely to prevent me from writing.

I figured out when I can write fast, and when I’m destined to write slow (and how to work around it).

I also learned how to silence my “inner critic” that often made me feel anxious about writing and learned how to write regardless of the thoughts in my head telling me “my writing isn’t good enough”.

As I did that, writing all of a sudden became this fun and enjoyable way to share ideas again, rather than the thing I “had to do” that created a lot of pressure in my head.

I loved that because writing was my favorite way to share my ideas with the world and help thousands of people with my knowledge, and I would have hated for anything to come in-between that.

The unexpected results of my online course about Ultimate Guides

Then, as I created an online course on writing 20,000+ word Ultimate Guides, I faced another challenge: I had to help my students write content that’s 10-20x longer than anything they’ve ever written before.

To my surprise, this went way better than expected.

Sure, the writing itself wasn’t easy, but with the right amount of support, training and accountability, the majority of my students managed to successfully write and publish their ultra-long guides within a few weeks or months.

I also noticed how every single person that went through the program ended up becoming a much better writer at the end of the program, which I didn’t expect at all.

But when I dug into it, it all started to make sense. In the program, we talked about a lot of different aspects of writing (from finding ideas what to write about to outlining to editing).

This means that they got to practice all of these concepts on a much larger scale than they did before (as writing an Ultimate Guide is the equivalent to writing 10 really good blog posts over a 1-month period), and they got better with practice.

I also made it a point to review all of their guides and give them feedback on them to make them better, which was another big factor in helping them become better writers.

“Now what?”

But after we finished the program, I noticed an interesting phenomenon.

I realized that a lot of my students were left wondering “now what?”, and after publishing a huge piece of content, they lost the momentum to keep writing.

I could see how they attempted to write a few blog posts, but then many of them fell back into their old writing habits and stopped writing regularly.

That didn’t feel right to me because I wanted them to use their guides as a spring board to continue growing their business, not as a major project they accomplish, but don’t know how to move on from.

That’s when I decided to get to the bottom of this issue.

I would figure out a way to help entrepreneurs write more, no matter what.

So I buckled down and did more research.

It all started with a survey…

I sent out a quick survey on writing to my readers about their experiences and challenges around writing:

The 81 survey responses absolutely blew me away.

The first interesting data point came from the question “How important is writing in your business right now on a scale of 1-100?”

The average response? 77/100.

This response was supported by comments like:

That’s when I immediately knew something was there.

There was a BIG problem a lot of entrepreneurs faced around writing, and based on the research I did, nobody was solving it for them.

There are plenty of online courses on copywriting, BUT…

Sure, there are plenty of online courses on copywriting, and many of them are really good. But I couldn’t really find anything that would help entrepreneurs and copywriters write more, at least not in the shape I wanted it to be.

As I dug deeper into the responses of my readers, I’ve found many specific challenges they had about writing like:

  • I know how to write consistently, but I’m a really slow writer
  • The hardest thing for me is to sit down to write
  • I don’t know how to balance writing with client work
  • I have times where I can write thousands of words, but then I have months of “dry spells” when I don’t write at all
  • I feel like I’m sitting on a graveyard of unfinished blog post ideas
  • … (and a lot more)

I’ve found many of these responses fascinating and I wanted to understand what my readers were going through on a daily basis so I could begin to help them.

I invited the people who filled out a survey to a 1on1 call with me and performed 15 customer research calls which helped me get even clearer on the challenges many of us face when we write.

That’s when I felt like I had enough information to start sharing and testing my ideas with a small group of writers, and I silently launched a BETA program where I would help 18 of my students write more than they’ve ever written over the course of 3 months.

I called it “Write More Every Day BETA”.

Behind The Scenes of Write More Every Day BETA

As I created WMED BETA, I first had to decide how long the program would be.

Should the program be 4 weeks long? 6 weeks? 8 weeks?

I didn’t have a clear right answer right off the bat, so I thought about the RESULTS I wanted to help my students achieve with the program.

One of the things I wanted to test with this program was CONSISTENCY.

I knew from past experiences that it’s possible to write a lot over the course of a month, especially if you’re working on a very exciting project, but that doesn’t mean you’ll KEEP writing after the first month of writing.

I wanted to create a bulletproof system for writing that works beyond the first month, and thought that a good length to test consistency would be a period of 3 months.

Over the course of 3 months, you can’t just rely on writing one big project, and things are bound to go wrong. You might travel, get sick, or have life come in-between in one way or another.

Stretching the program over 3 months would make the perfect stress test environment which would help us identify the biggest roadblocks and obstacles that throw us “off track” and develop and test solutions to work through them.

The evolution of the course curriculum

I initially planned to teach 6 lessons on different parts of writing and have 6 Q & A calls in the second half of the program, but allowed myself to be flexible with my plan.

As we started working through the program and I kept asking my students what else they needed help with, as well as paid attention to the challenges they still e-mailed me about, I began to expand the curriculum into a 10-week curriculum.

In the end, we covered everything from how to create a writing habit, decide WHAT to write, come up with ideas what to write, research, outlining and editing, writing faster, writing when life gets in the way and even the mental game of writing.

Then, we wrapped up the program with 2 exciting “hot seat sessions” where we helped each other with any outstanding challenges we had around writing.

We delivered all the lessons in the program live, and I was surprised by how many people kept showing up to the calls week after week (we even had 3 students join the calls in the middle of the night!).

Then, through the weekly tracking and accountability e-mails, I could see what’s actually working and what isn’t, and make notes to further improve the program in the future.

We collected 2,000+ data points on writing

One of the coolest things we did in the program was that we used a dedicated “writing tracker” to track ALL the writing we did in the program.

This meant that more or less every single writing session was documented and could be analyzed so we could collect real data on what’s working and what isn’t.

We tracked things like:

  • How long the sessions were
  • How many words were in a session
  • When the sessions took place
  • The speed of writing (in words per hour)
  • The energy levels before writing
  • Focus during writing
  • …and more

This helped us see patterns and insights on individual basis (and group basis) that we wouldn’t see otherwise.

A nerdy spreadsheet with daily writing data, words per hour (month by month), and more…

We could see things like:

  • WHEN are the best times to write (and how these times are different for different people)
  • How energy levels impact our focus and how fast / how long we can write
  • Which specific habits, activities or tricks help us write more
  • What makes us write slow (or fast)
  • What makes it more difficult for us to have longer writing sessions
  • …and so much more

Altogether, we’ve collected data from roughly 2,000-3,000 writing sessions from our students that we can use to come to better conclusions in terms of what REALLY helps us write more.

A lot of the things that we learned were really counterintuitive and surprising, and I’ll be sharing some of those in my next e-mail, so stay tuned!

We exchanged (and analysed) 481 e-mails with our students

During this program, I experimented with a new accountability system that I hoped would help my students write really consistently, and identify any obstacles that came their way.

I got the idea from my nutritionist, who I pay hundreds of dollars each month to keep me on track with my diet. I e-mail my nutritionist 2x/week with my bodyweight, and tell him what’s working and what’s not working. Then, he helps me out with any obstacles in my way and adjusts my diet when necessary.

As this kind of accountability worked extremely well for me, I wanted to see how it worked for my students as well.

That’s why I asked my students to send me weekly updates on how much they’ve written and any things that worked well / didn’t work well last week.

Looking back, this was one of the best things that we could have done in this program.

Not only did a lot of the students absolutely LOVE the accountability, I could also see all of their obstacles they were running into on a weekly basis, and see patterns among them.

I could see exactly which techniques and strategies from our weekly calls worked, and what didn’t work – so I could improve them in the future. I would also often get completely new ideas for solutions from my students that I wouldn’t think of myself.

Throughout the 12 weeks, I exchanged exactly 481 e-mails with my students, which would serve as additional data points for helping us improve the program in the future.

We kept talking to our students throughout the program

Even though the program was working really well, I wanted to continue digging deeper and deeper into the topics we talked about.

I wasn’t satisfied with good results, I wanted to find ALL the possible obstacles my students were running into, no matter how minor, as I knew that even small details (like going to a coffee shop during lunch hour when a lot of people are loud and rowdy) could often get in the way of efficient writing.

Even though the research kept piling up every week, I wanted to get to the bottom of cracking the writing game.

That’s why I continued to talk to my students regularly.

I encouraged them to ask me any questions they had in the WhatsApp group we had set up for the program, I sent out 2 detailed feedback surveys throughout the program, and I performed 45-minute customer research calls with 15 students at the end of the program.

Slowly but surely, I could see more and more patterns emerge, and I could feel like I had a deeper and deeper understanding of what it really takes to write great content consistently and efficiently.

We created a 53-page Google Document with all the insights from the program

We collected A LOT of data points throughout the program.

From tracking the 2,000+ writing sessions, to exchanging 481 e-mails, to answering hundreds of questions on the live coaching calls and in the WhatsApp group, we collected a mountain of data on writing that I haven’t seen anywhere else before.

We organized all of this data into a 53-page Google Document that we keep adding to as we review all the customer research interviews and coaching call recordings from the program.

This is helping us find the “sticking points” in the program and find ALL the questions that our students ever have about writing (and make sure we answer these questions in a way that helps them get over their sticking points).

Why all of this hard work is worth it

This is a lot of data, and it can feel overwhelming to work through it sometimes. My assistant and I have spent tens of hours putting together this document, organizing it and analyzing the data.

But each day it feels like we’re getting a more and more complete view of the puzzle of what really helps people write more (and what doesn’t).

At the end of the day, we know that doing the hard work is worth it, as it will help us create an even better iteration of the program in the future (which we’re already working on, and I’ll let you know about soon!).

It’s also worth it because we keep running into new, surprising insights that feel like finding hidden gems, and help us completely change the way we think about writing.

And then, we can share these ideas with the world, and change the way we ALL think about writing.

Speaking of insights, I’ll be sharing some of my favorite unexpected insights I learned about writing from this program in my next blog post, and I know they’ll surprise you as much as they surprised me.

To make sure you get these, leave your name and e-mail in the box below (and get my free e-book that will help you write some of the best content online).

I’ll see you in the next post!

-Primoz

10 Quick & Easy Ways to Get More Blog Readers You’re Probably Not Using Right Now

By Primoz Bozic 12 Comments

You know you want to drive more traffic to your blog.

You’ve spent hours and hours writing blog posts for your readers. But after the initial bump in traffic, even your best blog posts slowly get forgotten. They get buried on the 5th page of your blog section where only the most dedicated readers find them.

Wouldn’t it be awesome if these blog posts that you spent hours and hours writing…

Actually got the attention they deserved?

The good news is: They can!

In fact, there are 10 quick and easy ways in which you can drive more traffic to your best blog posts in a matter of minutes…

…and you only have to set them up once.

I’ll be sharing these 10 ways with you in the post below.

They’ll help you get more traffic to your blog, improve the SEO ranking of your website, and turn more first-time readers into loyal fans.

I’ll also show you, step-by-step, how to take advantage of them TODAY.

Let’s dig in!

Before we start: Create a list of your 5 best blog posts

There are two ways to think about what your “best blog posts” are.

First, you can think about your most popular blog posts.

These are the blog posts that already get the most traffic on your website.

You’ll want to use every opportunity you can get to get more people to read, like and share them.

You can find those by installing the Jetpack or a Google Analytics plug-in on your website. Either is fine.

TECH TIP: If you need help with installing WordPress plug-ins like these, you can read this quick tutorial on how to do that.

Once you have your analytics plug-in installed, you can look at the website stats to find the most popular blog posts on your website.

Second, you can think about blog posts that “should” be popular, but aren’t.

These are the blog posts that you’ve spent hours and hours writing, but way too few people find them or read them.

You know which blog posts these are.

They’re the ones that make you feel physical pain when you think about them and think “these are so good, more people should really read them!”.

You’ll want to find ways to put these blog posts in front of more people, so they can get access to some of your best advice.

Before we get started, I recommend you to create a list of 5 best blog posts that you want to drive more traffic to.

You’ll be able to plug these into the strategies below right away.

Traffic Opportunity #1: Website Sidebar

Your website sidebar is one of the most visible places on your website. Every reader that reads a blog post from you will see it.

It’s also the perfect place to include your best blog posts and drive more traffic to them.

So if you’re not using your sidebar to drive more traffic to your best blog posts, you should be!

Sidebar Example: Peter Nguyen, The Essential Man

Here’s an example from one of my friends, Peter from The Essential Man:

Peter's popular posts section on The Essential Man

Peter uses his sidebar to link to his most popular posts and Ultimate Guides, which helped him double his website traffic.

You can do the same by linking to your best blog posts in your sidebar.

How to customize your sidebar

If you’re using WordPress, you can use a plug-in like WordPress Popular Posts to link to your blog posts in your sidebar.

Then, you can either use the “popular posts” feature to automatically display the top blog posts on your website…

…Or you can link to a custom list of posts, so you can give your under-appreciated content some love too.

You can use the WordPress Text Widget to link to custom posts.

Traffic Opportunity #2: Navigational Menu

Another highly visible place on your website is your navigational menu.

That’s the menu that’s on top of your website, with your blog page, about page, etc.:

Navigational menu of my website

The navigational menu is one of the first places that your readers will check out, and another great place to link to your best blog posts.

You can add a “Free Guides” section there, a HUB page (explained below), a free resources section and more.

Navigational Menu Example: Derek Halpern, Social Triggers

Derek Halpern from Social Triggers does a great job at linking to his best blog posts through his navigational menu:

Derek halpern's navigational menu

You’ll notice that he links to his HUB pages that include links to the best blog posts on his website:

Derek Halpern's HUB page

How to customize your navigational menu

Customizing your navigational menu is super easy.

Once you log into WordPress and visit any page on your website, you’ll see this “customize” button on the top of your screen:

Wordpress customizer button

You can click that button to enter the WordPress Customizer. From there, you can click on Menus:

Wordpress customizer menu section

And you can just click on the “add items” to add new links, pages, and more.

Wordpress customizer menu example

Using the WordPress customizer is very intuitive and you can drag and drop, reorganize and rename your menu items very easily.

Traffic Opportunity #3: HUB Pages

You can think of HUB pages as a central train station that links to all other stations, except that the HUB pages link to your blog posts:

Hub page

Once you create tens (or hundreds) of blog posts on your website, HUB pages can be a great way to continue bringing more readers to your best ones.

As you start talking about more than one topic on your website, you can create multiple HUB pages for each of the topics you talk about, as you’ll see in the examples below.

HUB Pages Example: Ramit Sethi, I Will Teach You to Be Rich

Ramit Sethi from I Will Teach You to Be Rich has been using HUB pages like this one for years to drive more traffic to his popular blog posts:

Hub Page from Ramit Sethi

He links to his HUB pages from a menu that pops up his blog:

Navigational menu from Ramit Sethi

And has different HUB pages for personal finance advice, career advice and more.

How to create your own HUB page

Creating a HUB page is fairly easy as well.

All you need to do is create a new page on your website.

Then, on your page, provide some context on why your readers are here:

Hub page introductory copy

And link to your best blog posts:

Hub page links

NOTE: Your HUB page doesn’t need to have fancy design, especially if you’re just starting out. You can create a simple page without any widgets like I did recently for my blog posts around growing your online audience.

Traffic Opportunity #4: Homepage

What’s always going to be one of the most read pages on your website?

Your homepage.

Your homepage is the first page many of your new readers will visit.

It’s also a great opportunity for showing your new readers your best blog posts and turning them into loyal fans.

Homepage Example: Jill & Josh Stanton, Screw The Nine to Five

I love the homepage from Jill & Josh Stanton from Screw The Nine to Five.

They link to their latest guides right then and there:

Screw the nine to five website popular posts

This way, their new readers can check out some of the best content right away.

How to customize your homepage

This depends on the website theme you’re using.

I’ve used a lot of website themes from Studiopress which offers detailed instructions on how to change a homepage of each theme:

Studiopress homepage tutorial

When you purchased your theme, you likely got access to a set of tutorials for customizing your theme. The homepage tutorial should be one of them.

In most cases, you can customize your homepage by adding widgets to your homepage just like you would add them to your sidebar.

You can do that by going to the Appearance -> Widgets section in your WordPress Admin Dashboard:

Wordpress widgets

And then dragging a text or a popular posts widget into the “Front page” or “Homepage” area:

Wordpress front page widget

Opportunity #5: Welcome Email Sequence

If you’re using an email list to retain your blog readers (which you should), you can send your new email subscribers a series of welcome emails.

In this email series, you can link them to your best blog posts. This will help them get to know you better, learn more from you, and get more results from your advice. All of which will help you convert them into paying customers down the line.

HOW you do this isn’t as important as actually doing it.

You could create a series of 5 daily emails that each link to a different blog post. Or, you could send an email every 2-3 few days.

They could be about the same topic (and just go deeper and deeper), or they could be about different topics.

You could link to one blog post per email, or you could link to multiple related resources like you would in a HUB page.

Don’t overthink this step. You can set up the sequence, run it for a few weeks, then change it if necessary.

Welcome Email Sequence Example: Mark Manson

I recently read a blog post about happiness from Mark Manson. I’ve found the article through his Best Articles HUB page.

After reading the blog post, I subscribed to his email list to download his e-book on happiness.

Afterward, I received a series of emails from him related to happiness (most of which are automatically sent to every new reader):

Mark Manson welcome email sequence

In his emails, Mark linked me to more of his blog posts related to happiness:

Mark Manson welcome email

As that happened, I felt like I was being served a tasting menu, one delicious course at a time. I could read more of his best blog posts (related to the topic I was interested in), without having to spend hours browsing his website.

This isn’t just great for me as a reader – it also helps Mark drive more traffic to his old great blog posts.

How to create your own Welcome Email Sequence

This is slightly different for each email provider.

Here’s how you can do it in the most common email providers:

  • ConvertKit: Create a new email sequence (instructions)
  • Mailchimp: Create a new automation sequence (instructions)
  • Aweber: Create a new welcome campaign (instructions)

If your email provider isn’t listed above, you can usually find the instructions by Googling “[EMAIL PROVIDER NAME] welcome sequence”.

Opportunity #6: Thank You Page

After someone subscribes to your email list, you’ll likely redirect them to a “thank you page”.

The thank you page thanks them for their attention and instructs them what to do next to make sure they get the free gift you offered to them.

The thank you page is also a great opportunity to send your new email subscribers a few more blog posts that they’ll love reading while they wait for their free gift to arrive in their inbox.

Thank You Page Example: Groove HQ

Groove HQ, a help desk company, links their new email subscribers to their most popular posts:

Groove HQ Thank You Page

You could do the same (and score bonus points with your readers if you send content to them that’s directly related to the problem they wanted to solve by subscribing to your email list).

For example, if you offered a “paleo diet recipe book” to your readers, you could link them to 5 more great recipes on the blog through your thank you page.

How to create your own Thank You Page

First, you’ll want to create your own thank you page and link to your best blog posts from it.

You can do that by either creating a new page on your website, or by using software like Leadpages to create a nicer-looking page.

Again, don’t overthink this step – sharing your blog posts with your readers is more important than the fancy design of your thank you page.

Once you create your thank you page, you’ll want to update your default thank you pages for your opt-in forms with the new custom pages.

The process for changing thank you pages will likely differ from one email provider to another.

Here are the instructions for the most common email providers:

  • ConvertKit: Add a redirect page in form settings (instructions)
  • Mailchimp: Create a new thank you page (instructions)
  • Aweber: Change your thank you page (instructions)

If your email provider isn’t listed above, you can usually find the instructions by Googling “[EMAIL PROVIDER NAME] thank you page”.

Opportunity #7: Blog Posts

Another great way of sharing your best blog posts with more readers is to link to them in the other relevant blog posts you’ve written.

For example, if you’ve written a blog post about how to wake up early, you might want to link to other articles that you’ve written on similar topics:

  • Why waking up early is important
  • Morning routines of the world’s richest people
  • Why we struggle with going to bed early
  • …

By doing this, you’re giving your readers opportunities to deepen their understanding of the problem they’re trying to solve, or solutions to related problems.

You’re also allowing your readers to go and explore your website like they’d explore a castle in a video game, which they’ll love.

Blog Posts Example: Neil Patel, Quicksprout

Neil Patel from Quicksprout does a phenomenal job with constantly showcasing his best content.

Open any of the articles on his Quicksprout blog, and you’ll instantly find a few links to relevant blog posts:

Neil Patel Blog Post Crosslinking

This helps his readers not just read one blog post on his website, but 2, 3, 4 or even 10.

Just imagine what this does to his website traffic!

How to cross-link your blog posts

You can take advantage of this opportunity in two ways.

You can link to your old blog posts as you’re creating new content.

You can always think about any relevant blog posts you’ve written in the past and how they fit in with the message you’re trying to communicate.

For example, I’ve recently written an article about SEO for Ultimate Guides, and I know I’ll be linking to that article when I write about Ultimate Guides in the future.

You can also go back and update your old posts with new links.

If you’ve written a lot of blog posts in the past but haven’t done a great job with linking to other blog posts, you can go update those.

If you’ve written new blog posts that might be relevant to those old blog posts, you can also link to those.

For example, I could link to Neil Patel’s tips for writing Ultimate Guides and SEO tips for writing Ultimate Guides in my Ultimate Guide Checklist, my free e-book on writing Ultimate Guides.

I’ve written these articles after writing the e-book, but I know they’ll be relevant to the e-book readers. As this e-book gets a lot of downloads, I can point those new readers to more relevant articles on my website.

As you update your content, you should start by updating the blog posts that are getting the most traffic, as that will give you the biggest bang for your buck.

Opportunity #8: Facebook Groups

If you have a free (or paid) Facebook group wth a lot of members, that’s another great place to showcase your best blog posts.

You could include them in:

  • Welcome post / pinned post
  • Group description
  • Posts that you write in the group
  • The “files” section
  • …and any other place that comes to mind

This will help you put your best blog posts in front of more readers that are already interested in hearing from you.

Example: Jill & Josh Stanton’s Screw The Nine to Five Community

Jill & Josh Stanton (who we met earlier) do this really well in their Screw The Nine to Five Community.

For example, they recently created an announcement post, where they link to one of their latest blog posts:

Screw the nine to five community link to blog post

How to use your Facebook group to drive more traffic to your blog posts

There are a lot of opportunities to link your blog posts up in your Facebook group.

When you do that, you just want to make sure your blog posts are relevant.

For example, if you run a Facebook group that helps entrepreneurs with productivity…

…it’s a perfect fit to link up your Ultimate Guide to Productivity in the group description as a must-read for every member.

Linking a post about parenting instead? Not as relevant.

The one thing you should do in your community is to get creative with linking your block posts.

You should always be on a lookout for more opportunities to share your blog posts, and when the opportunity comes, take it!

Opportunity #9: Social Media Profiles

If you have a decent social media following, you can use that to your advantage.

Places like Facebook, Instagram and Twitter can be great places to turn your social media followers into avid blog readers.

Besides sharing your blog posts through social media, you can also link them in your social media profiles.

Those are some of the first things your new followers will check out, and great opportunities for showcasing your best blog posts.

Especially Instagram seems to be big these days, and you’ll see a lot of established entrepreneurs linking to their blog posts from it.

Instagram Profile Example: Kamila Gornia, Heart Behind Hustle

Kamila Gornia from Heart Behind Hustle links to some of her best blog posts right from her Instagram profile.

She includes a link in her profile:

Kamila Gornia instagram profile

After clicking on the link, her readers can click through to some of her best content:

Kamila Gornia using linktr.ee

How to link to your blog posts from your Instagram profile

The simplest thing you could do is to just link to one of your blog posts or HUB pages from your Instagram profile.

But if you want to take it a step further, there are some great tools available that allow you to link to more than just one blog post or resource on your blog.

I’ve seen two tools being used a lot:

  • Linktr.ee
  • Link in profile

Either of these will help you get more traffic to your best blog posts from your Instagram profile.

Opportunity #10: Guest Posts, Podcasts and Media Opportunities

If you’re using guest posting, podcasting, or writing for big publications to drive more traffic to your blog, you’ll have some great opportunities to get more traffic to your blog posts.

By providing extra blog posts for your new readers and listeners, you’re giving them extra opportunities to come to your website and deepen their understanding of the subject you’re talking about.

Media Opportunity Example: Selena Soo

My friend Selena Soo is an expert in getting more publicity for her business (and making the most out of it).

When she got featured in an article about conversation starters from Business Insider, she linked to one of her best blog posts:

Selena Soo business insider article

Guest Post Example: Zack Arnold from Optimize Yourself

Zack Arnold from Optimize Yourself recently wrote a guest post for Growthlab. At the end of his post, in his bio box, he includes one of his best blog posts:

Zack Arnold guest post for growthlab

Podcast Example: Gretchen Rubin on The Tim Ferriss Show

When Gretchen Rubin was a guest on The Tim Ferriss Show, she referenced a lot of her books, blog posts, talks and podcast episodes.

All of these were included in the show notes and helped her spread the word about her best content:

Gretchen Rubin show notes for Tim Ferriss Show

How to use podcasts, guest posts and media opportunities to drive more traffic to your blog

Here’s how you can use each of these mediums to drive more traffic to your blog posts:

  • Podcasts: Make a mental list of blog posts and resources you can mention in the podcasts. Mention these whenever relevant. Then, after the interview, send the host a list of resources you talked about in the show for their show notes.
  • Guest posts: If you can, link to your relevant blog posts throughout the guest post. If that’s not possible, make sure you include your best blog post in the “bio box” at the end of your post to make sure the guest post readers find your website.
  • Media publications: You can share relevant resources with editors that are writing the articles about you. Or, if you’re writing the articles yourself, you can link to other blog posts you’ve written.

Honorable mentions

Beyond these 10 quick & easy ways to drive more traffic to your blog posts, here are some additional tactics that you can use:

  • Facebook LIVEs: Mention your blog posts in the description or comments section of Facebook LIVEs (either as a guest or as a host)
  • Instagram LIVEs: Same as with Facebook LIVEs, you can experiment with mentioning your blog posts in Instagram LIVEs
  • Email Signature: You can link to some of your best blog post in the email signature that you use to communicate with your target audience
  • Online Courses: You can add additional resources to your online course worksheets and notes where relevant
  • Public Speeches: You can mention interesting blog posts you’ve written on the subjects related to your speeches

Beyond tactics: How to write great blog posts that your readers will love, read and share

While I’m a big fan of quick wins and low hanging fruit, I’m also a big fan of creating incredible blog posts in the first place.

If you create great blog posts, using the tactics above will be like pouring gasoline on the fire. If you fail to do so, you’ll likely feel like you’re fighting an uphill battle when you try to drive more traffic to your blog posts.

To make sure that never happens to you, I’ve created a resource that will help you create blog posts that are 100x better than anything else in your industry.

It’s called the Ultimate Guide Checklist – and it will help you create Ultimate Guides – the most detailed and comprehensive blog posts that will absolutely blow your readers away.

You’ll learn:

  • How I created an Ultimate Guide that got over 250,964 views.
  • How to use Ultimate Guides to drive more traffic, email subscribers and paying customers to your blog
  • My bulletproof 9-step process for writing Ultimate Guides (that you can start using TODAY)

To download my free e-book, just leave your name and email in the box below!

-Primoz

Which of these tactics will you implement in your business today?

SEO for Ultimate Guides: 5 Tips From a $1,000/h SEO Consultant

By Primoz Bozic 6 Comments

You probably know that SEO is important for your Ultimate Guides to rank high on Google.

It’s especially important when writing an Ultimate Guide, because:

  • You really want our Ultimate Guide to become the #1 piece of content in your industry
  • You want to attract more readers to your Ultimate Guide for years to come
  • You want your guide to reach as many potential customers as possible

But without having a background in SEO, figuring it all out can be overwhelming.

  • Where do you even start?
  • Do you need to invest in expensive SEO tools?
  • Do you need to read 100 blog posts about SEO?

Luckily, the answer is no.

Instead, you can focus on just 5 SEO tips to get 80% the results for your Ultimate Guide, while putting in less than 20% of the effort.

You’ll find these exact tips in the post below.

Since I’m no expert in SEO, I interviewed someone who is incredible at it.

His name is Steven Young, founder of Challenger Digital.

Steven charges $1,000/h for SEO consulting and has a lot of experience with SEO optimization of Ultimate Guides.

For example, he helped with putting together this killer Ultimate Guide to Finding Your First (or Next) Freelance Job and Font Sizes in UI Design: The Complete Guide.

I recorded an in-depth interview with Steven about SEO tips for Ultimate Guides for my Ultimate Guide System, and I condensed the most important tips from our interview into this article.

Think of this article as “The 80/20 Guide for SEO for Ultimate Guides” – it includes everything you need to know to get started with optimizing your Ultimate Guide to rank high on Google.

The only 2 SEO tools you’ll need

Before we get started with this article, there are two things you can do (so you can follow along).

I highly recommend installing the free version of the Yoast SEO plug-in that will allow you to follow along and immediately improve the SEO of your own Ultimate Guides.

You can also connect the Google Search Console to your website if you want to track SEO improvements of your content (this is optional).

These are the ONLY two SEO tools you’ll really need to get the most out of this article.

Now let’s dig in!

Tip #1: Choose a good SEO title for your guide

Each piece of content that you have on your website will have two titles: The post title and the SEO title.

The post title is what you’ll enter as a title on the top of your post in WordPress:

Screen20Shot202018 07 1020at2012.03.3720PM

It will also show up as the title of your post on your website:

Screen20Shot202018 07 1020at2012.00.0620PM

The SEO title is what you’ll enter in the “SEO title” box in the Yoast SEO plug-in (at the bottom of your post in WordPress), after clicking on “Edit snippet”. Reviews of the best online marketing white label services aim to promote the business value through the customer’s positive experiences with the help of their online review framework.

The SEO title is what you’ll enter in the “SEO title” box in the Yoast SEO plug-in (at the bottom of your post in WordPress), after clicking on “Edit snippet”.

Screen20Shot202018 07 1020at2012.04.4420PM

The SEO title won’t affect how your Ultimate Guide looks on your website, but it WILL affect how your guide shows up on Google. When your Ultimate Guide shows up as a search result, it will display the SEO title and not the regular title:

Screen20Shot202018 07 1020at2012.07.2620PM 1

(This one isn’t updated with my new title yet, but the SEO title will show up on Google like this).

The SEO title will also affect how high your Ultimate Guide ranks on Google. The more people that see the guide, and the more people that click it, the higher it will rank, and the more traffic you’ll get to your website.

How to choose a great SEO title for your Ultimate Guide

What you should NOT do is keep your SEO title the same as your post title.

When Google looks for content online, it pays the most attention to the first few words of the SEO title.

If I used “The Ultimate Guide to Attending Conferences” as my SEO title, Google will think this article is about Ultimate Guides, not Attending Conferences (as that’s how the title starts).

Because I want my guide to show up under “How to Attend Conferences” instead, a quick fix would be to simply switch the order of your words in the SEO title like this:

“How to Attend Conferences: The Ultimate Guide”

If you want to go beyond a quick fix, there are ways to make the title even better.

The best way to do this is to include “keywords” in your title that represent what your potential readers will be searching for when they’re preparing for a conference.

Now don’t worry – you don’t need to worry about complex “keyword research strategies” to figure this out. Not at all.

There are two easy ways to find good keywords for your Ultimate Guide, and one advanced strategy.

Technique #1: Use Telepathy

One of the best and quickest ways to find good keywords is by using a bit of telepathy.

For a few seconds, put yourself into the shoes of your target reader. Think about what they’re Googling to solve their problem.

So let’s say I’m preparing for a big conference, and I want to learn how to best do that.

I might Google things like:

  • “How to prepare for a conference”
  • “Conference tips”
  • “How to connect with speakers at conferences”

I probably won’t Google “How to attend conferences” (I think).

Sometimes the winning answer here will be pretty straightforward.

For example, if you wrote The Ultimate Guide to Finding a Job in International Development, “How to Find a Job in International Development” might be a simple thing that your audience might Google.

In other cases, the answer won’t be as straightforward. That’s when you can use the second technique.

Technique #2: Use Google Autocomplete

You’ve probably already heard of (or used) Google Autocomplete (sometimes also called Google Suggest) before.

It’s that box that starts showing up as soon as you start Googling in your sidebar or in Google that makes your life easier:

Screen20Shot202018 07 1020at2012.11.5820PM

Google Autocomplete suggests the most common searches related to the word you type in, and gives you a good idea of what other people are Googling.

IMPORTANT: When you use Google Autocomplete (or try to see how high your content ranks on Google), make sure you use the incognito mode of your browser.

This is important because Google tries to recommend personalized content in non-incognito mode. You don’t want that to happen as you might get biased results. Incognito mode will help you come up with results that aren’t affected by your past browsing history.

The best way to use the Google Autocomplete is to play around with a few different search phrases until you find something useful.

For example, if I Google “conference”, I might get results like this:

Screen20Shot202018 07 1020at2012.16.4720PM

Which might not be all that useful.

But if I Google “attending conference”, I might get some interesting results like this:

Screen20Shot202018 07 1020at2012.17.1620PM

The two that stand out to me are “attending conference tips” and “attending conference alone”.

I could rephrase my SEO title into “24 Best Tips for Attending Conferences”, or even “How to Attend Conferences Alone: The Ultimate Guide”, if I wanted to target a more introverted crowd.

I could also click on the “attending conference tips” to study what kind of other content is already out there, and make sure I’m writing a guide that’s unique enough to succeed.

Screen20Shot202018 07 1020at2012.20.1220PM

You can play with Google Autocomplete for a few minutes while planning (or updating) your Ultimate Guide, and in 90% of the cases this will be enough to come up with a great SEO title for your guide.

Technique #3: Use KWFinder

If you want to go the extra mile finding the perfect SEO title for your Ultimate Guide, Steven suggests using KWFinder. You can play around with it for free for the first few searches, and later invest in a premium plan if you wish to.

Screen20Shot202018 07 1020at2012.20.5520PM

Here’s a quick start guide to help you get started with KWFinder.

You should only worry about doing this is you really want to get amazingly good at SEO though.

If you don’t want to go down the rabbit hole of spending hours and hours looking for keywords, using The Telepathy Technique and Google Autocomplete will be more than enough.

Last but not least, don’t sweat the title TOO much

Steven suggests that you don’t get extremely worried about the title.

The title of your guide is actually one of the easiest things to change, and you might find yourself changing it 3-5 times before you find the best one.

Instead, get into the habit of experimenting with different things, like:

  • Adding a parenthetical statement
  • Rearranging words
  • Adding or removing caps

And then seeing if your guide starts to rank higher or lower on Google.

For example, I might experiment with titles like:

  • 24 Best Tips for Attending Conferences This Summer
  • How to Attend Conferences And Get The Most Out of Them: The Ultimate Guide
  • 24 Helpful Tips for Getting The Most Out of Your First Conference

Small experiments like this will bring you better results than spending hours coming up with “the perfect title” in a vacuum (more on that in a sec).

A word on slugs

Once you find a good keyword that a lot of people seem to Google, you can also update your “slug”. Slug is the part of your guide link after your website name:

Screen20Shot202018 07 1020at2012.26.5320PM

You can update your slug below your post title in WordPress:

Screen20Shot202018 07 1020at2012.28.1520PM

If your slugs show up “ugly” like “http://example.com/?p=N”, you can change your permalink structure in your WordPress settings to “Post name”. This takes less than a minute.

Steven’s advice on slugs is “the shorter the better”.

You’ll also want to focus the earlier part of the slug on keywords you’ve found through your searches.

This means that “attending-conferences” slug will be better than “ultimate-guide-to-attending-conferences”.

…and another word on meta descriptions

You should also write a meta description after writing your SEO title.

A meta description is the “preview” of your Ultimate Guide that shows up on Google:

Screen20Shot202018 07 1020at2012.07.2620PM

You can edit your meta description below your post in WordPress, in the Yoast SEO plug-in section:

Screen20Shot202018 07 1020at2012.46.3720PM

With your meta description, pay attention to 2 things:

  1. Make sure you include some of the keywords you’ve found in your research
  2. Make the description compelling enough that someone will want to click on it if they see your article as a Google result

Don’t overthink this step – just give it your best shot. If you write a custom meta description, you’ll already to much better than by not having one.

How high does your Ultimate Guide rank on Google?

To see if your new SEO updates are helping the ranking of your guide, you don’t need to pay for any expensive programs.

Instead run your browser in incognito mode and see how much higher (or lower) your guide ranks.

The titles will usually update within 24-48 hours if you update them correctly through the Google Search Console.

In order to do that, you’ll first need to connect your website with the Google Search Console.

Then you’ll need to go to the crawl section, and click the button called “fetch as Google”, type in the page you updated and tell Google you’ve made changes to your website. Then click Fetch.

Screen20Shot202018 07 1020at2012.57.5320PM

This will allow you to update the title in 24-48 hours instead of 30 days.

In the search console you can also track where your guides are ranking and how many people click on them.

If you want to use a more advanced tool to see how well your content is performing, Steven recommends using a tool called SERPWatcher.

Tip #2: Make your Ultimate Guide less daunting

When you write an Ultimate Guide, you want to make sure that it’s the most detailed and comprehensive piece of content on the internet.

However, I also agree with Neil Patel that thoroughness is more important than length.

When you write an Ultimate Guide that’s tens of thousands of words long, you do risk overwhelming the reader. It’s your job to make sure that the guide is thorough but not daunting.

If your content is too daunting, people will either bookmark it or just close the tab.

For SEO purposes, that’s not great. Google pays close attention to how long your readers spend on your website, and it can’t know if your content was too good that it was bookmarked, or if it was so bad that the readers just left.

That’s why you’ll want to make sure the guide draws readers in, not turns them away.

You can do that by including as much information as possible in the guide, and organizing it in a very accessible way so your readers know they can find all the information they need in it.

Don’t turn your Ultimate Guide into a dictionary without an index

Nobody reads the dictionary cover to cover. Just imagine having to read the whole dictionary without the index to find what you’re looking for. You’d have to be crazy to do it!

Still, people are comfortable with using the dictionary because everything is alphabetical and nicely organized.

A lot of people will use your Ultimate Guide like a dictionary, so you should make using it a great experience.

8 ways to make your Ultimate Guide less daunting

Don’t write a guide that’s a wall of text. It will turn people away and frustrate them when they can’t find what they’re looking for.

Instead, you can use the following elements to make your guide less daunting:

  • Table of contents
  • Short introduction
  • Videos
  • Infographics
  • Images
  • Bullet points
  • Quotes and italics
  • Headings

You can start with a quick introduction that explains who you are and gives you the credibility that answers the questions “Who am I and why should you trust me?”

I love the example from Greg Nuckols’s Definitive Guide to Deadlifting:

Screen20Shot202018 07 1020at201.13.2320PM

Include a Table of Contents so your readers can preview the content before scrolling through it and go to the part that is the most valuable to them (example from Neil Patel’s Advanced Guide to Content Marketing):

Screen20Shot202018 07 1020at201.17.3520PM

Your Table of Contents can also just be a collection of links, like in my Ultimate Guide to Surrounding Yourself With Successful Entrepreneurs:

Screen20Shot202018 07 1020at201.19.2720PM

To explain complex subjects, you can include videos and infographics (example from Leadpages’s Ultimate Guide to Landing Pages):

Screen20Shot202018 07 1020at201.23.3620PM

And don’t forget to make your guide easy to read through quotes, bullet points and images (example from my Ultimate Guide to Attending Conferences):

Screen20Shot202018 07 1020at201.25.3520PM

You don’t need to invest in fancy design to write a successful Ultimate Guide, but you should make sure your readers actually stay and read the guide.

When your readers spend 10 minutes reading your guide rather than 30 seconds, Google will know – and will push your guide to more readers.

Tip #3: Get your overview right

There’s two parts of the “overview” – your introduction and your Table of Contents.

I’ll be the first to admit that I often include a LOOOONG introduction to my Ultimate Guide to Attending Conferences.

Screen20Shot202018 07 1020at201.28.0420PM

Yeah, this is just a fraction of my introduction.

Steven pointed out to me that a long introduction can hurt you more than it can help you. When someone finds you through Google after searching for a solution to your problem, they don’t want to hear your whole life story. They just want to solve their problem.

Instead of turning your introduction into a book, write a 1-3 paragraph introduction that gets to the point quickly, gives you the credibility you need and move on to your outline (example from The Ultimate Guide to Finding Your First (or Next) Freelance Job from Freelance to Win):

Screen20Shot202018 07 1020at201.30.4820PM

You can use Brian Dean’s APP method to give more structure to your overview:

aap blog post introduction

This way, you’ll be able to avoid going on a tangent and focus your guide on the problem you want to solve for your audience.

Make your Table of Contents SEO friendly

The same tips that apply to choosing the right SEO title (covered under Tip #1) also apply to choosing the right chapter titles and headlines in your Table of Contents.

If you split your Ultimate Guide into chapters (covered under Tip #4), each of your chapters will function as a separate blog post, which can rank on Google as well.

For example, after I played around with Google Autocomplete for a few minutes, I’ve found a gold-mine of ideas for chapter titles:

Screen20Shot202018 07 0920at202.45.1720PM

What surprised me was that people don’t really seem to Google things like “How to connect with speakers at a conference” and other things I included in my outline:

Screen20Shot202018 07 1020at201.35.5220PM

Why you SHOULDN’T make a 100% SEO-friendly Table of Contents

Things do get a little bit trickier here though.

You can still use the ideas from Google Autocomplete to write the SEO titles of your chapters, but there’s one other thing you’ll want to pay attention to – time per session.

Time per session is another metric that Google tracks, which means how much time someone has spent on your website (going through different pages). The more, the better. Facebook must rank really high because of that.

This means that when you’re creating your Table of Contents, you shouldn’t just pick chapter names that are SEO-friendly.

You should pick names that are interesting to your readers and make them want to read more than just one chapter (I call these copy titles).

Let’s say you want to write a chapter about 7 important tools for attending conferences.

  • The SEO-title might be something like “7 best tips for attending conferences”. It’s probably not the best title and your audience might feel tricked if they come for tips but find tools.
  • The copy title might be something like “7 must-have tools for attending conferences” which nobody would ever Google, but it will be interesting to readers who are already there.

Think of your SEO titles as the candy that brings readers in.

Your copy titles are salad dressing that make the things that your readers need to know sound more exciting.

My recommendation is to make sure your guide has a mix of both SEO titles and compelling titles.

The SEO titles will help you bring more readers through Google, and the copy titles will help you keep your new readers engaged.

If you want more help with creating a really killer Table of Contents for your guide, make sure you also read about my “BIG SIX outlining technique”. It will change the way you approach outlining forever.

Tip #4: Split your guide into chapters

Steven worked on an Ultimate Guide to Typography Guidelines for a client recently. It was about choosing the right font sizes for different systems (Apple devices, Android phones, etc.).

Originally the guide was all in one page, and his client was wondering why it doesn’t rank high for searches like “iOS font size guidelines”.

The problem was that his guide was around more general topic (typography guidelines, not exclusively about iOS guidelines). Because Google wants a result that is as specific as possible to what someone is looking for, his guide wasn’t ranking well for the specific search terms.

They split the guide into separate chapters:

Screen20Shot202018 07 1120at2011.32.2720AM

They created dedicated chapter names like:

  • The iOS Font Size Guidelines (Updated for iOS 11)
  • The Android/Material Design Font Size Guidelines
  • The Responsive Website Font Size Guidelines

The chapter names were very related to what their audience was Googling. And quite soon, the separate chapters started ranking among the top results on Google.

For example, if you Google “iOS font size guidelines” now, you’ll see that the iOS chapter of the guide ranks as #3 on Google, and the whole Ultimate Guide ranks as #4 (right after articles from Apple on the topic):

Screen20Shot202018 07 1120at2011.29.5420AM

If you split your Ultimate Guide into chapters, there’s another great side-effect: You’ll be able to increase the “pages per session” metric. The more pages of your website your readers click to within a session, the higher it will rank on Google.

3 steps to splitting your Ultimate Guide into chapters

I’m guilty of not splitting my Ultimate Guides into chapters as I thought a one-page guide provides a better reading (and searching experience).

I still believe that, which is why I’ll continue to offer my Ultimate Guides as PDFs for my email subscribers. This will help them read the guide in one document if they want to, or print it out.

But now that I learned much more from Local Viking and my own practice, and understand how the SEO behind a guide works, I’ll make sure I split my longer guides into 2,000-3,000 word chapters and give them more potential to drive traffic through Google.

To split your guide into chapters, just follow the steps below!

Step #1: Create your HUB page

You should start by turning your existing Ultimate Guide page into a HUB that connects the guide to all the chapters.

Think of your HUB as a central train station that all the trains go to:

tumblr oj8t00qbLT1r54c4oo1 1280

The HUB page should include:

  • Hook: The introductory story or section that draws your readers in and assures them they’re in the right place
  • Introduction: The 1-3 paragraph introduction that explains who you are, why you wrote this guide, who this guide is for, and establishes credibility.
  • Table of Contents: The links to all the chapters and short descriptions of what each chapter includes.
  • Call to Action: The opportunity to subscribe to your e-mail list and get the PDF version of your whole Ultimate Guide as a gift.

Below is an example of a HUB page from The Ultimate Guide to Getting Your First (or Next) Freelance Job.

It includes a hook:

Screen20Shot202018 07 1120at2011.54.1320AM

An introduction:

Screen20Shot202018 07 1120at2011.49.4920AM

A Table of Contents:

Screen20Shot202018 07 1120at2011.48.1920AM

And a call to action inside the opt-in box:

Screen20Shot202018 07 1120at2011.50.4120AM 1

Here are a few additional examples of HUB pages I love:

  • The Beginner’s Guide to Online Marketing from Neil Patel
  • The Ultimate Guide to Forms and Surveys from Zapier
  • The Ultimate Guide to Social Skills from Ramit Sethi

You can see that these examples all have a similar structure and include the key sections (hook, introduction, table of contents and call to action), but have drastically different designs.

Now that you’ve seen these examples, you can go ahead and create your own HUB page for your guide.

Step #2: Create your Chapter Pages

Once you’ve created your HUB page, you should create Chapter pages for each of your chapters (this can be as simple as copy pasting the old content into new pages).

As you do that, make sure you create new SEO titles for each of the pages so the pages can rank high on Google.

Each of the chapter pages should include the navigational boxes (explained below), the content of the chapter, a call to action and an opt-in box.

Here’s an example of a Chapter page from Font Sizes in UI Design: The Complete Guide:

Screen20Shot202018 07 1120at2012.02.2320PM

As a call to action, you can use a specific comment request (we’ll talk more about comments below, under tip #5).

You should also always have an opt-in box at the bottom of the chapter that offers your readers the access to the PDF version of the guide and any bonuses that come with it:

Screen20Shot202018 07 1120at2011.50.4120AM

If you have the extra time, you can also develop specific bonuses for each of your chapters.

Like this Upwork proposals bonus that is at the end of the “How to write Upwork proposals that make clients say, “Take my money!” chapter of the above guide.

Screen20Shot202018 07 1120at2012.10.4720PM

Step #3: Add the Navigational Boxes

You’ll also want to create navigational boxes that you will add on the top of each Chapter page.

Navigational boxes could look like this:

Screen20Shot202018 07 1120at2012.15.0920PM

Or this:

Screen20Shot202018 07 1120at2012.15.3220PM

To create a navigational box, create a content box and then include the link to the HUB page to it. You can also include links to other Chapter pages if the names are short enough (see second example).

This will help readers that find your guide through one of the chapters read the whole guide.

You’ll also want to add a link to the next chapter at the bottom of each chapter:

Screen20Shot202018 07 1120at2012.16.2620PM

This way, your readers can easily jump from one chapter of the guide to another.

Extra credit: Create your navigational sidebar

Finally, you could create a navigational sidebar like this:

Screen20Shot202018 07 1120at2012.16.5120PM

Or this:

Screen20Shot202018 07 1120at2012.17.4120PM

This might be a bit trickier and require some coding skills. First you’ll have to find a good sidebar plug-in that allows you to link to chapters of your guide (you can usually customize a popular posts plug-in).

Then you’ll have to create custom sidebars for the HUB page and Chapter pages of your guide.

If this seems like too much hassle right now, don’t sweat it. Stick with the navigational boxes for now, which should be more than enough to let your readers navigate through your guide.

Tip #5: Use chapter-specific Calls to Action to get more comments

Once you split your Ultimate Guide into multiple chapters, you should focus on optimizing each Chapter page to get as many comments as possible.

Comments are very important if you want your Ultimate Guide to rank high on Google, and publishing a 20,000+ word Ultimate Guide and asking people what their favorite part of it was isn’t the best way to get comments.

Instead, you can create calls to action that are specific to each chapter of your guide.

For example, if I wrote a chapter of an Ultimate Guide about connecting with speakers at conferences, I could ask my readers what their horror stories are from connecting with conferences speakers.

How to ask compelling questions

The best questions for getting more comments:

  • Solicit an emotion from your readers
  • Ask readers to share their own stories and experiences
  • Help readers express their opinions

You can see some of those elements used in the example of conference horror stories above.

Everyone has a horror story like that – they’re usually filled with emotion, they’re interesting stories, and allow them to express their opinions.

One of my favorite blogs to read for studying comments is One Mile at a Time. It’s a travel blog that does a phenomenal job with soliciting comments and gets hundreds of comments a day.

For example, in a post about Surinam Airways, they ask their readers about their experience with Surinam Airways.

Screen20Shot202018 07 1120at2012.25.3520PM

In a post about a new start up airline, they ask their readers for their opinion if the airline will succeed:

Screen20Shot202018 07 1120at2012.27.3720PM

In a controversial post about crediting miles from traveling with friends to your account, they ask them about the emotional situations (fighting over points, selfishness).

Screen20Shot202018 07 1120at2012.29.5620PM

Pay attention to how they phrase their questions (“What do you think…”), and see if you can apply some of these examples to make your calls to action stronger!

6 ways to get more comments on your Ultimate Guide

To get more comments on your Ultimate Guide, you can use:

  • Launch Emails: Ask for comments in the emails you send out when you launch your guide
  • CTAs: Place specific calls to action at the end of each chapter
  • PDF: In the PDF version of your guide, you can ask people to leave comments on your blog by linking to dedicated comment sections
  • Social Media Posts: Ask people to comment on your blog in your social media posts
  • Engagement: Respond to all the comments that you get on your blog to entice more of your readers to leave their comments
  • Podcasts: If you talk about your Ultimate Guide during a podcast interview, you can ask the listeners to leave a comment on your guide

The more often you ask your readers to leave a comment and the more compelling your questions are, the more comment you’ll get on your guide, and the higher it will rank on Google.

Want more tips for creating killer Ultimate Guides?

These tips from our conversation with Steven are just the tip of the iceberg. There’s so much more gold that he shared, and we included the whole 90-minute interview in Ultimate Guide System.

But even if you don’t have access to Ultimate Guide System, you can start writing your first Ultimate Guide today.

You can download a free copy of The Ultimate Guide Checklist, my free 13,000-word e-book on writing Ultimate Guides.

You’ll learn:

  • How writing my first Ultimate Guide helped me go from 0 to $38,000 in coaching revenue in an industry where nobody knew me yet.
  • How I used Ultimate Guides to build an email list of 2,200+ email subscribers within my first year of starting my blog.
  • How one of my Ultimate Guides lead to a $36,381 product launch and helped me establish myself as an expert in a new niche.

To download your free e-book, simply leave your name and email in the box below and I’ll send it your way!

-Primoz

Which of these SEO tips surprised you the most? Would a guide on how to do link building help in the future? And which SEO tip will you implement in your next (or existing) Ultimate Guide? Let me know in the comments below!

How to Write Ultimate Guides Like Neil Patel

By Primoz Bozic 11 Comments

Do you want to know how to write an Ultimate Guide that attracts 361,494 website visitors and 8,421 email subscribers to your website?

Just imagine, how would that impact your business?

  • How much would your website traffic increase?
  • How much would your email list grow?
  • How many more products and services could you sell?

In this post, I’ll show you exactly how to do that – with expert tips from an expert in writing Ultimate Guides, Neil Patel.

neil patel

Neil Patel is the co-founder of companies like Crazy Egg, Hello Bar and KISSmetrics, and is one of the top SEO and online marketing experts out there.

He has also published 12+ Ultimate Guides on his website, attracting up to 361,494 website visitors and 8,421 email subscribers per guide.

neil patel's ultimate guide library

Last week I had a chance to jump on a Q & A call with Neil, thanks to our mutual friend Chris Winfield.

I’ve been wanting to talk to Neil about his experience with writing Ultimate Guides, so when the chance presented itself, I took it.

Neil Patel’s 6 Tips on Writing Ultimate Guides

During the Q & A session, I asked Neil the following question:

“Besides choosing an advanced topic, investing in design and splitting an Ultimate Guide into multiple chapters, what are the 1-3 most important things you should pay attention to when writing an Ultimate Guide? Also, what are the 1-3 things people THINK are important, but actually aren’t?”

I already read all of the posts on his website from 2013-2014 where he talks about writing Ultimate Guides and I didn’t want him to just tell me what I already knew. I wanted an answer that’s relevant to 2018.

I loved Neil’s responses so much I turned them into a blog post, which you’ll see below.

The first 3 tips are the common myths, and the second 3 tips are the things that you really need to pay attention to to write a successful Ultimate Guide in 2018.

Let’s dive in!

Tip #1: Don’t write long guides. Write thorough guides.

“Other people think that length is important. With these Ultimate Guides yes, you do want them to be thorough, but length doesn’t matter as much as thoroughness. If you can get the same message across in 7,000 words instead of 20,000, you should keep it at 7,000.”

I agree – just writing a long guide won’t necessarily make it good.

But write a guide that’s more thorough than 99% of the other content out there, and you have a winner.

So how do you actually write a “thorough guide?”

My advice: Use the “BIG SIX” outlining technique

You can create an extremely thorough guide by creating an extremely thorough outline.

In Ultimate Guide System, I teach a 6-step technique for outlining Ultimate Guides that I call I call the “BIG SIX” outlining technique:

  1. Shitty First Draft: Start by writing down all the things YOU think you should include in your guide, without worrying about flow, structure or grammar. This stage is messy.
  2. Research: Add the questions and problems from your audience that you want to solve to your outline. You can do this by going through your research notes and by analyzing other content out there. This stage is still messy.
  3. Clarity: Organize your notes into chapters, and move them into a sequence that makes sense. Turn any jargon or notes to self into plain english language that your audience would understand.
  4. Feedback: Show your outline to 5-10 people in your audience (IDEALLY you’d do this in person or via Skype) and ask them what’s missing from outline, what’s confusing and what you should throw out / expand on. Then improve your outline.
  5. Power ups: Add “power ups” to your outline that make it easier for your readers to turn your advice into action. This could be examples, case studies, scripts, videos, templates, spreadsheets, infographics, frameworks…
  6. Copy: Finally, turn the outline into the table of contents – something you’re comfortable with including in the beginning of your guide.

Go through these six steps (especially #2, #4 and #5), and you’ll write a guide more thorough than 99% of other guides out there.

You can also read my Ultimate Guide Checklist for more tips on writing a really thorough Ultimate Guide.

Tip #2: Don’t spend too much money on design

“Most people think that when you’re doing design, it has to be really pretty and amazing and visually appealing with a lot of graphics. That helps a little bit, but not much, and what you’ll find is that updating the content where there’re too many graphics is a pain, takes too long to update, and when the guides become updated people stop linking to them and sharing them.”

I’ve found this tip from Neil surprising given that he specifically recommended investing in premium design in the past:

neil patel's advice on design for ultimate guides

Many people that spent that kind of money on Ultimate Guide design echoed Neil’s new advice and told me that that investing in premium design wasn’t worth it.

Especially if you’re just starting out, don’t worry about spending thousands of dollars on design.

Instead, just make sure that you get these three things right:

My advice: The only 3 design elements you need

There are really only 3 things you need to worry about when designing your Ultimate Guide:

  1. PDF: I highly recommend creating a PDF version of your Ultimate Guide to accompany the blog post version of your guide. This will allow you to  The simplest way to do this is to write your guide in Google Docs and export it into a PDF. If you want to take it a step further you could get a designer to design it, through ROI of that is questionable.
  2. Opt-in Boxes: The most important part of Ultimate Guide design is to have “opt-in boxes” throughout your guide that allow you to turn your readers into e-mail subscribers. I recommend including opt-in boxes after your outline, at the end of your guide, in the sidebar and as a pop up.
  3. Sharable Cover: If you want your guide to be shared on social media, it’s a good idea to create a cover for it. You might want to create a vertical cover that you use as the PDF cover, but you should also create a horizontal cover with sharable dimensions and set it as a featured image for your blog so it shows up nicely on social media.

You can see a great example of all of the above in my Ultimate Guide to Attending Conferences.

It includes a PDF version of the guide:

pop up for your ultimate guide

It includes multiple opt-in boxes:

opt in box for your ultimate guide

It has a horizontal cover:

horizontal cover for your ultimate guide

As well as a shareable cover:

sharable cover for your ultimate guide

Tip #3: Find a unique angle for your Ultimate Guide

“A lot of people think that just because you create an Ultimate Guide about a major topic, it will get a lot of traffic, and that is completely false. It used to be that way 5-6 years ago, but nowadays you just cannot write a guide about any played out topic, you need to have a unique angle to it. There are already Ultimate Guides for everything, like SEO, PR, you name it. You need to figure out a unique angle to make your content better.”

It’s true that writing an Ultimate Guide isn’t as easy as it was 5 or 6 years ago.

The good news is that you’ll still get much better results from Ultimate Guides today than you’ll get from regular blog posts (as more people than ever are blogging, but relatively few people are writing Ultimate Guides).

If you want to hit a jackpot and attract thousands of email subscribers through your Ultimate Guide, you’ll definitely want to find a unique angle for it.

My advice: Use the Uniqueness Scorecard

To find out how unique your Ultimate Guide idea is, answer the following questions and rate your answers on a scale of 0-3 (0 = NOT TRUE, 3 = VERY TRUE).

  1. I’m targeting a very specific audience with this guide.
  2. I’m covering a very specific topic with this guide.
  3. I am solving a problem with this guide that nobody else is solving for my audience.
  4. I am serving an audience that nobody else is serving well.
  5. There aren’t any good Ultimate Guides on this topic out there yet.

You can go through this exercise by doing a quick google search.

Make sure you google around your guide topic to see how many people are doing the same thing, and how many existing guides are out there.

The max. score you can score here is 15.

  • Your uniqueness score is 10-15: As long as there is actual demand for this topic, chances are you’ve hit a home-run!
  • Your uniqueness score is 5-9: You’ll have some competition, but if you put in the work to write the best guide out there it can still be a huge success for you.
  • Your uniqueness score is 0-4: Your guide isn’t unique enough. You’ll want to pick a more specific audience, a more specific topic or a different audience / topic that nobody is addressing well yet.

Once you complete this exercise, leave a comment below this post and let me know what your guide is and what the uniqueness score for it was!

Tip #4: Link to your Ultimate Guides in your sidebar

“My Ultimate Guides rank really well because I link to them in the sidebar, on almost every page. That helps with ranking. It takes over a year to see results by just adding those links in the sidebar but it works.”

Here’s how Neil links to his Ultimate Guides from his sidebar:

neil patel's sidebar of ultimate guides

Not only will linking to your guides help you rank higher on Google, it will also help more people see your Ultimate Guides, especially once they get pushed back from the first page of your blog.

My advice: 12 easy ways to drive more traffic to your Ultimate Guide

The sidebar is just one of the places from where you can link to your Ultimate Guide.

Here are 12 easy ways to drive more traffic to your Ultimate Guide:

  • Sidebar: You can create an “Ultimate Guides” section on your sidebar that shows all of your guides alongside every blog post.
  • Navigation Menu: You can create a “Free Guides” item in the navigation menu of your website and list your Ultimate Guides underneath.
  • Homepage: You can link to your Ultimate Guides from your homepage (or include an opt-in box that offers access to the PDF version of your guide).
  • Welcome Email Sequence: You can email your Ultimate Guides to your new email subscribers as part of your welcome sequence.
  • Thank You Pages: You can include links to your guides on your thank you pages (that get displayed after someone subscribes to your email list).
  • Blog Posts: You can link to your Ultimate Guides from your blog posts (and include PDFs as opt-in offers below them).
  • Facebook Groups: If you run your own Facebook group, you can link to your guides from the group description.
  • Online Courses: If you have an online course, you can link to your guides from your course membership area.
  • Social Media Profiles: You can link to your guide from your Facebook, Instagram, Twitter and other social media profiles.
  • Media Bios: You can link to your Ultimate Guides from your media bios after any media profiles, guest posts or interviews you do.
  • Facebook LIVEs: You can link to your Ultimate Guides in the description or the comments section of a Facebook LIVE.
  • Email Signature: You can link to your most popular guides in the bottom of each email you send by creating a custom email signature.

The more of these you use, the more eyeballs you’ll get on your guide.

If you want to work through these in more detail, read my posts on 10 quick & easy ways to drive more traffic to your best blog posts and SEO for Ultimate Guides – you’ll love them!

Tip #5: Send your guide to everyone you know

“You need to get the word out there for the guide to do well, and this indirectly helps you get more links to your guide. You want to send your guides to everyone you’re connecting with on the social web. I’m not talking about just posting them on Facebook and LinkedIn, I’m talking about direct messaging every single person you know and saying ‘Hey so and so, thank you for being a friend, I just wrote this guide, feel free to go here and check it out.’ That drives a lot of the traffic when the guide first comes out.”

If you spend weeks and weeks creating an Ultimate Guide, it’s your responsibility to share your guide with as many people as possible.

But how can you do that in a non-spammy and authentic way?

The one thing I would NOT do is reach out to your network and ask everyone to share the guide by saying “Hey, I wrote this guide, can you please share it on social media?!?!?”, especially if you don’t have a strong relationship with someone.

People don’t like it when you only reach out to them when you want something from them, and they’ll feel weird if you constantly ask them to promote your work.

My advice: Use this email script

Instead, you can send your guide to your whole network in a much more authentic way by using the following script:

“Hey NAME,

[Insert Personal Message]

Over the past few months I wrote this super detailed [Ultimate Guide Title] – and I thought I’d send it your way because you might enjoy it (or know someone who does).

Have a great week!

-Your NAME”

Here’s an example of an email like this I’ve sent out:

reach out email for sharing your ultimate guide

It’s simple, not spammy at all, and very effective.

Tip #6: Email your guide to your email list

“Make sure you send out your guide to your list. If you don’t do this it won’t do as well. If you’re not collecting emails yet, make sure you start doing that.”

Emailing your guide to email list is one of the first things you should do once you write it.

Your email list is also one of the places where it’s totally ok to ask your loyal readers to spread the word about your guide:

Example email for sharing your Ultimate Guide

But there’s a way to take this strategy a step further, and get even more out of your Ultimate Guide:

My advice: Treat your Ultimate Guide as a product

If you really want to “squeeze the lemon” and get everything you can out of your Ultimate Guide, you should treat your Ultimate Guide the same way you would treat an online product.

Don’t just send out a single email to your list to launch your guide – write the whole launch sequence!

You could write a 5-day email sequence to successfully launch your guide:

  • The Problem: Talk about the problem your guide is solving, and why it’s important for you to solve. Hint at the release of a new amazing resource.
  • Sneak Peek: Share a “preview” of your guide by sharing one punchy technique from the guide. Announce that the big announcement of the guide is coming tomorrow.
  • Big Announcement: Share the full guide with your readers, and ask them to help you spread the word about it.
  • Epic Bonus: Remind your readers that they can get access to an epic bonus that you created for them that will help them put the guide into action (a checklist or a worksheet).
  • Reader Responses: Share the response from your readers about the guide, and link the readers to your guide one last time.

For example, for my Ultimate Guide to Attending Conferences, I could write this email sequence:

  • The Problem: “3 things you NEVER want to do at a business conference”
  • Sneak Peek: “The best way to connect with speakers at conferences”
  • Big Announcement: “The Ultimate Guide to Attending Conferences is Here!”
  • Epic Bonus: “How to prepare for your next conference in 24 hours”
  • Reader Responses: “3 reasons why you should read my latest guide (if you haven’t done it yet)”

You can get creative here and tweak the sequence to make it your own. Just make sure you give your guide a big push for a big chance of success.

Want to get started with writing your first Ultimate Guide?

If you’ve read this far, you’re probably interested in writing an Ultimate Guide yourself.

You’ll love my Ultimate Guide Checklist, my free 13,000-word e-book on writing Ultimate Guides.

You’ll learn:

  • How writing my first Ultimate Guide helped me go from 0 to $38,000 in coaching revenue in an industry where nobody knew me yet.
  • How I used Ultimate Guides to build an email list of 2,200+ email subscribers within my first year of starting my blog.
  • How one of my Ultimate Guides lead to a $36,381 product launch and helped me establish myself as an expert in a new niche.

I’ll also show you the exact 9-step checklist you can use to start writing your first Ultimate Guide TODAY!

To download your free e-book, simply leave your name and email in the box below and I’ll send it your way!

-Primoz

P.S. I’d love to know which tip you loved the most – leave a comment below to let me know!

5 Surprising Lessons I Learned From Freewriting for The First Time

By Primoz Bozic 5 Comments

So you want to learn how to freewrite.

You’re probably wondering:

  • What is freewriting?
  • How do I freewrite?
  • How can freewriting help my business?

Today, I tried freewriting for the first time.

According to Wikipedia, freewriting is a prewriting technique in which a person writes continuously for a set period of time without regard to spelling, grammar, or topic. It produces raw, often unusable material, but helps writers overcome blocks of apathy and self-criticism. It is used mainly by prose writers and writing teachers. Some writers use the technique to collect initial thoughts and ideas on a topic, often as a preliminary to formal writing.

Or, in common folk language, freewriting means sitting down and writing whatever comes to mind without worrying about grammar or anything else for a few minutes.

I’ve first heard about freewriting from my buddy Frank that does it all the time, but I was never curious about it enough to actually try it.

Until today.

Today I sat in a coffee shop and worked on an article, and noticed that I really struggled with staying focused. Every 3-5 minutes, I kept getting these random thoughts at the back of my mind and that urge to check my Facebook or Instagram account. I just felt stuck, and didn’t understand what was going on.

Then, all of a sudden, I had an idea.

If I had all of these thoughts in my head and I wanted to get them out of my head, why not just sit down and write them out?

So I did. I sat down for about 10 minutes and just wrote wrote and wrote. I wrote 1349 words in 10 minutes, which must be some kind of a record.

I wrote about my business, about my work with clients, about writing, about relationships, about things I’m grateful for, about the impact I want to make in my life… I wrote about everything that came to mind with zero censorship.

It was random. It was uncomfortable. It was eye-opening.

And it only took 10 minutes!

Throughout this freewriting process, I got 5 very interesting insights that I want to share with you in this post.

Let’s dive in!

Insight #1: Freewriting helps you clear your head

Before I started the freewriting exercise, my thoughts were racing. I couldn’t focus no matter what I did. It felt like my head was about to explode.

For example, this was one of the passages I wrote:

I really want to build a bigger online business. I really want to help people. I want to feel that passion to help them that other people have. I wish I could bring my energy and passion from podcast interviews to my day to day work. I just don’t know what to do. I’m focusing on this one thing but I’m not sure if I’m doing enough. I wish I woke up earlier at like 5am. But that would mean going to bed at 9pm and that feels impossible right now. I want to have time to hang out with friends. Why do I hang out with my friends? It’s because I like it. It’s comfortable. I can lose myself in talking to them and playing games. I can just relax and chill. I feel like if I woke up at 5am I couldn’t really do that. I would just work all day long.

It’s hard to focus when you have thoughts like that going on through the back of your mind all the time!

No wonder I couldn’t focus on writing about one thing when I’m thinking about waking up at 5am, building a bigger business, feeling more passionate, podcast interviews, hanging out with friends… All in less than a minute!

After the exercise, I noticed that I felt way more calm, collected, and that my mind started to slow down. It was a lot easier for me to focus on one thing and write this article.

Now I know that whenever I feel like my brain is racing, I can just freewrite for a few minutes to make it slow down.

Insight #2: Freewriting helps you observe your subconscious thinking

Going through the freewriting exercise was fascinating to me because I could really observe how my brain worked.

For example, here’s another passage I wrote:

I miss going for walks and spending time outside. I don’t want to be locked in a house all the time. It would be great to live in the US where I could work and do all of my calls in the mornings. Then I could wake up earlier and have all afternoon for myself. I can’t do that right now. I don’t know why I’m paying so much for an expensive apartment. It’s not worth it. It’s big but it doesn’t feel like home. Why am I so negative all the time? I want to be more positive. I need to start. Now.

As I wrote that, it was fascinating for me to see the associations and connections my brain made, as well as how I reacted to them (for example: the “why am I so negative all the time? I want to be more positive.”.

It was also awesome to see some of the subconscious thinking that I never saw before (for example: “It would be great to live in the US where I could work and do all of my calls in the mornings. Then I could wake up earlier and have all afternoon for myself”).

I realized that there are things I’m really unhappy about right now (like having afternoons full of client calls) that I need to change in my schedule, which I haven’t really noticed earlier. I also noticed that my apartment doesn’t feel like home, which I need to do something about as well.

Before the freewriting exercise, I would just feel frustrated about this problem – whereas now I can actually do something about it.

Insight #3: Freewriting is great for copywriting

Another thing I realized while freewriting was just how powerful it could be for copywriting.

In copywriting, you usually try to capture the exact language and thoughts of your potential customers, which can sometimes be difficult – especially when it comes to capturing the subconscious thinking.

But through freewriting, that’s exactly what I was able to pull out of myself – the exact words I say to myself consciously and subconsciously.

Now I’m thinking about different ways in which I could use freewriting to write better copy.

Could I imagine a younger version of myself that has problems that I want to help my audience solve? Can I think about the desires and dreams that that younger version of myself had? And can I then freewrite about it?

Another idea that comes to mind is to freewrite regularly, then once I solve the problems I’m having right now I can go back and look at my old notes to find the exact language I was using.

I haven’t tried using freewriting in this way yet, but I imagine it could become a super powerful copywriting tool!

Insight #4: Freewriting helps you notice the negative thinking

When I started freewriting, I was shocked to discover just how negative I was.

It seemed like for every positive thing I said, I would spark 2 or 3 negative thoughts which were related or completely unrelated. That really blew my mind!

For example, even when I wrote about things that I appreciate in my life right now, I soon threw myself into a spiral of negative thinking:

What do I appreciate? I appreciate spending time with Aida. I appreciate that she cared for me this morning. That she tried to make me feel better. That she got us the pancake syrup. That we will go eat pancakes together tonight. I appreciate that my parents are still alive. I want to start sharing negative thoughts but need to train myself not to do it. Wow I could keep writing like this forever. This is interesting. Why is writing like this so easy but writing for business so hard? I need to get out of the downward spiral. Positive thoughts.

If you read through my earlier passages, you’ll notice I did that on a number of occasions – and overall about 2/3 of my writing was negative.

Freewriting helped me raise awareness around my thinking, and through the second half of the exercise I intentionally focused on more positive thoughts like what I’m proud of:

What am I proud of? I am proud of connecting a lot of my clients to each other. I need to stop having these BUTs and negative thoughts after each positive thought. I might cry. It’s hard for me to give myself credit and experience positive emotions. Why is this so hard? Ok, what am I proud of? Getting 2 renewals for TPC. Helping Heidi explode her business. Helping Jenni do the same and help a lot of people. I’m proud of helping Antrese launch her membership as well. I’m proud of Diana for getting fully booked with clients. I’m proud for myself for going through a painful therapy today. I’m proud of winning 3 gold medals in lifting. I’m proud of building a business out of nothing. I’m proud of working through my social anxiety.

This wasn’t easy, but I feel like I could get better at feeling more positive and having more positive thoughts by focusing more of my freewriting sessions on positive thinking like this.

Insight #5: Freewriting helps you get more clarity

Finally, I felt like freewriting gave me a lot of clarity on where I wanted to take my business.

For example, I spent some time freewriting about a product idea I had:

I really want to create some kind of a membership program. I LOVE TPC. I want to bring in more people like TPC people into my business. How can I do that? What do they have in common? What values to they have in common?

They are unapologetic. They want to do BIG things in life. They aren’t satisfied with something small. They don’t want to work 24/7. They want to feel connected to other people. Maybe through an event? They want to genuinely help people. They want to push themselves to their limits and beyond them. Maybe they want to be the best in the industry themselves, or they just want to be the best version of themselves. Who are the people I would like to have in my community? People like Jenni, Heidi, Karen, Nagina, Camille. People like Cary. That would be awesome. To connect these cool people together and just see magic happen. I want to find a way to foster CONNECTION. I want to bring opportunities to people. Like Selena’s IM community. How can I make that happen?

I want to spread positivity. I want to connect amazing people together. I want to give them amazing knowledge. Pass on what I learned. But also learn from them and help them teach each other. That would be amazing. I really enjoy learning. I’m curious. I also love creating and connecting. Even though it’s hard for me. I like making people smile. I like helping them. I should send the TPC link to Peter. I am really excited about the new version of TPC. I’m going to make it even better than the last one. I really can’t wait to get started!!

I knew that I had to think about what values my customers shared in order to build a strong community or a movement that would be a part of a membership community that I want to build.

I just never got around to putting my thoughts around that on paper. Through freewriting, my thoughts just flew onto paper and I already have a lot more clarity around this idea than I had before.

This means that I can stop thinking so much about my membership idea and move towards planning it and building it.

The 10-minute freewriting challenge

It’s crazy to see just how powerful 10 minutes of freewriting was for me.

So if you’ve read this far, I challenge you to try it out for yourself as well.

It’s really very simple.

  • STEP #1: Open a google document or get a pen and paper
  • STEP #2: Set a timer to 5 or 10 minutes
  • STEP #3: Just write whatever comes to mind

That’s it!

Then, once you do it, leave a comment below to let me know how the experience was!

  • « Go to Previous Page
  • Page 1
  • Interim pages omitted …
  • Page 3
  • Page 4
  • Page 5
  • Page 6
  • Page 7
  • Interim pages omitted …
  • Page 10
  • Go to Next Page »

Copyright © 2025 · Primoz Bozic