If you ever wondered how to write a killer sales page for your e-book, online course or coaching program, you’re in the right place.
In this detailed post, I’ll take you behind the scenes of how I wrote a sales page that generated $111,170 in 10 months:

The sales from my sales page for Ultimate Guide System
You’ll learn:
- The exact strategies I used to develop and sell a $1,997 online course from scratch
- A detailed walkthrough of how I wrote my $111,170 sales page in 8 simple steps
- How YOU can create a high-converting sales page for your e-book, online course or coaching program
You’ll be able to the insights from this post to write your own sales page – whether it’s for a $29 e-book, a $197 online course, or a $1997 flagship program.
Let’s dive in!
Before you start reading, I highly recommend you to download my High-Converting Sales Page Starter Kit:
(1) The PDF version of this 8562-word article (that you can print out or save for future reference
(2) The PDF with my 69-page $111,170 sales page (that you can print out and follow along with as you’re reading this article)
(3) Two plug-and-play “Perfect Sales Page Templates”, which you can use to create your own sales page for a $47 e-book or a $1997 flagship online course.
You can download your High-Converting Sales Page Starter Kit here.
How a single sales page generated $111,170 in 10 months
Before I go into the nitty-gritty details of how I wrote this sales page, let’s set some context.
When I sat down to write this sales page, I:
- Validated my online course idea by getting 7 paying 1on1 coaching clients
- Had a successful online business that I started 3 years ago
- Had an e-mail list of 5,000+ e-mail subscribers that were eager to learn (and buy) from me
I didn’t spend a single cent on paid advertising – all the revenue came directly from selling my online course to my existing e-mail subscribers through e-mail launches and webinars.
Besides the sales page, the other key element of my launch process was my sales funnel, which I broke down in this incredibly detailed post I wrote for Growthlab.
The online course I sold through this sales page was called Ultimate Guide System – it was a 14-week live online course on growing your online business through Ultimate Guides, and I sold it for $997-$1997.
Here’s exactly how the revenue came in:
- In April, I first opened the doors to the program, priced it at $997, and generated $36,381 in revenue
- In July, I relaunched the program at $1,497, and generated $33,075 in revenue
- In September, two of my existing clients joined the program at $1,497, which generated $2,994 in revenue
- In December, I relaunched the program at $1,997, and generated $38,720 in revenue
Combined, this sales page generated $111,170 in less than 10 months.
How I wrote a 6-figure sales page in 8 simple steps
Now you have the context, let’s dive into how I wrote this sales page – from an idea to a finished page.
Beyond the typical steps of writing the sales page (writing the headline, hook, guarantee,…), I also included the steps that took place before the actual writing (the idea, validation, research and product development).
I included these steps because they are just as crucial for writing a high-converting sales page as the actual writing.
Without a great, validated product dea that is backed up by research, you could write the best copy in the world – but if you aren’t selling a product that your audience actually wants and is willing to pay for, it will never convert well.
In this article, I won’t talk about how I started my online business or grew my e-mail list (both very important factors for successfully selling your online products).
To learn more about that, you can read my MASSIVE 447-page Ultimate Guide to Growing Your E-mail List.
You can use this guide to get to your first 1,000 (or 10,000) e-mail subscribers, and put yourself in a position to create 5-6 figure sales pages.
Ok, let’s talk about sales pages!
Step #1: The Idea
I first got the idea to create an online program about writing Ultimate Guides WAY back in 2015 (this is a message I wrote to a friend of mine):

A message I sent to my friend about creating a product about writing Ultimate Guides
And yet… I didn’t act on it for 2 whole years.
At the time, I thought it was just a random idea, that I couldn’t create more than an e-book about it, and I definitely didn’t envision selling a $1,997 online course about Ultimate Guides.
2 years later, as I decided to open a new chapter with my online business (I was sick of talking about productivity for the last 5 years), I thought long and hard about what to talk about next.
When I looked back at the growth of my online business, I noticed that the common denominator for attracting high-quality clients were the meaty, 10,000+ word Ultimate Guides that I wrote and published online for free.
When I looked around, I noticed that many established entrepreneurs like Ramit Sethi and Neil Patel wrote Ultimate Guides as well, as did the companies like Leadpages.

Neil Patel’s Library of Ultimate Guides
I had a hunch there was “something there”, and I thought about teaching online entrepreneurs how to grow their online business through Ultimate Guides.
But before I could move forward and create an online course about Ultimate Guides, I had to thoroughly validate my idea.
Step #2: Validation
I validated my idea through 3 simple experiments.
By the time I finished these experiments, I was 99% sure that my online course would be a success – AND I had the research to back up my assumptions.
Experiment #1: Coaching
One fall afternoon, I had a conversation with a long-time friend who also ran an online business.
I offhandedly mentioned my idea of teaching entrepreneurs how to write Ultimate Guides to him, and his response shocked me:
“That’s a great idea. Can I hire you?”
At first, I was shocked – I didn’t expect such a positive response.
Then, I said “of course”, we fleshed out the idea, and I sent him an invoice for $500 to coach him through writing his Ultimate Guide:

The invoice from my very first Ultimate Guide coaching client
This wasn’t a huge money maker for me (at the time, I’ve signed coaching clients for more than $5,000 per client) – I just wanted to see if anyone would pay me for helping them write an Ultimate Guide.
Later that afternoon, I had a conversation with another entrepreneurial friend, and mentioned my idea to her.
Her response was exactly the same:
“I’m in! Can you send me an invoice?”
In a single afternoon, I went from an idea to 2 paying clients.
I knew there was something there.
To continue validating my idea, I asked some of my clients if they wanted me to help them write an Ultimate Guide:
A message I wrote in a community of one of my online courses
And I e-mailed my e-mail subscribers and asked them the same thing:

Part of an e-mail I sent to my e-mail subscribers, offering Ultimate Guide coaching to them
Soon, I had 7 paying clients for 1on1 coaching on creating Ultimate Guides.
With each client, I kept increasing my rate – from $500 per guide to $1,500, $2,500, $4,000 and $5,000.
In just a few weeks, I generated $20,000+ with 1on1 coaching for Ultimate Guides through phone sales – without a sales page or even a thought of creating an online course.
Now I was certain that there was something there.
Experiment #2: Office Hours
The coaching clients I worked with were mostly my existing friends and past clients, and I wanted to make sure they didn’t buy from me just because “they knew me”.
I wanted to test my idea out with a wider audience that didn’t necessarily work with me in the past.
That’s why I created a simple post in an online community I was active in and offered to do “office hours” where I would coach entrepreneurs on a topic of their choice for free:
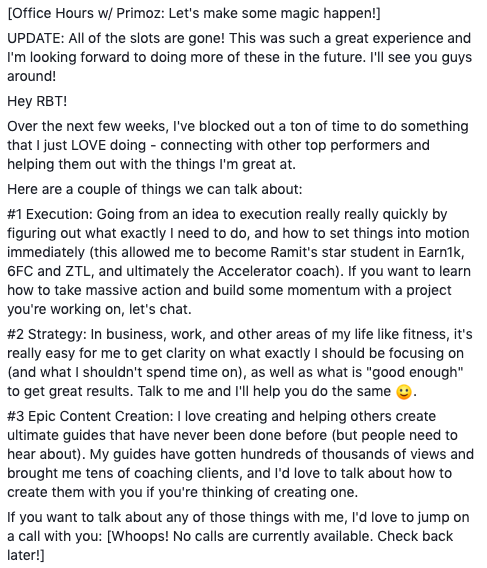
An “office hours” post I made in an online community I was active in
One of the possible topics was writing Ultimate Guides.
I knew that the specific community was full of my entrepreneurs that continuously invest in themselves (and not freeloaders), so I was comfortable that this experiment would give me more reliable data to validate my idea.
As it turned out, roughly 50% of the people that signed up for an office hours call with me were interested in creating Ultimate Guides and already saw the value in them. They came prepared with a list of specific questions, and I happily helped them out.
This experiment showed me that even people outside of my direct audience saw the value of Ultimate Guides, and helped me do a lot of research around the problems and concerns with creating Ultimate Guides.
Every day I worked on my idea, I was more convinced that it could become a huge hit.
Experiment #3: Free E-book
After my two initial experiments, I spent a few months focusing on serving my 1on1 clients as best as possible, noting down every question they ever asked me, and refining my process for creating Ultimate Guides.
Eventually, I turned my knowledge into a simple, step-by-step system for creating Ultimate Guides, and I wanted to share my system with the world.
I also wanted to demonstrate the value of Ultimate Guides to people that didn’t see the value in them yet.
That’s how I decided to write my Ultimate Guide Checklist, my free e-book that I shared with my e-mail subscribers, entrepreneurial friends, and my Facebook friends:
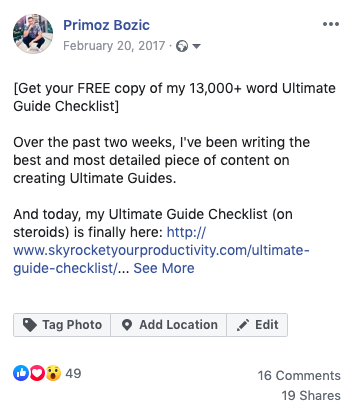
I shared my e-book on Facebook, 19 people reshared it and I got hundreds of new e-mail subscribers
The e-book took off, and within less than a week, hundreds of entrepreneurs subscribed to my e-mail list to download my e-book.
That was the final “green light” I needed to proceed with developing Ultimate Guide System – my flagship course on creating Ultimate Guides.
Step #3: Research
By the time I started writing my sales page, I had hundreds of pages of notes related to creating Ultimate Guides:

My Master Research Document for Ultimate Guide System
To collect these notes, I:
- Took notes during my 1on1 coaching calls and office hours
- Exchanged my e-mail subscribers about writing Ultimate Guides
- Talked to every person I met or connected with about Ultimate Guides
For example, when I went on an entrepreneurial mastermind in Cancun, I asked every entrepreneur in the room if they knew about Ultimate Guides and if they were interested in creating them, then grilled them about it.
I asked them why they wanted to create Ultimate Guides, what value they saw in them, why they created them (if they created them in the past), why they didn’t create them yet (if they didn’t have any), their concerns about writing Ultimate Guides, and more.
When I coached my 1on1 clients on creating Ultimate Guides, I diligently wrote down every question they ever asked me, and every interesting insight related to Ultimate Guides.
I took these notes in separate documents, and when it was time to start writing my sales page, I sat down to combine all of my notes in a single Master Research Document.
At first, it was a complete mess – I literally had hundreds of pages of disorganized notes.
I took a few days to plow through the notes and organized them into a few categories that helped me get a bird’s eye view of the data:

I organized my Master Research Document into different categories
Here are the categories I organized my research into:
- Audiences I could help with my program
- Problems that my audiences faced
- Alternatives they tried in the past to solve their problems
- Dreams that they wanted to achieve / accomplish
- Concerns they might have about joining my program
- Obstacles in their way
Here are a few examples from each of the categories.
Category #1: Audiences
There were a few different audiences that I could help with my program:
- New entrepreneurs who wanted to get their online business off the ground
- Established entrepreneurs who wanted to get more organic traffic and e-mail subscribers
- Freelance copywriters that wanted to write Ultimate Guides for their clients
Category #2: Problems
These were the problems that entrepreneurs currently faced in their business:
- “I’ve been working on my business for months / years, but haven’t seen much progress with it.”
- “I see all other people growing their business so much faster than me. I feel like for the work I’m putting in, I should be getting the results that they are getting as well.”
- “I want to launch my first online course but my e-mail list is too small and I’m not getting enough traffic to my website”
Category #3: Alternatives
This is what they have tried in the past to solve those problems (with limited success):
- “I’ve published a few blog posts in the past, but they haven’t got me much traffic or e-mail subscribers”
- “It’s hard to land guest posts opportunities, it takes forever to get them accepted, I often spend time just waiting on other peoples’ responses”
- “Guest posting is not a popular thing in my industry. Very few sites allow guest posts. There’s only a few sites where I can promote my content”
Category #4: Dreams
This is what they wanted to accomplish / achieve:
- “I want to be earning $2k/month by the end of the year”
- “I want to get my business off the ground (launch a product my subscribers will be dying to buy, make some real money so I know I can do this and it’s not just a hobby”
- “My #1 goal this year is to get to 1,000+ subscribers. That would allow meto make money from my blog.”
Category #5: Concerns
These were concerns that entrepreneurs had about writing guides in the first place:
- “I’m not an expert – what can I bring to the table that others haven’t already said?”
- “I don’t think writing a guide is that important for me right now”
- “I don’t want to spend all these hours writing a guide that doesn’t have a financial payoff in the near future”
Category #6: Obstacles
These were obstacles that prevented entrepreneurs from writing Ultimate Guides:
- “I get lost in too many ideas for the guide”
- “I get lost in doing the research, lose my momentum, and end up putting it off because it takes time for me to write”
- “I spend way too much time doing the research and designing the guide, because I’m afraid people won’t like it”
For each of these categories, I had tens of quotes from my customers (many of them were similar).
I worked through them to highlight the quotes that were the most common, the most painful, and attracted great clients.
I would ignore the quotes that were either extremely rare (like “I want to build a business so I can work from any country because my partner is restricted by visas”), or attracted bad clients that were scattered and overwhelmed, or wanted overnight solutions (“I feel overwhelmed by everything I could be doing and haven’t done anything for my business for the last 3 months”).
Once I had my Master Research Document ready, it was time to move on to product development.
Step #4: Product Development
The final step I took before sitting down to write my sales page was to develop the actual program.
To do that, I had to develop the course curriculum, format and pricing.
Part #1: Curriculum
First, I needed to figure out what to teach my clients – which would help me create my course curriculum.
To do that, I asked myself questions like:
- What are all the key steps a student needs to take to successfully write an Ultimate Guide (and grow their e-mail list through it)?
- What order should they take the steps in? What do they absolutely need to complete before moving to the next steps?
- How long will it take my typical student to work through the steps, and how much can they accomplish each week?
As I developed my curriculum, I realized that the typical 4-week or 8-week online course framework wouldn’t cut it for this program.
There was just too much crucial information to cover to cram it all into 8 weeks or less, so I stopped paying attention to “industry standards” and focused on what would work best for my clients instead.
That’s how I decided to turn my program into a 10-week course (and later evolved it into a 14-week course).
I extended the curriculum after I went through the first cohort of my program and noticed that a few weeks were too work intense and my students started falling behind. I also realized that it took the vast majority of students roughly 14 weeks to finish their guide.
Of course there were a few exceptions of students that could write their guides in just a few weeks, and for those students I unlocked the content earlier, so they could speed through it if they wished to.
Finally, I ended up with an extremely detailed course curriculum, that would later help me create the “What Will I Learn?” section of my sales page:

A short passage from my course curriculum
As I designed my curriculum, I used my Ultimate Guide development process that I used with my 1on1 clients as a foundation.
I then combined this process (the steps that my students needed to go through) with the quotes from my Master Research Document (a long and draining process), to make the curriculum more forward-facing.
This combined what my audience NEEDED to do (the process) with what they WANTED (problems, dreams).
Once I completed my curriculum, I had the first starting blog of my sales page done, and I continued to develop the 2 remaining parts of my program.
Part #2: Format
Once I had a finished curriculum in my hands, I needed to figure out how to deliver the actual program.
Should I deliver the course live or record it up-front?
Should I include a community with the course?
Should there be additional Q & A sessions?
To get a clear answer to those questions, I asked myself a simple question:
How can I support my students to maximize their chances of success?
I knew that writing an Ultimate Guide was a long and intense process, and I wanted to make sure my students were fully supported throughout the process, so they could finish their guides on time and get the results they wanted.
Instead of putting my needs first (like “what’s the easiest way for me to do this” or “how do I make passive income?”) like many entrepreneurs do, I put the success of students first.
This philosophy helped me guide the development of my course format, which eventually turned into:
- A 14-week live intensive training with live presentations and Q & A calls
- A year of monthly alumni calls
- A slack-based coaching platform
- Masterclasses and Case Study interviews
Here’s what the document with my course format looked like:

My course format (before writing the sales page)
Each element would add an additional layer of support to my program.
Through the weekly live training calls, I would coach students through every step of developing their Ultimate Guides answer their questions, and give them feedback on the work they’ve done to date.
Through the alumni calls, I would continue to support my student in writing future guides after they’ve successfully written their first guide.
Through the coaching platform, I would give my students additional feedback on parts of their guides (and help my students support each other through writing their guides).
Through the masterclasses and case study interviews, I would show my students real life examples of how to successfully write their guides, and dive deeper into topics I wasn’t an expert at with experts I knew (example: SEO masterclass).
This felt like a bulletproof support system where I would support my students from all different angles that I was happy with.
Part #3: Pricing
Notice how until now, MONTHS into research and product development, I didn’t mention pricing even once.
The truth is that when I started out with planning Ultimate Guide System, I didn’t know I would create an online course that would sell for $997-$1997 and generate $111,170 over the course of less than a year.
I didn’t set out to create a $1,000 course or to make 6 figures with it.
Instead, I thought to myself “I know that Ultimate Guides are valuable, I know I can teach how to write them well, and I want to create the best online program on this topic out there”.
Before I nailed my course curriculum and format, I actually had no idea what I could price the program at.
I remember thinking about pricing it at $497 before I decided on the course format, but once I had the course in format in place, it started to feel more like a $997 course.
With 14 weeks of live calls (and a full year of support), $497 felt way too cheap. $997 felt better, and I knew that it could also be a $1997 course.
But since I’ve never sold a $997 course in the past, I decided to play it safe, price it at that, and try to help as many students as possible through the course (rather than trying to maximize the amount of revenue I earned through it).
Later, as I started the program, multiple students repeatedly told me that my program was “a steal” and “that I should charge more for it”:

Which later lead me to gradually increase the price of the program to $1497 and $1997, as I continued to improve it.
Throughout my pricing process, I did run into one major dilemma – should I create two tiers of the course or not?
I saw many online entrepreneurs that offered “pro tiers” of their courses that would include a few weeks of Q & A calls, and typically cost double the amount of a recorded online course.
I thought long and hard about whether to split my course into two tiers or not. I thought about offering a “content only” tier at $497 and selling a tier with the live coaching calls at $997.
Ultimately, I solved my dilemma by going back to the question of “how can I help my students succeed?”.
I knew that:
- The recorded online courses had a WAY lower success rate than live calls (most recorded courses I saw that were 8 weeks long had a success rate of only a few %).
- My students are far more likely to succeed if I coach them and support them through writing their guides than they are if I just throw 14 long video lessons at them
That’s how the decision became obvious – to give my students the best chances of success, I would need to offer the live coaching calls to ALL of my students.
And that’s how I removed the cheaper, “self-study” tier from my program, and locked my pricing ($997 for the full program) in place.
Now that I had a fully developed course curriculum, a course format with a bulletproof support system and the right price chosen, there was one final step I needed to complete before I started writing the sales page – the narrative.
Step #5: Positioning
In order to sell my program successfully and write a clear and compelling sales page, I needed to have a clear positioning for the sales page.
This positioning (my position in the market) had to communicate with my audience that my unique program can help them solve their problems and reach their dreams.
Some people like to call this “the big idea”, others like to call it the narrative, and yet others like to call it “the unique selling proposition” or “positioning” – which is the expression I’ll use in this post as well.
Based on the research I’ve done, my positioning was as follows:
Ultimate Guide System helps new online entrepreneurs grow their e-mail list to 1,000+ e-mail subscribers so they can launch their first online product and get their online business off the ground.
A version of this positioning would then make it into the offer introduction section of my sales page:

A version of my positioning statement on my sales page
To put together my positioning, I simply pulled the most common and painful problems and desires from my primary audience (new online entrepreneurs) and assembled them into a positioning statement which would explain my sales page in a single sentence.
While there were other audiences that could benefit from the program (like established entrepreneurs and freelance copywriters), I knew that 80% of my audience had less than 1,000 e-mail subscribers – that’s why I decided to target that audience with my sales page positioning.
Step #6: Writing
I wrote my sales page step-by-step, by writing out each element of the sales page and assembling it into the order that made sense.
The elements of the sales page I wrote were:
- Headline: The big title on top of the sales page about the #1 problem of my audience
- Hook: The first few paragraphs of the sales page, designed to “hook” the reader in
- Twist The Knife: An emotional, painful summary of the biggest problems of my audience
- Common Myths: The biggest myths in my niche (and reasons why my readers were facing the problems they were facing)
- Hope: A hint that a better solution exists
- Paint The Dream: A vivid summary of the biggest desires of my audience
- Introduce The Solution: The reveal of a “better approach” to solve their problems, and what the approach is
- My Story: The first layer of proof that my approach works: my personal experience
- Expert Examples: The second layer of proof: case studies from other experts
- Relatable Examples: The third layer of proof: examples from new entrepreneurs
- Data: The final layer of proof: data behind why my approach works
- The Danger of Doing it Yourself: The cost and drawbacks of implementing my strategy without my guidance
- The Background Story: The story of how I developed my approach and online program
- Address Concerns: Addressing any final concerns why my approach wouldn’t work for the reader
- Introduce The Offer: A brief introduction of the course with course positioning
- How it Works: A detailed overview of the course format
- What You’ll Learn: The course curriculum
- Is This Program Right For You: Qualifying to make sure I’m attracting the right students
- Money-Back Guarantee: Removing the rick of joining the course
- Buy Buttons: A quick summary of the course format, countdown time and buy buttons
- Close: The final argument for joining the course (to help the readers on the fence make the right decision)
The one element that I didn’t include (but I typically do) is the FAQ (Frequently Asked Questions) section that answers any additional questions my readers would have about the program (like “when are the times of coaching calls?” and “what if I can’t attend the coaching calls?” and “can I join the program even if…?”).
I decided not to include this section with this specific sales page because I felt like the other sections answered those questions well enough, and I answered those questions in detail in a dedicated FAQ e-mail that I sent out on the last day of my launch.
Writing this sales page was a messy process, and I reorganized and rewrote the sales page during the editing phase a number of times (which I’ll talk about in the editing part of this post).
I didn’t write my elements in this exact order, and I find that with every sales page I write, my process is slightly different.
Therefore, rather than trying to write a sales page in a fixed order, I always allow myself to write different elements of my sales page as they come to me, and then reorder them in the order that makes sense (which will likely be different with every sales page I write).
The key is to have all the key elements included in your sales page, and organize them in the order that makes sense to you.
Ok, let’s dive into the elements and look through them one by one!
NOTE: Since my sales page is wider than this blog post, some sections might prove to be hard to read.
To help you with that, you can download the PDF with my 65-page $111,170 sales page (that you can print out and follow along with as you’re reading this article) here.
Element #1: Headline
Your headline is the very first line on your sales page – it’s typically in big font, with bold letters, and in your face:

The Headline and Subheadline
The headline often also includes the subheadline, which strengthens the headline.
Here’s why I wrote my headlines as I did:
- I knew that hitting 1,000+ e-mail subscribers was a big dream of my audience (as was “getting their business off the ground”, an expression I’ve seen in my research over and over again
- In a few of my customer research calls, I got a great reaction to “not worrying about doing everything and just focusing on one thing”, which I worked into the second part of my headline
- Finally, I knew that my audience wanted to build their e-mail list FAST (and I knew I could deliver on that claim), so I made that idea more specific by talking about months instead of years
With the headline in place, let’s move to the immediate next step of the sales page: the hook.
Element #2: Hook

The Hook
The sole purpose of the first part of your sales page is to “hook” your readers and get them to keep reading.
Ideally, you want your readers to think “oh, that’s interesting – tell me more!” and scroll down your sales page.
That’s why the part right after your headline is called the hook (it can also be called your “lead”).
There’s no right or wrong way to write your hook – there are many different variations of hooks you can use, from personal stories to talking about a specific problem of your audience.
To write my hook, I decided to talk about a journey that I noticed in many online entrepreneurs:
- They started building an online business
- They set a goal of getting 1,000 e-mail subscribers
- They did everything they were supposed to do
- Unfortunately, they only got a handful of new e-mail subscribers each week
- They wondered what they were doing wrong
And I intentionally included a graph of steady e-mail list growth that every entrepreneur desired.
This hook wasn’t particularly “creative”, but based on all the research I did, I knew that this was the exact journey many entrepreneurs went through – so I simply talked about what they were already going through to “hook them” and get their attention.
Learn more about finding the right hook / lead for your sales page.
Element #3: Twist The Knife

Twisting the Knife
From my hook, I quickly transitioned into “twisting the knife” (I focused on the pain of my audience, and showed them that I understood it).
I did that by talking about all the different problems of my audience I uncovered during research:
- They were putting in the work, but their e-mail list wasn’t growing
- They were doing everything they were “supposed to” (blogging, guest posting, going on podcasts), but not getting e-mail subscribers
- They saw their friends going their businesses, while they felt stuck in the same place frustrated that their business wasn’t growing
As I did that, I talked about the emotions and frustrations they were feeling as this happened to them – I wanted them to feel the pain as they were reading.
Learn more about Twisting the Knife.
Element #4: Common Myths
Next, I told my audience that it wasn’t their fault that their online business wasn’t growing:

Transition to the Common Myths section
And I explained why that is through the “3 myths of the online business world that nobody talks about”:

The Common Myths
In this section, I addressed the strategies my readers typically used to grow their e-mail lists, and broke down why they didn’t work.
I talked about:
- Why guest posting isn’t necessarily the fastest way to get to 1,000 e-mail subscribers
- Why you don’t have to spend hours and hours writing blog posts and promoting them
- Why your business doesn’t have to become your second job if it takes off
For each of the myths I talked about, I did the following.
First, I talked about a counterintuitive myth and explained why the myth exists:

Explanation of the myth
Then I explained why it is in fact a myth (and offered a solution what to do instead):
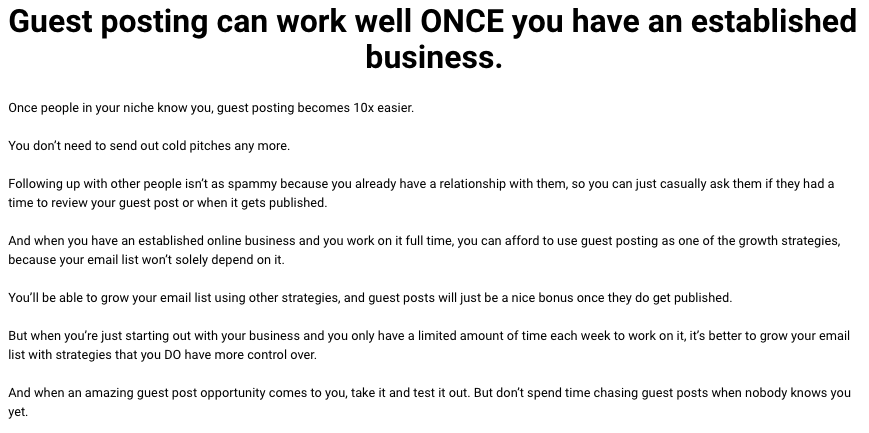
What to do instead (the truth)
For example, I mentioned that many people consider guest posting to be the “holy grail” of e-mail list growth, but explained why you might struggle with landing guest posts when you’re just starting out, and concluded that guest posting is a better strategy to pursue once you already have some traction and visibility in your niche.
I shared these myths to show my readers that what “they were supposed to be doing” wasn’t necessarily the best approach to growing your e-mail list, and I explained why what they were doing wasn’t getting them the results they wanted.
Element #5: Hope

I begin to hint at a “better solution” and give my readers hope
After I established the myths, I hinted that “there was a better way” of doing things – without focusing on 100 things at the same time – and by doing just ONE thing at a time.
I gave my audience hope that they can grow their e-mail list a lot faster than they’re growing it now, while simplifying their lives and focusing on just one key strategy for growing their e-mail list.
At this point, I didn’t yet share what the solution was – I just hinted that a solution exists.
Element #6: Paint The Dream

Next, I transitioned into Painting The Dream, the opposite of Twisting The Knife.
With Twisting The Knife, I amplified the pain around the problems my audience was facing, and with Painting The Dream, I talked about the dreams my audience had in as much detail as possible.
I painted the dream about “growing your e-mail list to 1,000 subscribers and making your first few sales with your business”.
I talked about what it would feel like to:
- Grow your e-mail list to 1,000+ e-mail subscribers and get your first few sales with your online business
- Have your online business grow on it’s own (even when you’re not working on it 24/7)
- Know exactly what to do to get to 2,000, 5,000, 10,000 e-mail subscribers and beyond
At this point, I made a lot of big promises and claims – so I made sure to back them up screenshots of my own results (and later on added testimonials and quotes from my students to this section):

Finally, I acknowledged that all of the above claims MIGHT sound “too good to be true”, and quickly continued with a few sections that revealed my solution and included undeniable proof that my solution worked.

Element #7: Introduce The Solution
At this point, I:
- Hooked in my audience through my Hook and Headline
- Acknowledged their pain through Twisting The Knife
- Explained that it’s not their fault that they’re feeling the pain through Common Myths
- Hinted that there’s a solution to their problems and gave my audience Hope
- Built anticipation about the solution by Painting The Dream
And now, it was time to introduce my solution and prove that it works.
I briefly mentioned that the solution to the problems of my audience was creating Ultimate Guides – which would help them grow their e-mail lists to 1,000+ e-mail subscribers and get their online business off the ground:
Then, I provided different layers of proof to prove that Ultimate Guides really are one of the best ways to grow your e-mail list (and that this strategy will work for my readers).
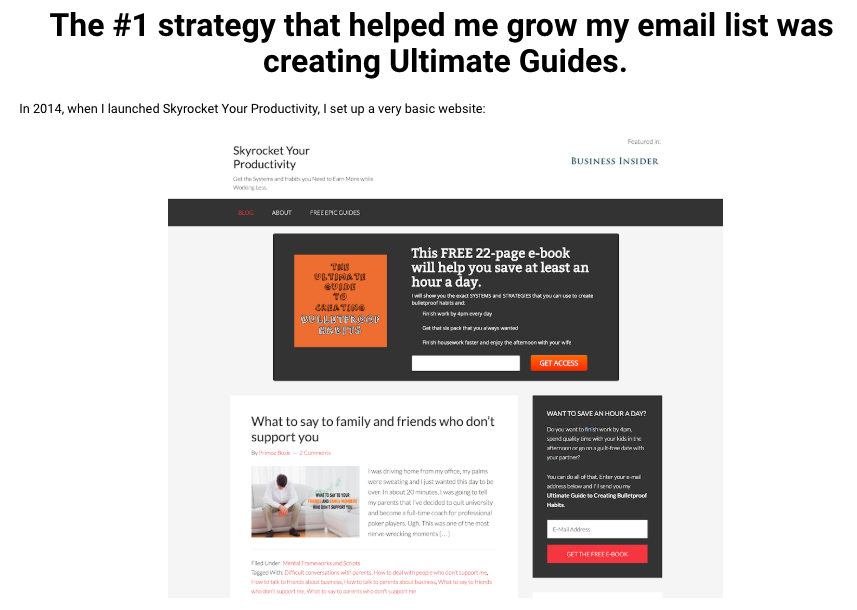
Element #8: My Story

The first layer of proof was my own story of how I grew my online business through Ultimate Guides – from getting traffic to my website, to growing my e-mail list, to selling my online courses.
I filled this section with screenshots to prove my claims:

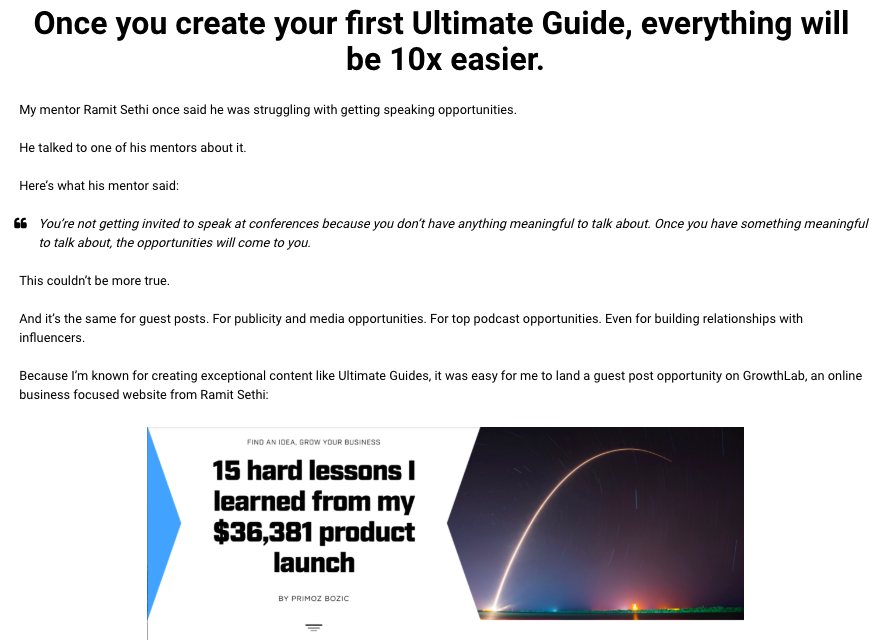
Then, I continued to tell my story and worked in elements of Painting The Dream.
I talked about how building an online business through Ultimate Guides helped me do things like speak at conferences, connect with influential mentors, and get guest post opportunities that would help me continue growing my e-mail list.

Element #9: Expert Examples

With the second layer of proof (Expert Examples), I wanted to show my readers that Ultimate Guides weren’t just a strategy that worked for me – they were a strategy that many top online entrepreneurs used to grow their e-mail lists.
I shared a few examples of experts that my audience was likely familiar with and showed how they grew their online businesses through Ultimate Guides.
Element #10: Relatable Examples

The third layer of proof were examples from new online entrepreneurs that successfully grew their online businesses through Ultimate Guides (from growing their e-mail lists to getting paying consulting and freelance clients).
Initially, I included a few examples from my friends in there, which I later replaced with examples from the students that went through Ultimate Guide System.
This layer showed my readers that Ultimate Guides didn’t just work for me OR for established entrepreneurs – they would also work for them.
Element #11: Data

The final layer of proof was cold hard data that Ultimate Guides got more traffic and shares than regular blog posts, which I pulled from a few credible blog posts online.
At this point, I bombarded my readers with proof from different sources and angles that Ultimate Guides work – and backed up my claims that I made earlier.
To wrap up this section of my sales page, I quickly Painted The Dream again and showed my audience how Ultimate Guides could help them get more e-mail subscribers with less work:

As well as how Ultimate Guides could make everything else in their online business 10x easier:
Element #12: The Danger of Doing it Yourself

At this point, I knew that some of my readers might buy into the idea of Ultimate Guides, but wouldn’t necessarily think that they need help with creating Ultimate Guides.
Why wouldn’t they just create the guides by themselves? Why would they need my help?
To address this, I talked about the danger of writing an Ultimate Guide by yourself.
I talked about all the different places where you could “mess up”, and showed how that would cost you months of work you could never get back.
As an alternative approach, I suggested writing an Ultimate Guide under my guidance – to avoid any mistakes and wasted time, and write Ultimate Guides “the right way” and make sure they would actually help them grow their online business.
Element #13: The Background Story

At this point, I shared my background story of how I learned to create Ultimate Guides, and refined my system for creating them over the past 6 years.
This is where I explained how and why I decided to create Ultimate Guide System, and softly introduced it to my readers.
But before I shifted my attention to my program, there was one final thing I needed to do – address any final concerns of my audience they had about creating Ultimate Guides.
Element #14: Address Concerns
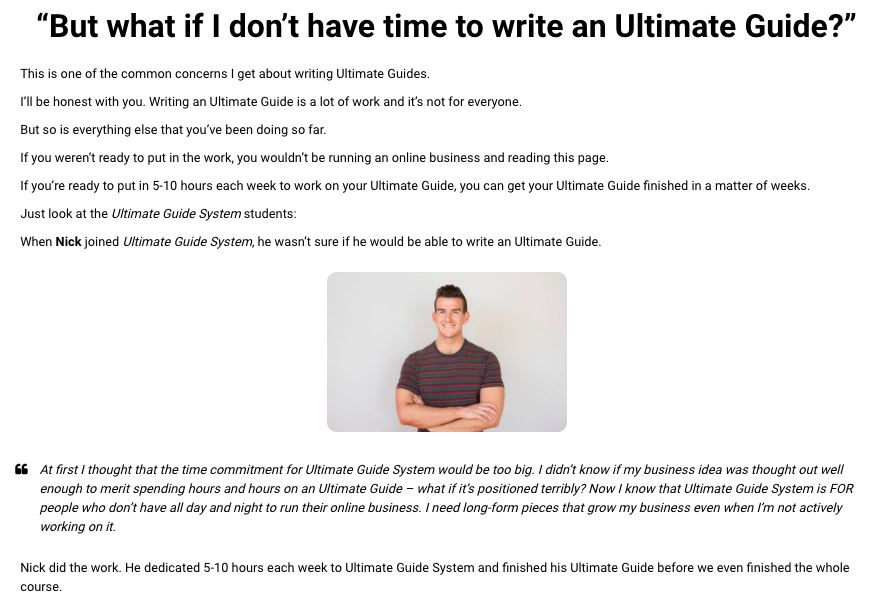
From my research, I knew that my audience would have additional concerns about writing Ultimate Guides, like:
- “What if I don’t have time to write an Ultimate Guide?”
- “What if I’m not an expert?”
- “What if I’m not a writer?”
- “Will my audience actually read a 50+ page guide?”
I addressed each of these concerns with more proof – my personal stories and stories of my clients and students that were able to successfully grow their online business through Ultimate Guides despite having those concerns.
With this final section I wrapped up the first, more creative part of the sales page, which was designed to show my readers that I can help them grow their online businesses through Ultimate Guides.
Therefore, I transitioned to the second part of the sales page, which was all about the program I was selling, Ultimate Guide System.
Element #15: Introduce The Offer

First, I briefly introduced the program (this is where I reused some of my Hook, as well as my Positioning) and focused on the Dreams of my audience.
The basic narrative was “I can help you reach your [dreams], even if you have [concerns]”.
Element #16: How it Works
Next, I explained how the program worked (the program format).
First, on a high level:

And then I broke down element by element, from the course curriculum, live coaching calls, and the community that was a part of the program.
As I did that, I focused on the benefits of my program, rather than the features.
As you can notice from my headlines, I didn’t talk about what the program included (“a community”) – I talked about how the features from my program would help my audience (“get feedback on your guide and answers to your questions”).

As I did that, I backed up each section with screenshots and testimonials to show what the program was like, and provided constant proof of how helpful the program was.
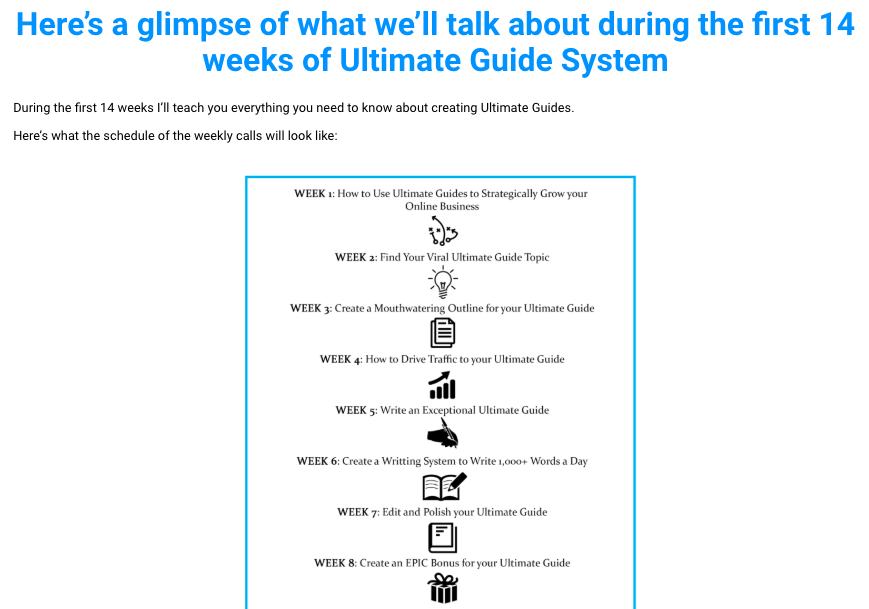
Element #17: What You’ll Learn
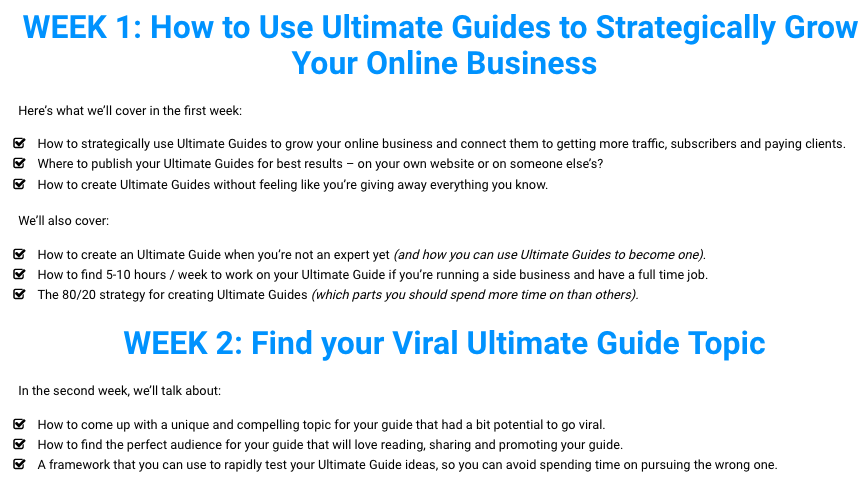
Next, I went over the curriculum of the program, where I talked about what we would cover during each week of the program.
Again, I focused heavily on the benefits of what we’ll cover each week (“What you should worry about and what you should NOT worry about when designing your guide (so you can design it quickly and move on to publishing it, rather than spend weeks or months on it”).
Element #18: Is This Program Right For You?

With this section of the sales page, I wanted to make sure the RIGHT people joined my program (that I would love working with, and that I knew would get results with my program).
In the “program IS right for you” section, I listed all the different types of entrepreneurs I could help:

And in the “program IS NOT right for you” section, I listed all the types of entrepreneurs I couldn’t help (entrepreneurs without business ideas), and entrepreneurs I didn’t enjoy working with (chronic procrastinators).
This would help me filter out the entrepreneurs that were a bad fit for the program, and keep the entrepreneurs that were a good fit for it.
At this point, I could also include a FAQ section where I would answer additional questions like “when do the live coaching calls take place?” and “what if I can’t make the live calls?”, but since I sent out a detailed FAQ e-mail that addressed those questions on the last day of my product launch, I felt like that wasn’t necessary.
Element #19: Money-Back Guarantee
I backed up the program with a 120-day Money Back Guarantee, as I knew that if my students went through the whole program, they would get the results from it that they wanted.
I made the guarantee window wide enough to give my students plenty of time to work through the program.
I chose to opt-in for an “action taker guarantee” (a guarantee where you are eligible for a refund only if you put in the work) because I knew that the program was intensive, and I only wanted to have serious people in the program:

While I might be able to earn more money if I had a “no questions asked guarantee”, I know I would also get a lot of less serious people in the program that would just “take a peek” and wouldn’t be willing to do the work.
Because it’s against my values to sell a program that people don’t execute on, I decided against that, and decided to only focus on acton takers.
Element #20: Buy Buttons
In this section, I briefly summarized what my students would get access to if they joined the program:

I included the “buy buttons”, including a payment plan for the program and added a reminder and a countdown timer to let my readers know when enrolment to the program closed (so they wouldn’t miss it).

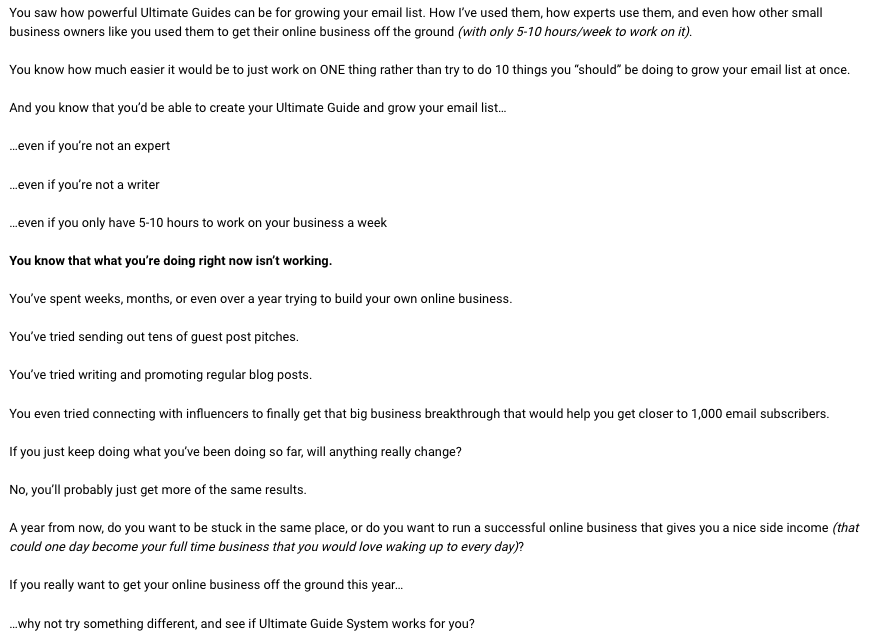
Element #21: Close
The final section of my sales page that I wrote was called the “close”.
At this point, I knew that my readers either:
- Joined the program
- Closed the sales page
- Were on the fence of joining
Therefore, the focus of my “close” was to help the students that were on the fence of joining make the right decision.
In the first part of the close, I reiterated on Twisting The Knife and Painting The Dream:
I touched on the guarantee:

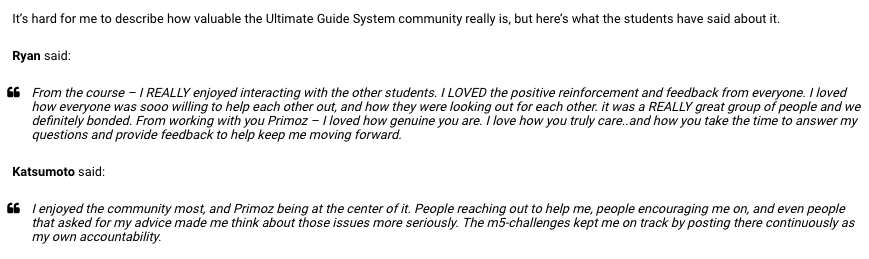
And as one final weapon in my arsenal, I shared what my students said when I asked them what they would say to someone considering joining the program.
That’s where I shared one final round of raving testimonials about the program:

And let my students decide if they wanted to join or not for themselves.
Finally, I included the buy buttons, offer summary and a countdown timer again:

And finished the sales page.
Woah, that was A LOT, right?
Yes – it was, and we still have two steps to go.
Writing a sales page for a $997-$1,997 online program is quite a beast, but if you write it one step at a time, it’s definitely manageable.
With this sales page, I included most of the key elements of every high-converting sales page (apart from the FAQ section, which I sent via e-mail), and you’ll find many of these elements in any great sales page you choose to analyze.
You might notice that these elements will be in a different order to make the sales page flow better, that the elements (like Painting The Dream) might repeat themselves multiple times throughout the same page, but the types of elements will likely stay the same.
You’ll be use these same elements to write your own high-converting sales page (more on that later, at the bottom of this article – right now, we have two steps to go!).
Step #7: Editing
When I first wrote my sales page, it was a lot messier than it is now.
As you can imagine, organizing 21 different sections of a sales page into an order that makes sense can be quite a (headache-inducing) project.
After writing my sales page, I took a few days to edit it, reorder it, and asked a few of my entrepreneurial friends to help me review it and organize it in an order that made sense.
As I was editing my sales page, I focused on 3 key rounds of the editing process:
- Flow
- Clarity
- Proof
With each of these rounds, I went through the whole sales page, marked the sections I needed to edit, and edited them to take my sales page from a “shitty first draft” to a finished page.
Round #1: Flow
First, I decided to edit for flow – I tried to order my sections 1-14 (the first part of my sales page) in an order that made sense, based on the stories I included in my sales page.
This meant playing around with different types of Hooks, leading with Twisting The Knife vs Painting The Dream, figuring out where to fit the Myths and My Story… until I found an order that made sense to me.
To find that order, I read through the sales page, and whenever I noticed myself stop or lose myself, I checked if the flow was good or not – then I reordered the sales page into a different order and tried again.
It took a while to nail the exact order, but once it was there, I felt it – and I was able to move on to the next round of editing.
Round #2: Clarity
With the second round of my editing process, I mostly focused on making my sales page clear and easy to understand, to keep the attention of my readers.
My #1 goal was to edit any confusing places that would lose my readers.
I did that by reading through the sales page myself, as well as asking my friends to read through it and paying attention to parts where their reading slowed down (this way, I knew that a section was confusing).
Then, I rewrote and simplified those sections, and tried again.
Round #3: Proof
Finally, I read through my sales page and added in any missing proof.
I specifically focused on finding any “unbelievable claims”. If I made a claim (like “an Ultimate Guide will help you get more coaching clients”,), I backed it up with my own story or example or a story from one of my clients.
Then, I added specific screenshots, data or testimonials to make my claims more believable and stronger.
Throughout my editing process, I didn’t really focus on grammar or rewriting paragraphs UNLESS they were confusing.
If I tried to edit every word of this massive 65-page sales page, I could spend weeks editing it, with questionable returns on the invested time – so I decided to keep things simple and edit parts that mattered most.
After the editing, I was done with my first version of the sales page, and used it in my first product launch to generate $36,381 with my first launch of Ultimate Guide System.
Step #8: Polishing
After each cohort of students I took through the program and before I launched my program the next time, I spent some time polishing my sales page.
As you already know, I increased the price point of the program with the first few launches (from $997 to $1497 to $1997) until I found a price point I was happy with.
As I did that, I changed the offer of the program slightly (for example, I added additional templates, alumni calls and masterclasses to the program).
I also added in any new testimonials that I got from students and made some minor edits to flow, proof and clarity with a fresh set of eyes.
And that’s how I wrote my $111,170 sales page.
So how can you write yours?
How to Write YOUR High-Converting Sales Page With The “Perfect Sales Page” Templates
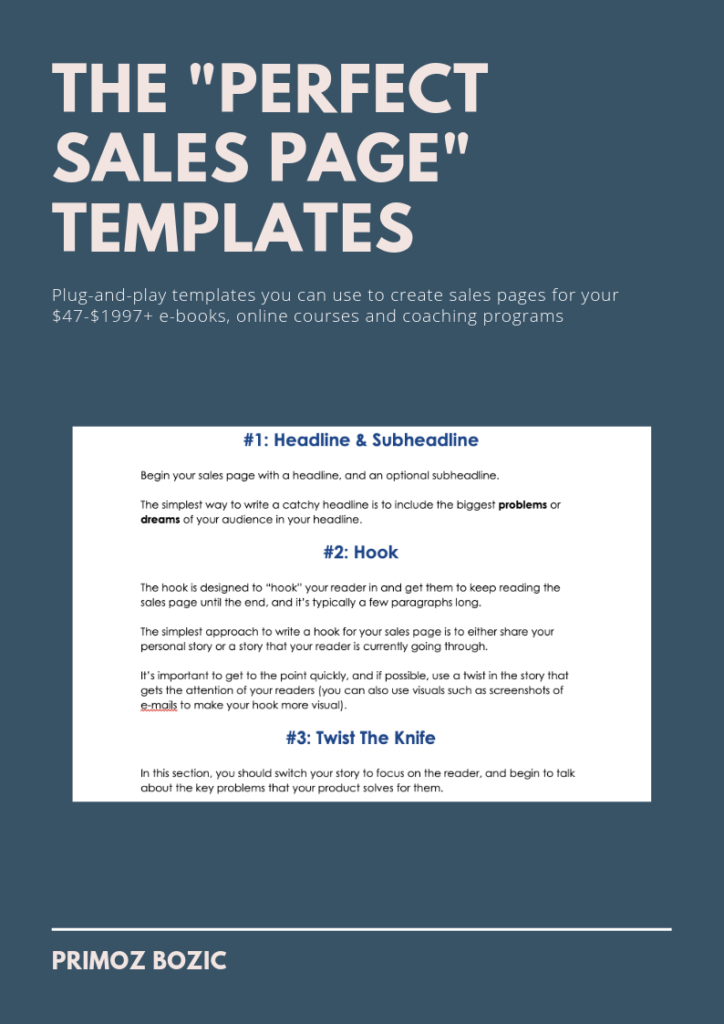
To help you write your own high-converting sales page, I created two “plug and play” templates for you:
- The Essential Sales Page Template, which you can use to create a sales page for $47-$297 e-books or online courses
- The Epic Sales Page Template, which you can use to create a sales page for your $997-$1997+ flagship programs
You can download those templates (PLUS a PDF version of this article AND my full $111,170 sales page) through the box below!


